Art is so absorbing and makes it easy to forget the busy life we lead. It’s also a great social activity as it’s a brilliant way to get together with like-minded individuals. I have taught art classes for many years in the beautiful Vitreus Stained Glass Gallery in Potterspury, Northamptonshire, and my students have become great friends. Much laughter is had whilst we create art, and everyone goes away with their mood lifted.
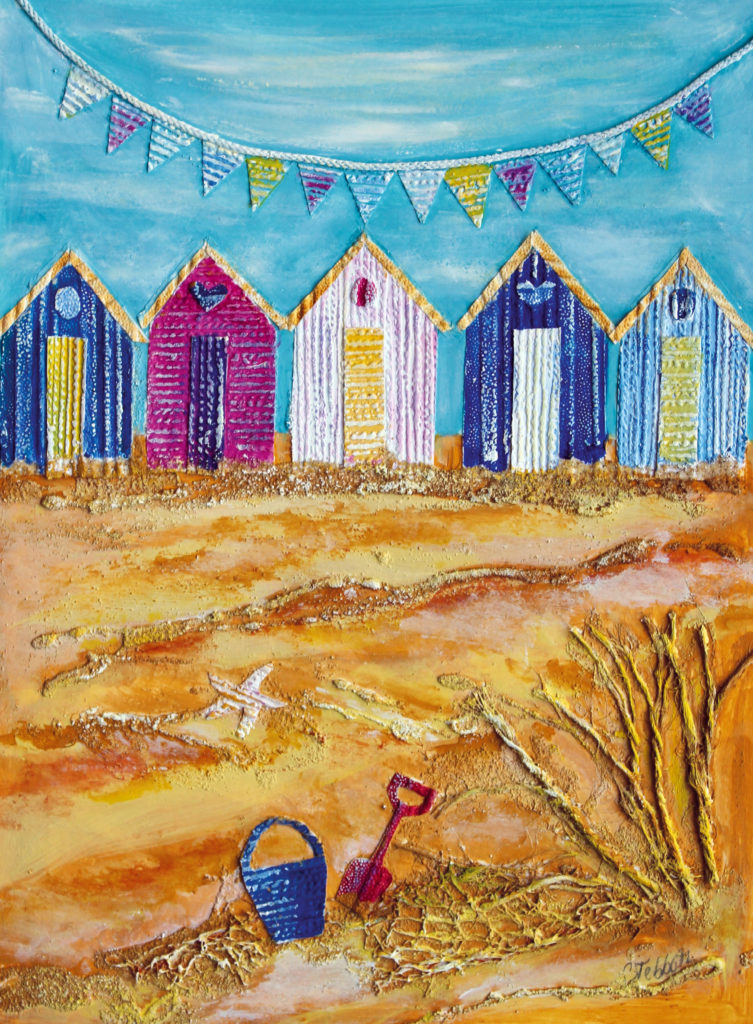
I am always squirrelling away interesting bits of packaging or fabrics. They come in useful if you are a fan of mixed media artwork, as I am. I recommend keeping a shoebox handy for these little treasures although, admittedly, I have much more. You never know when they will come in handy! My chosen subject of iconic beach huts will hopefully evoke happy summer days spent by the sea.
1 Before embarking on a piece, I have found it best to plan a simple composition, creating several sketches. I like to make use of left-over recycling materials and love the unexpected textures they can create. You will need to use a rigid piece of card as a base; mount board is ideal. Having sketched out the composition I then match different materials to the different elements in the picture. PVA applied with a fine nozzle creates diagonal lines which draw the eye into the row of beach huts. They can also be used to represent mounds of sand or grass stems. Sprinkle sand over the PVA lines and gently tap the excess sand away.
2 Cut out squares of different textures of wallpaper to represent the base of each hut. Use the same textures – but place in a different direction – for the doors. Now, add a cut-out starfish, bucket and spade. Fray pieces of garden string and glue to represent grasses. Then, use a piece of fruit bag netting to blend the bucket and spade onto the base of the grass. Cut out small flags to go on top of each hut. A line of picture framing cord has been used to create bunting above the huts, with triangular paper flags attached.
Use pieces of fruit bag netting to create a join between the huts and sand. Before proceeding any further, you will need to make sure everything is securely attached to the base board with PVA. Then, allow to dry overnight.
3 I used Cadmium Yellow acrylics to paint the sand with horizontal streaks of White and Yellow Ochre to create contours in the foreground. Paint the sky in a Cobalt Turquoise mixed with a little White using a Size 8 brush. Next, paint the beach huts in different colours. I used Ultramarine Blue, Quinacridone Magenta and Cadmium Yellow. Use the textures of the paper to help create a guide for the hut decoration. Using Titanium White, lightly brush highlights. I find a Size 4 brush is useful here.
4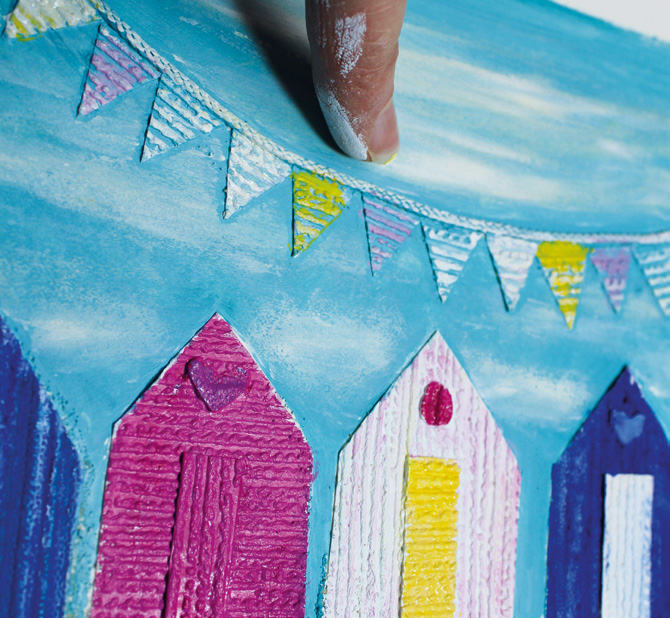 Use a cloth or your finger to wipe clouds across the sky with Titanium White. Pick out details around the bucket and spade and use your finger to brush a little white paint lightly across the wallpaper. This will pick up texture and can be used to indicate the direction of sunlight. If you don’t want to get messy, wear gloves! Drag your finger with a little paint over the textured areas to create variations in colour, adding depth to your artwork. Finally, I used Cadmium Yellow, Green Gold and Titanium White to depict the grasses.