
PA Ali Lindley suggests a simple exercise to add a new technique to your painting skills
Simple pencil sketch exercise
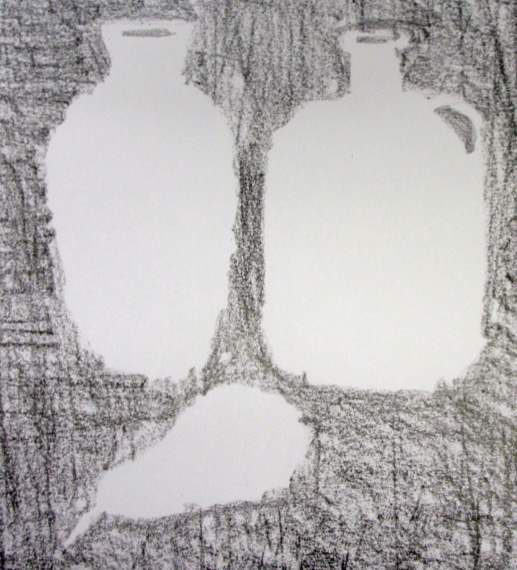 If this is totally new to you a good exercise is to set yourself up with several simple, but pleasingly shaped objects and with a soft pencil (4B or above) simply shade in your paper to leave the shape of the object as untouched white paper. Draw the object first if you need to but ultimately aim to do the exercises without any pre drawing as it frees you up.
 We all know that painting is about observation. We spend time looking at our chosen subject but how much time do we spend looking at the negative space the subject matter leaves, or in other words the empty space around it? It is easy to overlook but in many cases the negative shapes can be more inspiring than the positive and good use of them can go a long way to making a composition more exciting. At this stage using the negative approach when painting is simply an exercise in seeing and using shapes, not about copying colour or shading.
1 Firstly mix a generous pool of paint with your chosen colour, the consistency of milk. Using the flat brush wet your paper evenly with clean water and when the ‘shine’ has just gone load your brush with colour and lay down a random wash. A quick application produces the best results. It’s fine to have areas with more paint than others and don’t worry about any ‘happy accidents’.
Important – at this point leave to dry completely, not just touch dry. Stop for a cuppa or speed the drying process with a hairdryer.
2 Using the reference photo draw the pear (object 1). Add more pigment and water to your well of paint – you will need lots of both! Now, with a fully loaded brush and dry paper apply your second layer of paint, across the paper, avoiding the pear. Work quickly to move the paint around. You should now have a pear, lighter than the background.
3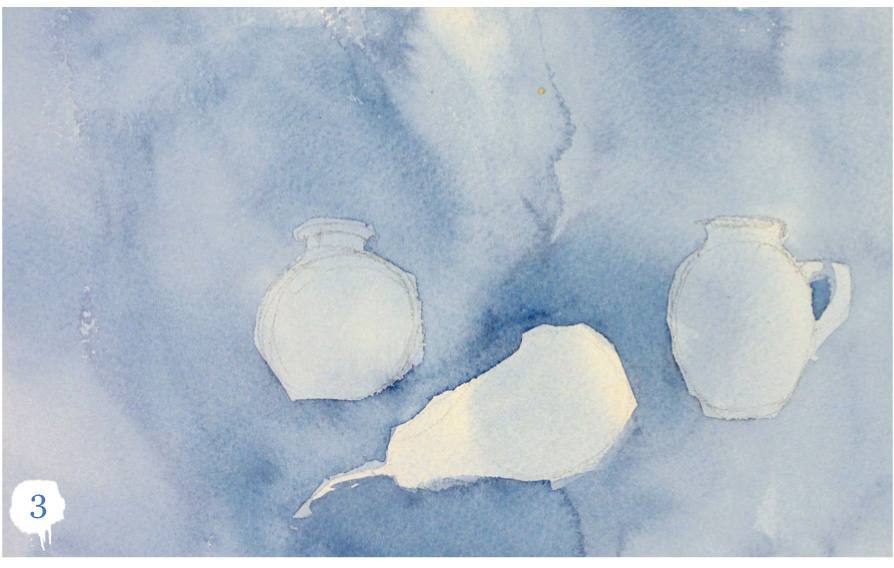 Again, when dry, draw the number 2 1 objects. Repeat the paint application as in stage 2 but this time you must paint around both the pear and the bottles. You should now have a pear, two bottles and a background without actually painting the objects. This process tackles the problem of what to do about the background – you paint it as you go!
4 Once again repeat stage 2 using the number 3 objects. You will now start to connect some of the shapes. Clearly your background is becoming darker against lighter objects. With practice it is possible to achieve light and dark within objects and background and hard and soft edges.
5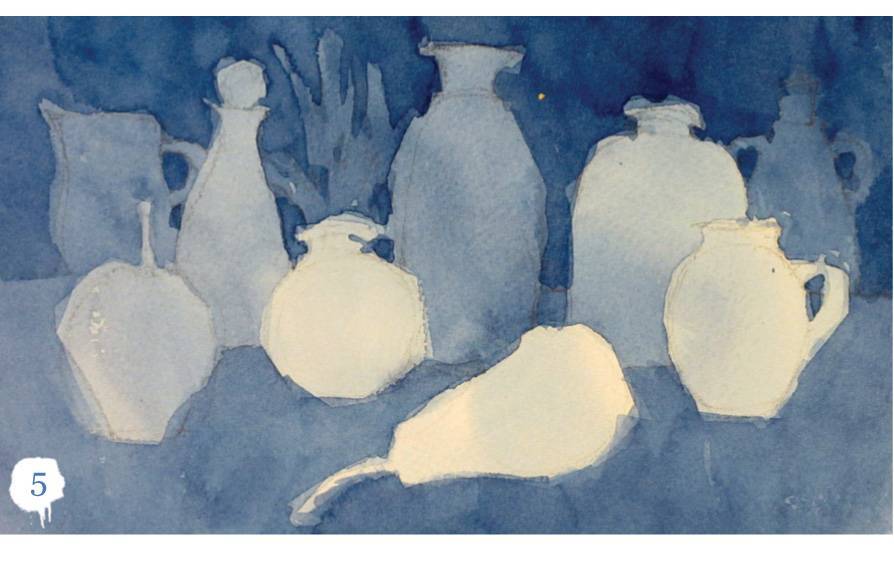 When dry add the remaining objects (shape 4) in the same way. You can build as many layers as you like adding more objects as you go, which is when it gets really interesting. In doing so you will find that with each layer you will actually be painting smaller areas, some of which will be ‘enclosed negatives’ and building up some really dark tones. It’s up to you how far you want to take this but be warned it can become addictive!
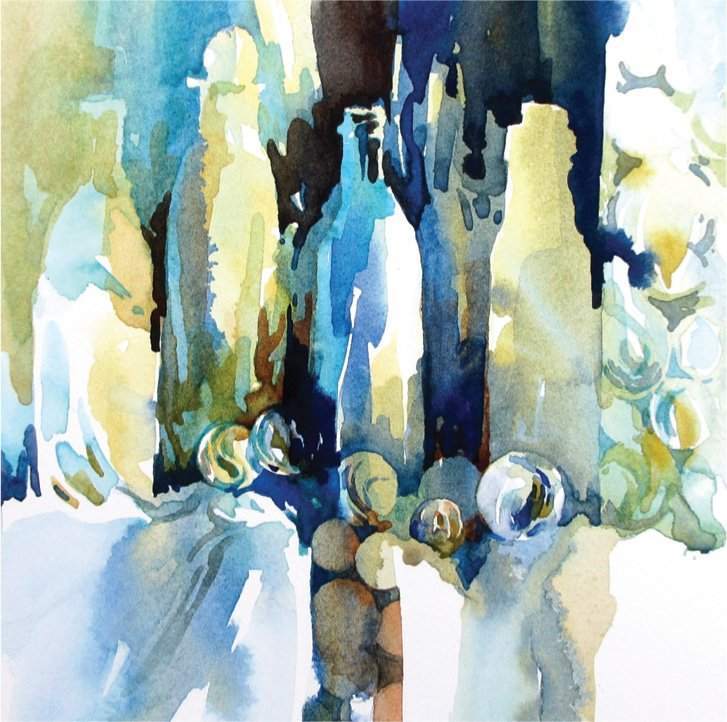
You’ve just painted a technique. When you’ve mastered it you can use the technique to add an extra ‘something’ to your paintings.