
I never go for a walk without my mobile phone for taking photographs when the opportunity arises. Look carefully and you will see these busy little creatures which are so important to our very existence. I’m humbled by the bumbles and can’t resist reaching for my brushes. I hope that my flicks with a few old toothbrushes will do them justice.
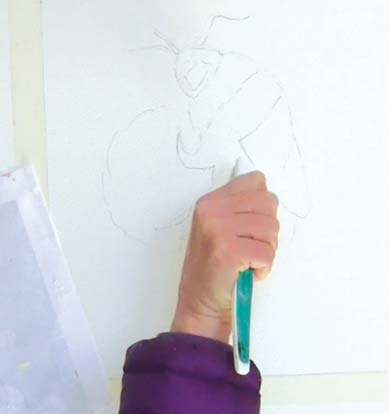 Lightly sketch the bee and rough outline of a flower using the reference photo. Pour masking fluid onto a scrap piece of paper and dip the tip of a clean toothbrush into it then practise pulling your thumbnail along the bristles aiming it at the scrap paper to produce a fine spray of masking fluid. The odd big blob won’t matter. When you are happy that you have the consistency right for a light spray, repeat this process on your painting on the lower section of the bee. You will be aiming for the spray to land where the pollen is on the bee. Leave to dry thoroughly before moving on.
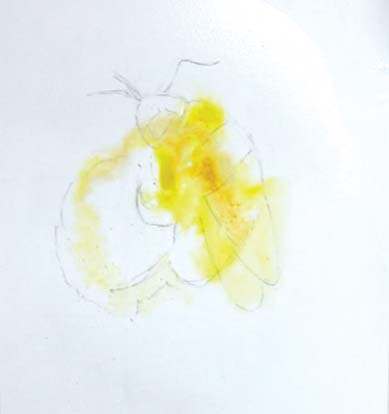 Using a large brush (28) wet the paper thoroughly with clean water. Cover the whole bee in water and about a 10cm circle around it. Change to a No. 4 brush then mix the palest colours, Lemon Yellow and Raw Sienna, to make a wash the consistency of whole milk. Apply this to the yellow areas of the bee. Don’t worry if the paint moves into other areas, as you will be covering this with darker colours later. Next add a very small amount of Burnt Sienna to the mix and paint the darker yellow on the top of the bee’s back. Bring this same wash down through the water to the left side of the flower centre.
 The paper is still wet – keep going! Mix up a dark green using Ultramarine Blue, Phthalo Blue and Lemon Yellow. Pick up the wash and touch it to the paper above and slightly away from the top edge of the bee. This will make sure that the green doesn’t mix with the yellow already on the paper. Gradually move your brush closer to bring the green to the edge of the bee – you will have more control this way. Now change to the No. 10 brush and stroke the paint that is already on the paper away from the bee to indicate petal shapes. Then add further green petal shapes to the left side of the flower.
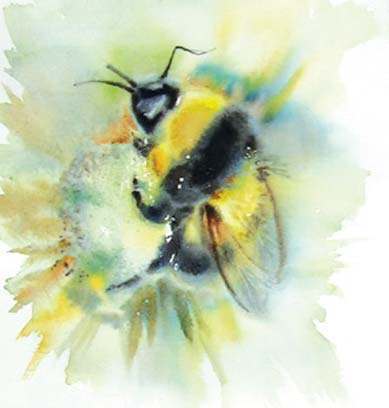 The paper is still wet – keep working! Change to the No. 4 brush and mix up a black using a combination of Burnt Sienna and Ultramarine Blue. The wash needs to be thick in consistency, too watery and it will run straight into the yellow. Apply where you see black on the bee, then temporarily using a rigger brush, pull the black paint down the lines which form the outside of the wings. Add black paint to the head of the bee, leaving a small rectangular piece of the head untouched by the brush for a highlight and to give the head form. The paint will dry paler so keep reapplying more of the same pigment to the areas that appear darkest on the photo but be careful not to add dark paint underneath the wings. These need to stay pale to retain a translucent feel. As well as adding dark pigment, you can also lift paint from the lightest areas using a clean dry brush. Now leave this to dry thoroughly.
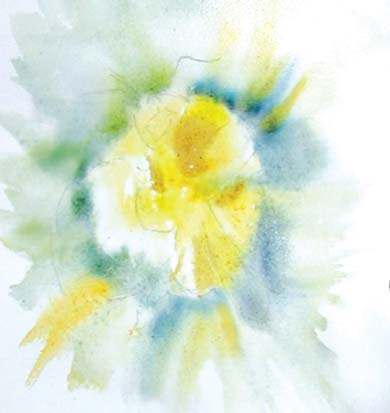
 Turn the painting upside-down to give yourself a fresh perspective on it. Using the No. 10 brush, mix Phthalo Blue, Ultramarine Blue and Burnt Sienna to make a green that is similar in colour to that previously applied to the section above the bee. Imagine petals of a flower and, working outwards, use the green to paint the shadow areas in between the petals. Break up any hard lines by adding a little clean water. Turn the painting the right way up again and use the underlying wash edges to help you form further petals using a pale wash of the green you have just mixed.
 Cover the bee with kitchen paper then mix Lemon Yellow and Raw Sienna with water in your palette then dip a new clean toothbrush in it. Flick your thumbnail across the bristles to add specks of yellow to the flower centre, then flick your wrist to allow a few blobs to drop from the brush. Once this is dry repeat but with a mix of Pthalo Blue and Ultramarine Blue. Leave to dry again then repeat with Titanium White, allowing some flecks of white to go across the bottom part of the bee.
 With a Rigger brush apply a very small amount of Titanium White to the wings then leave to dry thoroughly before rubbing your fingers across the bee to remove all the specks of masking fluid. You can also gently use a putty rubber or a Maskaway.