
Margaret Evans love to create a preliminary ‘mood’ on her paper, inspiring the development of her subject, and creating a reaction against more colours.
Art Spectrum Colourfix White
Red Gold
Soft Greys, Purplish Green, Pinky Green, Off Whites and Creams
If I know the basic colour scheme of a finished painting I can plan ahead, making lots of sketches and swatches of colours to decide how I am going to develop the mood of the scene. I then start off by using the complementary colours as an under painting.
Holy Island of Iona is off the west coast of Scotland, and in high summer the colours are vibrant, with white sands, deep blue skies, and turquoise pools of water all setting off black rocks and grey cottages. My focus is on a blue theme which I will start off a complimentary orange or red base.
Having primed my white paper with Copper and Red Gold System 3 Acrylics I am ready to start sketching. You can prime with just one colour, or several for a multi-coloured effect like this.

Using one of the blues which will feature in the painting I sketched in the outline of the composition.The big shapes are important at this stage as they help me judge whether the balance and design of the composition are what I want in terms of proportion of sky to land and sea – there is no point in fussing over details until these shapes are correct.

I started blocking in the large areas with the dominant colour areas, using broad painterly strokes, and planning where I wanted the under-painting colour to show through. The colours need not be exact, just basic colours to assess cool blues against hot orange from beneath – they can be adjusted later with other tints. Ultramarine and some Turquoise was mixed into the sky, and purplish greys were blocked in for buildings and rocks where needed.
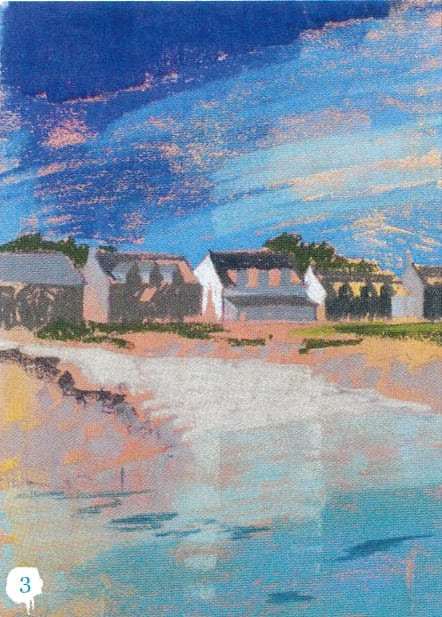
Less under-painting shows now, but still enough to inspire warmth in this picture, and stronger contrasts of tone have been added to create the directional light and mark where the strongest shadows will be.
Areas that still have the orange under-colours showing will probably be the warmer points of the painting. This broad treatment allows me to see the mood of colours I am creating, and check they are what first inspired me, and what I intended.

Now for some of the finer points, not so much ‘detail’ but smaller shapes, such as rocks, and building shapes to simply suggest detail, and even a few hints of people. Architectural subjects always tempt too much fussing, so I tend to continue working around the painting in a circular fashion, developing a little at a time, so the entire composition grows together as a unit, instead of allowing a fussy area to take over and distract.

This close up section shows that the illusion of detail is still very loose and suggestive, and there are lots of little pockets of orange popping through to give a feel of sunshine and warmth against the strong cool blues elsewhere.
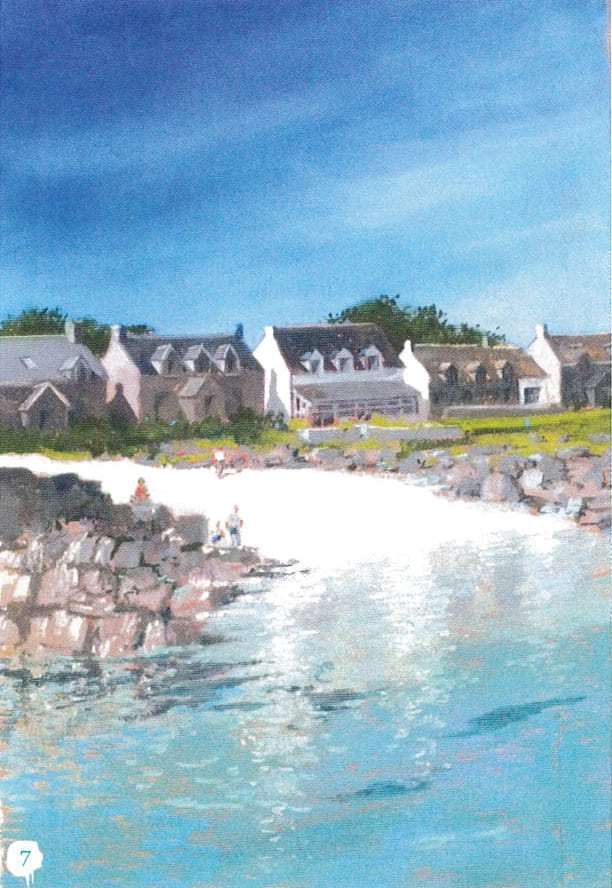
Strengthening these colours also starts to dramatise the white sands which are so typical of Iona.

With further building up and finishing, I’ve concentrated more on textures to give a balance of rough against smooth areas. I rubbed the sky to blend several shades of blue into each other, creating a soft, smooth, yet still vibrant sky, in contrast to the busier textured parts, such as the rocks, shoreline and water reflections.
1 – Restrict your palette to no more than 12 to 15 sticks of colour
2 – I haven’t quoted exact colours, brands or tint numbers – this is too mechanical. Make your own observations on colour. Be descriptive – if you see a grey wall, is it a blue grey, a pinkish grey or a purple grey? Painting like this will help you use your imagination and create your own identity in the colours you use.
3 – As you work, keep in mind your initial intentions and check you are keeping to them as much as you want. Sometimes the initial objective can be lost, causing disappointment – if there is dissatisfaction better to know early on and adjust accordingly.
4 – Once ‘finished’ check for the balances needed to create a good painting: are there enough balances of lights versus darks, warms versus cools, textured versus smooth?
5 – Leave your painting to ‘simmer’ for a few days, before deciding it is finished, then sign it! As with the best of proverbs “finish in haste – repent at leisure”.