Saskia Skoric creates colourful, textured works of art using just her fingers. Finger painting: a method of painting for kids only, right? Wrong. Fine artist Saskia Skoric has been working with this unusual method for some time and has found it has completely reignited and widened her creative flow.
1 The sky.
Make sure the image you want to create is drawn out accurately and clearly. Then it’s time to put your gloves on. Select the paints required and take the tops off. Lay paper towels out ready to clean your fingers as and when you need. Squeeze Prussian Blue onto one or two fingers and apply to the top of the canvas. Keep reapplying the paint until you’ve covered the top. With the same method, add Cobalt Blue below and blend in the two colours where they meet. Wipe your fingers and then apply White and Primary Cyan and mix on the canvas. Also, blend this into the Cobalt Blue. Leave the left side clouds blank. Clean your fingers again and, working on the right side of the background, use Cadmium Red Light, then blend in Transparent Yellow Medium and White at the bottom. Use the Cadmium Red Light and Transparent Yellow Medium for the left bottom of the canvas.
2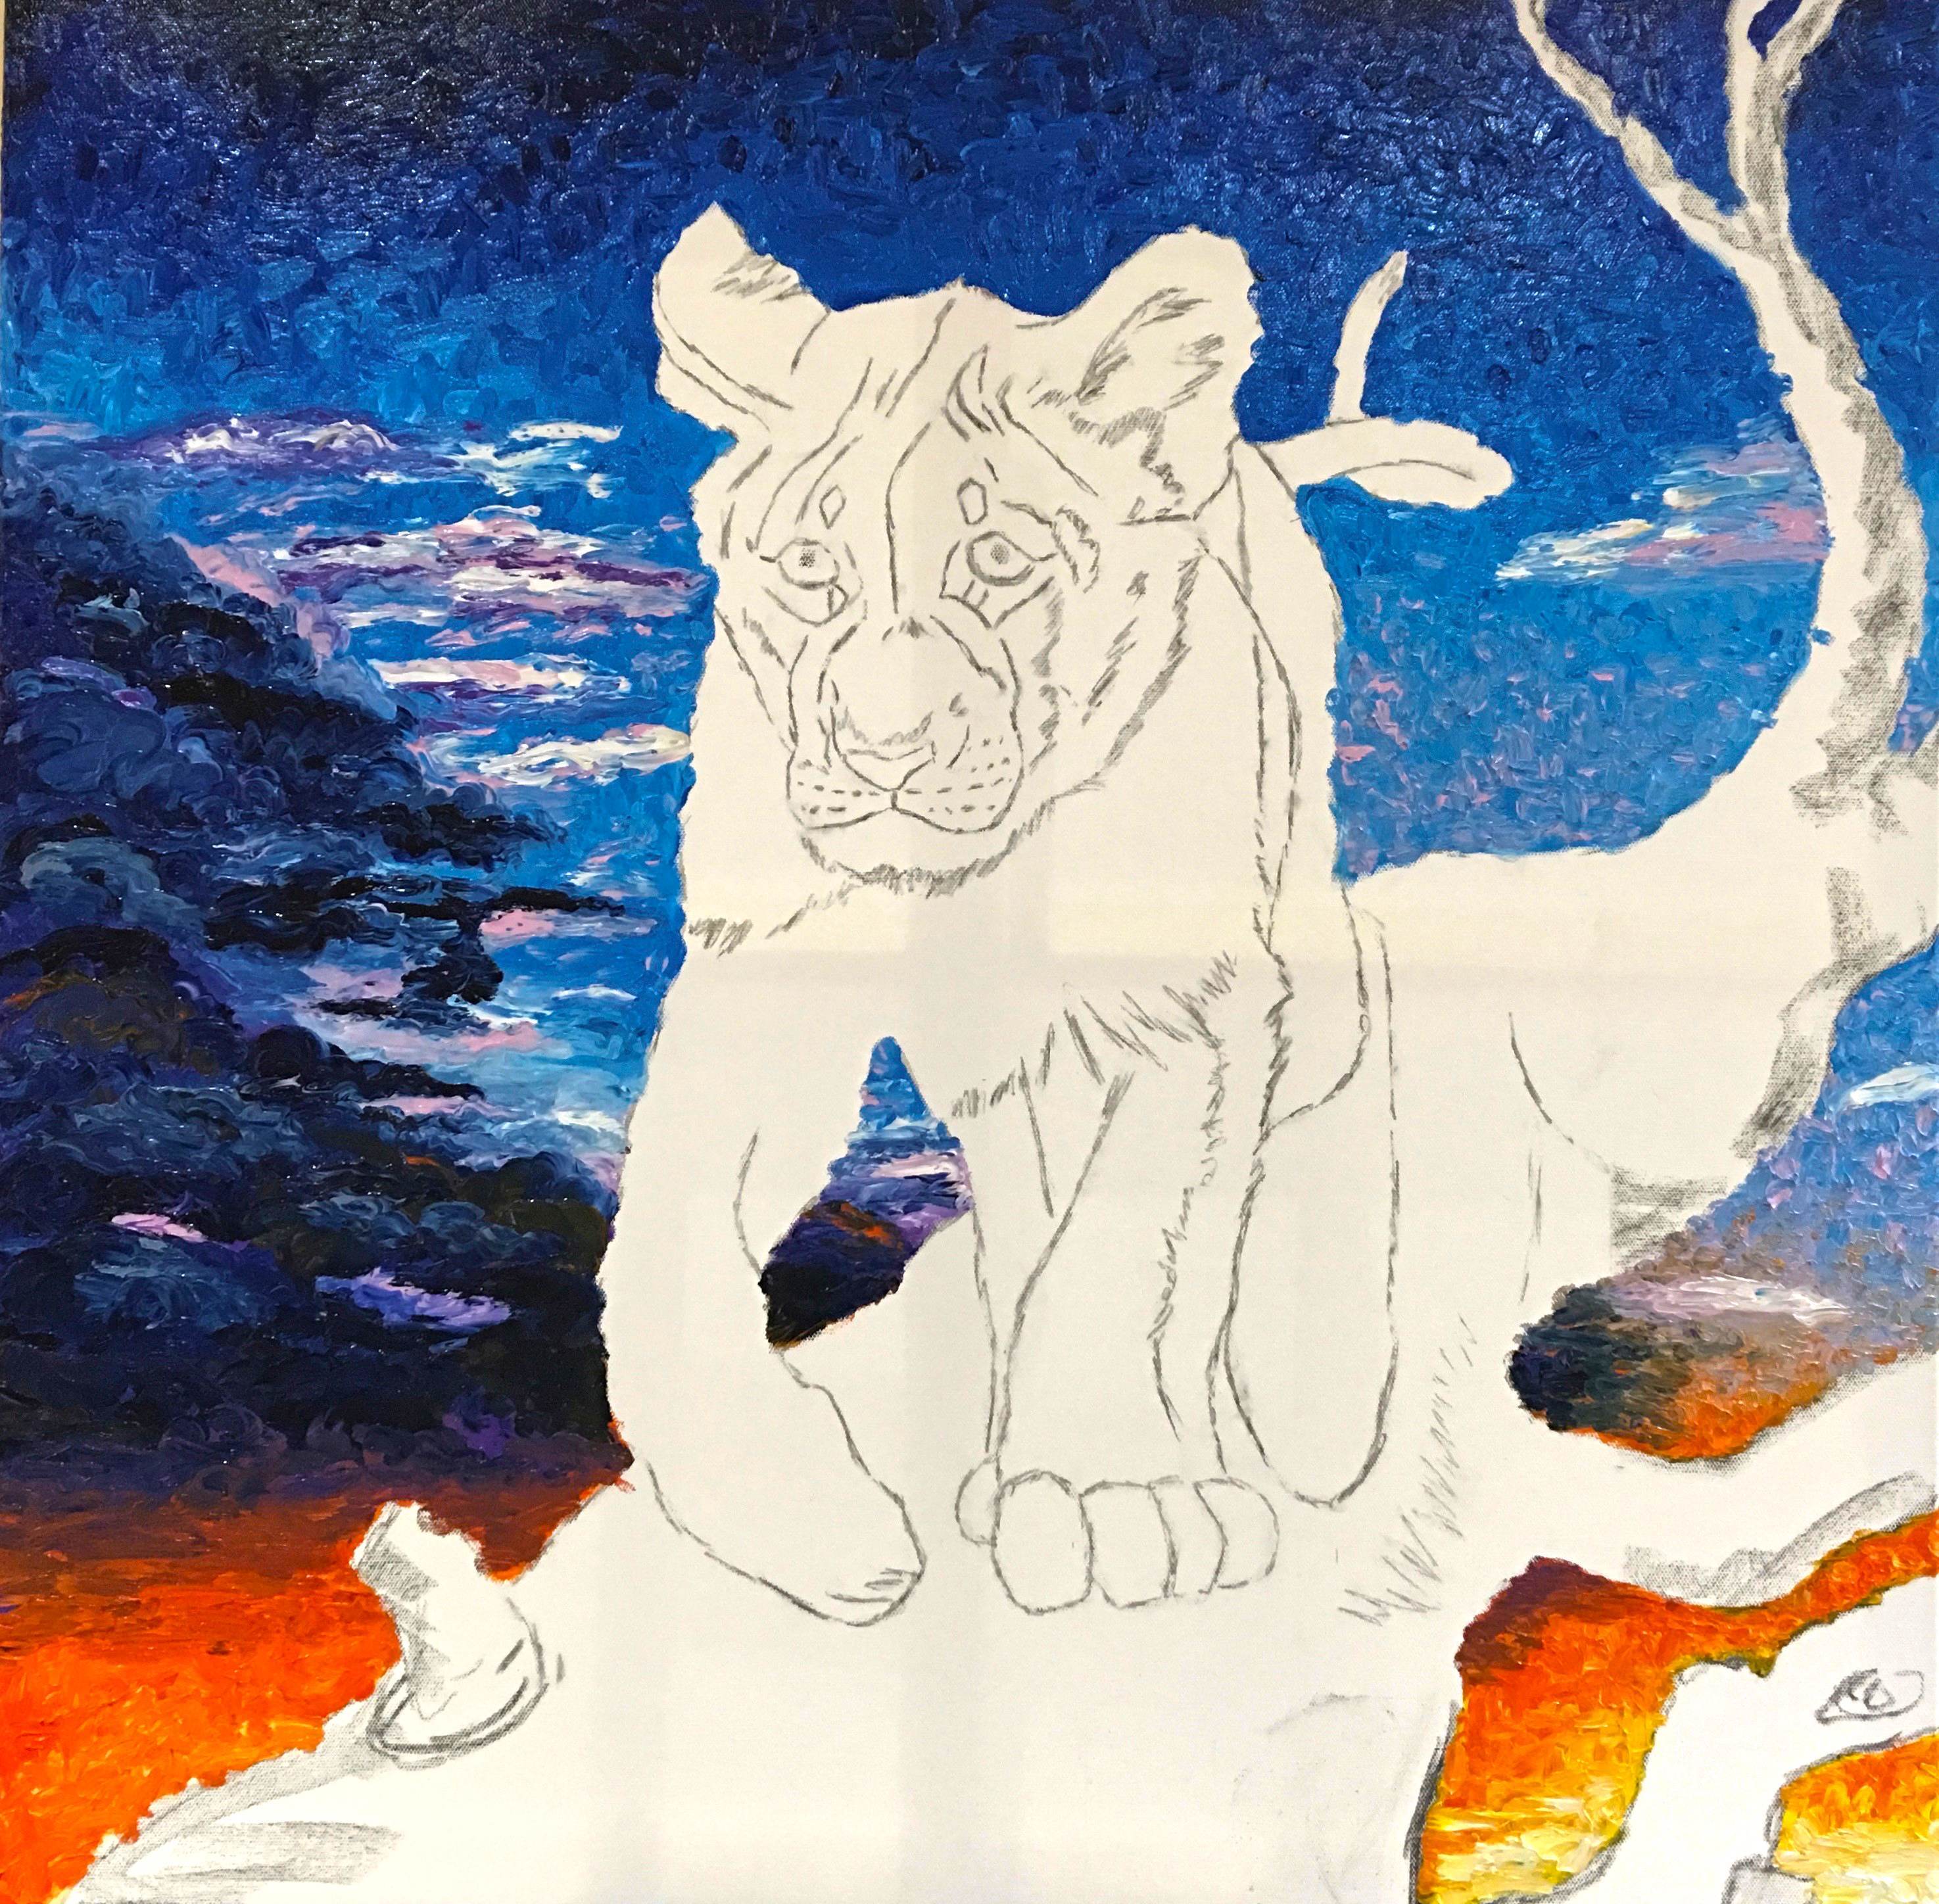 The clouds.
Working over the top of the painted area, select where you want to add clouds. Use Persian Rose with long sweeps to create them. Clean your fingers again and then apply White over the top of the Persian Rose. For the dark clouds on the left of the canvas, use Persian Blue in half circle movements, wipe your fingers and add Greyish Blue over the top. Blend the bottom of the clouds into the Cadmium Red Light at the base of the canvas.
3 The tree.
Use the paint to help create the texture of the bark. Start with Permanent Red Violet to outline the tree on the left side of all branches. Continue with this colour and Burnt Umber to define contours in the wood. Use Permanent Red Violet Light and Naples Yellow Red to fill in between the darker markings. For the area under the lion use Burnt Umber and break it up with Naples Yellow Red. Work the Naples Yellow Red down the front of the tree and use as highlights along the top branches down to the back of the lion. The highlights to the right side of the branches are Permanent Lemon Yellow and Light Oxide Red. A few extra highlights can be added with Persian Rose.
4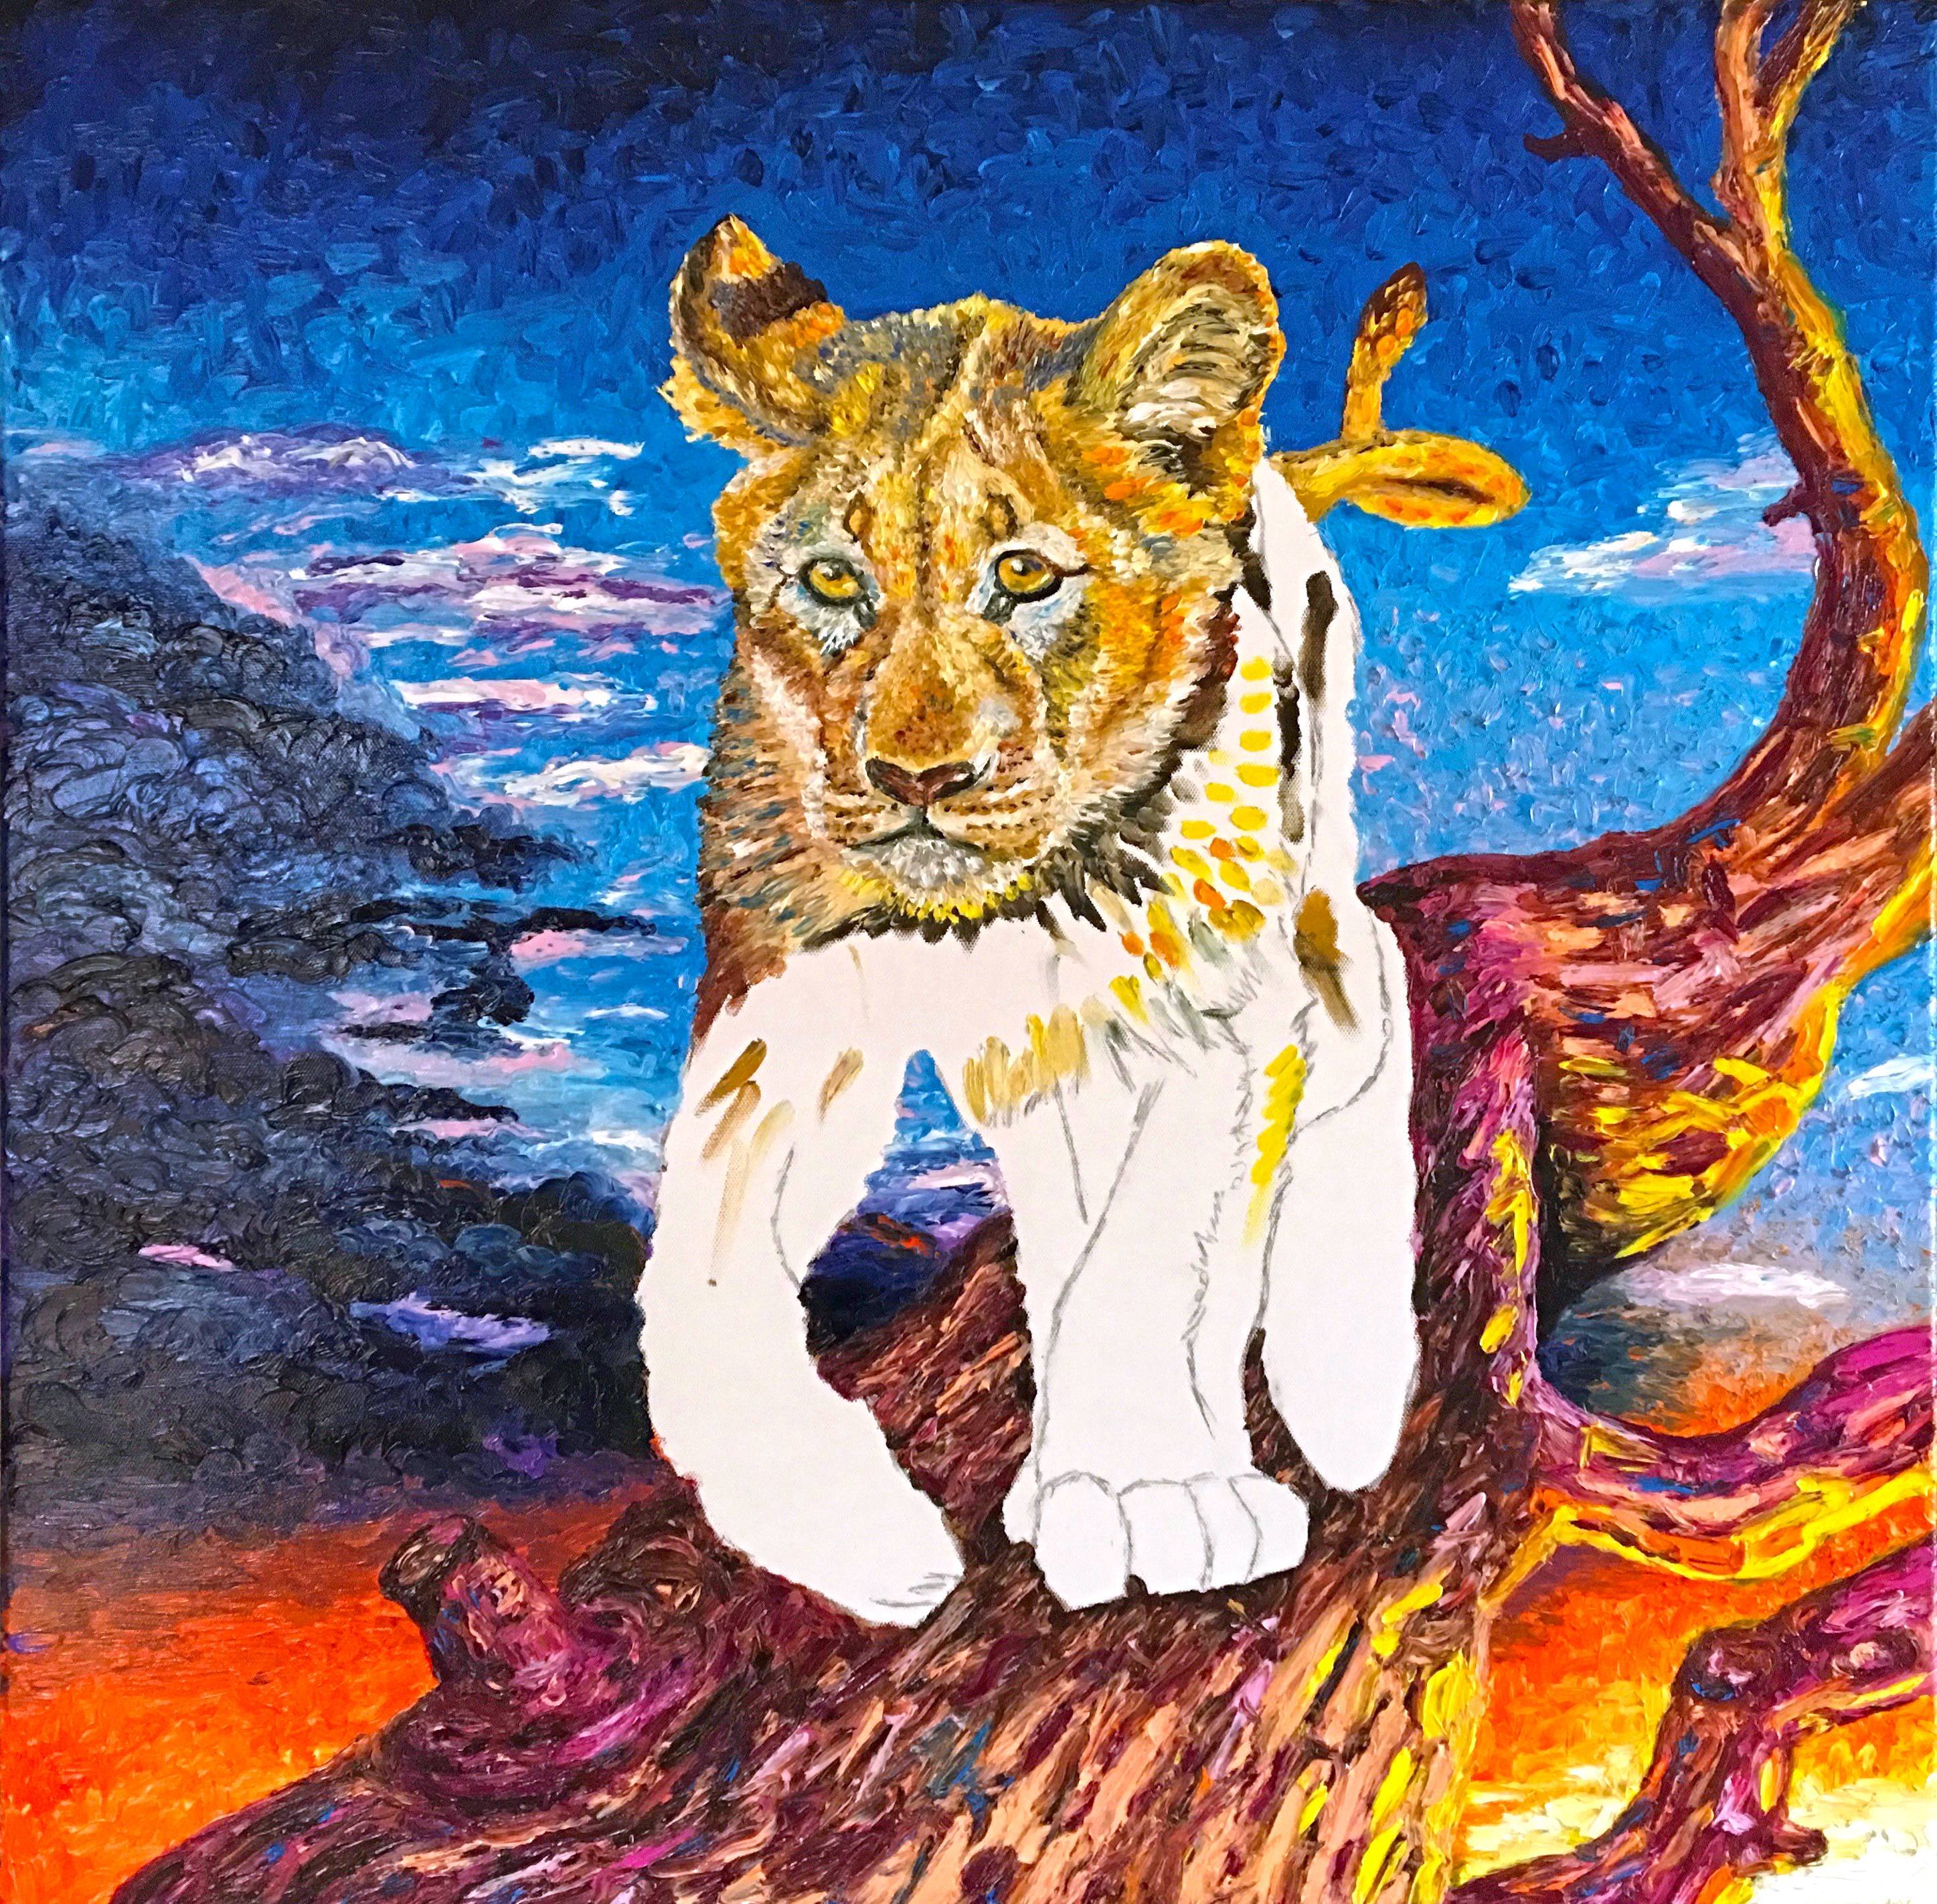 The lion’s face.
Start with the eyes, the trickiest part. Outline them using black; I use my nail for intricate work. Fill in the eye with Naples Yellow Deep, add a small amount of Permanent Lemon Yellow to the bottom, then Black for the centre, with White for a highlight. For the rest of the face, including the neck, place Burnt Umber in areas where it’s darker. Use White around the eyes. For the rest of the face work with Naples Yellow Light, Naples Yellow Deep and Yellow Ochre breaking it up with a little Burnt Sienna where needed. When creating fur, use lighter shades with darker on top. Always apply the paint in the direction the fur would go. Use your nail to make fur marks and mix in paint when required. For the nose, use Black for the outline and Burnt Sienna for inside, with White to highlight.
5 The lion’s body and legs.
Remember: apply the paint application in the direction of the fur. Begin with filling in the darker areas with Burnt Umber and break it up with Yellow Ochre. Around the neck, use Yellow Ochre and highlight with Naples Yellow Light and work in a little Naples Yellow Deep. For the tail, the back and left side, work in Yellow Ochre and use Naples Yellow Deep and Naples Yellow Light for paler fur. Paint the back legs using Burnt Umber, Burnt Sienna and then break it up with Yellow Ochre. For the left front paw, you need Burnt Sienna with Yellow Ochre to break it up. Meanwhile, down the front left leg, use Greyish Blue, Yellow Ochre, Naples Yellow Deep, then White to highlight. For the right leg, use Yellow Ochre with Naples Yellow Deep and highlight with White down the inside of the leg. For added highlights, use Permanent Lemon Yellow and Permanent Orange. Once you get to this stage, you can assess how much highlighting or blending of the fur you might need to do. Finally, it’s time for the whiskers. Using white and the tip of your nail, apply a thin line where you want the whiskers to sit.