While I value a painting that is thought out, considered, then developed slowly, sometimes I need to loosen up and create an image a lot faster; an instant creativity hit if you like! This painting is essentially a pencil and acrylic sketch, which I can work up as little or as much as I like. On this occasion I decided to keep it reasonably loose, but also to work up some of the details to still make it good enough to frame as a study.
I chose this photo, taken by my friend Steve Burgess when we were out in the Maasai Mara Game Reserve. Cape buffalo are both scary and beautiful and full of character. I cropped the picture on my computer to give an essential and pleasing composition and printed it to A4 size, then placed it over my canvas board to check that it would fit comfortably within the edges, with a generous space on all sides.
1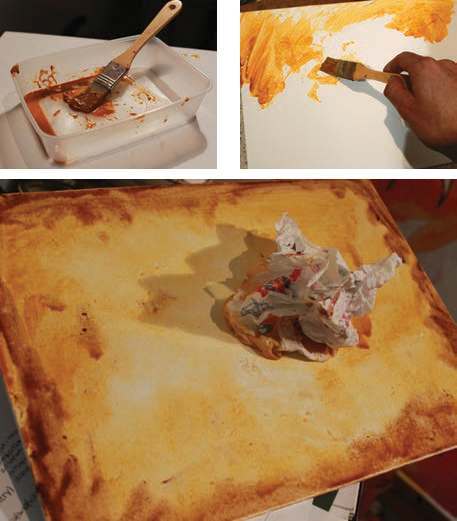 Using a pot or a palette, some Raw Sienna and lots of water, make a mix using the flat brush, and then slap it onto the canvas board with gusto! Let the colour be more intense at the edges, using the brush, or move the board letting gravity take it to the sides. Have fun with it; the aim is to give it an aged look so keep it loose. Add some Burnt Umber to the edges with loose strokes, letting the paint mix and run together on the board. Take a piece of clean, scrunched up kitchen roll and dab the middle, taking some of the colour off. Roll and dab it to create various, parchment-type effects. Flick a few flecks of both Burnt Umber and Raw Sienna of varying strengths towards the edges, with a few drops here and there in the central area. Then let it dry thoroughly whilst flat.
2 Transfer the A4 size image using Tracedown, putting it graphite-side down between the printed image and the canvas board, thus enabling you to get the essentials down quickly and accurately. This is a fun exercise and on this occasion don’t listen to anyone (or that critic in your head) telling you that it’s not ‘proper art’ if you can’t draw perfectly well free hand!
Once the main image is down, copy in any extra details you may want to include. Now ‘fix’ the graphite by drawing carefully over the lines with thinned down Burnt Umber.
3 Mix a wash of Ultramarine Blue and a little Raw Sienna and use the size 8 brush to block in areas of hair and shadow. Make the mix darker for the shadow areas. Wash in some Raw Sienna to add warmth to areas that need to come forward, around the nose and on the horns, especially the underneath edges, this will appear to be reflected light and lift your painting. Switch to the smaller brush when you wish but hold off for as long as you can and don’t get bogged down in detail!
4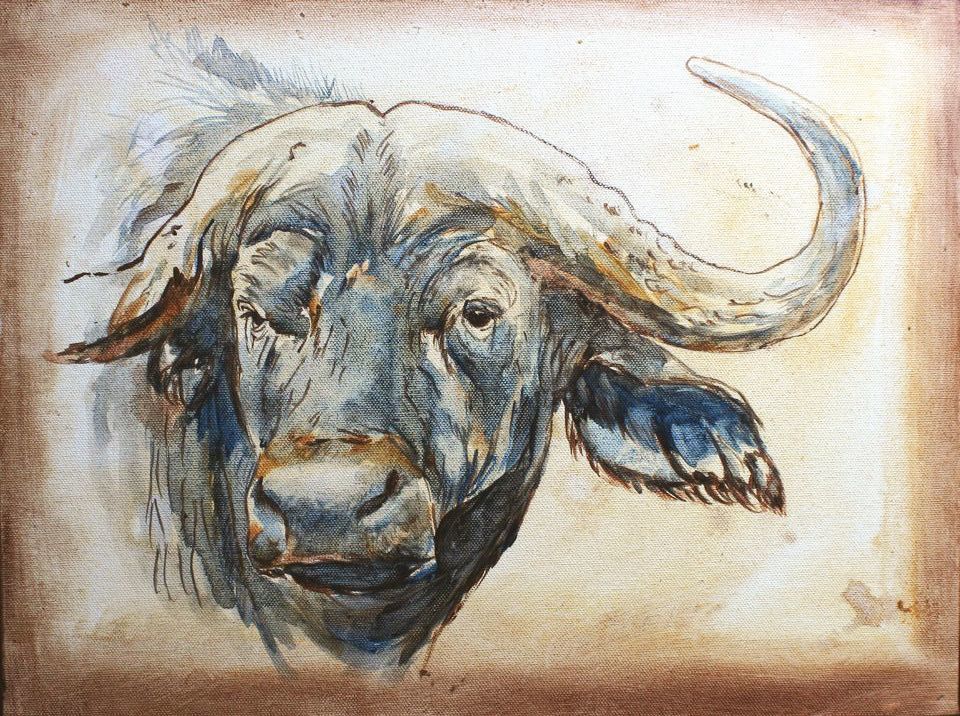 By now you will have slowed down, but try to retain the sketch look, especially at the edges, and on the receding neck and body. Keep these cool with the blue and quite light in tone. Reserve the darkest darks for the eyes and nose and then deepen the tone beneath the jaw and in the ears. This stage is where you decide when to stop, whether you want to add more detail, and to lose any heavy lines that look unnatural. For this, mix the White with one of the other colours, depending on what you are painting, and using the small brush take out those heavy lines and add a few highlights to the horns, nose, and ears to bring out the form of the face (look for lumpy bits to emphasise – like above the eyes.)
5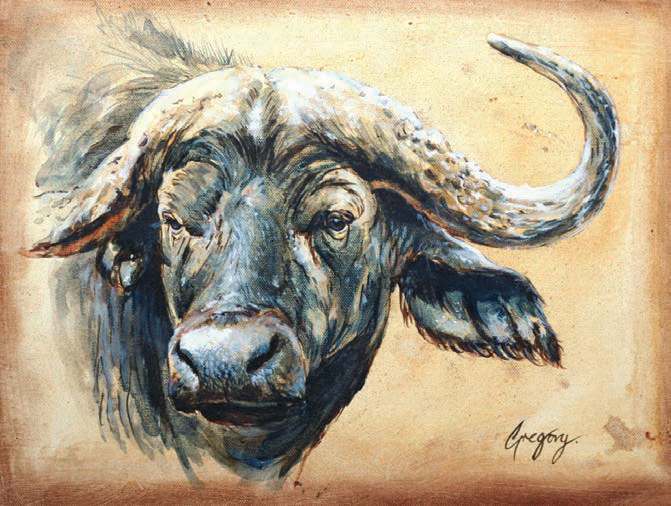 Carefully add some final highlights to the eyes and nose, and you may want to evaluate the strength of values here and there. I made the reflected light even warmer and added some to the bottom jaw and some around the nose to bring it forward. Try and trust your judgement, if it looks right, it probably is. Leave it for an hour, then with fresh eyes make any adjustments. The White (a few dabs) will really act as your friend for adjustments, but don’t overuse it! Use dark washes to help light areas nearby appear lighter. Try to retain areas of energy and looseness, and these will really balance well with any tighter detailed areas. Don’t worry about any remaining pencil lines – let them show through.