Every TV and radio programme tells us nature is in trouble, which includes the world’s population of seabirds. This group includes gulls, terns, albatrosses and others and over the last 60 years numbers have fallen by around 230 million, a 70% slump, due to a group of maladies that includes overfishing, plastic and oil pollution. Having recently returned from visiting friends and family in South Africa, I was totally inspired by the nature there, which is overwhelming! From weaver birds weaving nests in the trees, or seagulls squawking in the air, to the amazing wild animals we saw on safari.
I trained as an art teacher many years ago using oils and pastels, but when I immigrated to England I fell in love with watercolours. But I didn’t fall in love with the pesky watercolour paper that makes the paint so hard to control; traditional paper is very absorbent and can cockle, so it’s important to find a surface that suits you. I decided to work on canvas instead. After many years of experience, I’ve found that my paintings are more controllable, and I get better results on canvas. I now use nothing else. This way of working allows you the freedom to correct any mistakes because the surface is waterproof. The paint takes at least 20 minutes to dry, so you can lift off, add more paint or remove it without panicking.
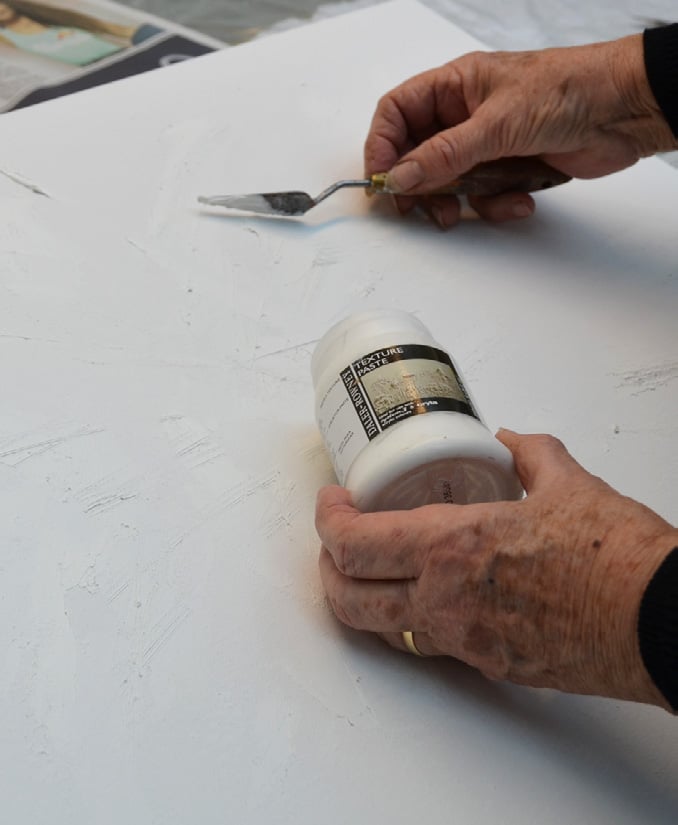 For my painting, called ‘Flight’, I began by preparing the background, using Texture Paste which I put on randomly with a painting knife. I love the unpredictability of not knowing how the background will work out. I wanted to capture the movement of the sea air and spray and the chaos of seagulls flying. I allowed the texture paste to dry, which takes approximately half an hour.
Dilute a generous amount, of both Ultramarine and Turquoise paints. Make sure you mix enough. You do not want to run out in the middle of a painting.
 The third stage is one I constantly use on a fair proportion of my paintings. I wet the entire surface of the canvas using a Derwent spritzer and a large Wash brush. I then drop in the blues and turn and tilt the canvas to encourage the paint to run in every direction and into the crevices made with the texture paste. Watercolour is lovely to watch as it works wet into wet and gives you random colour combinations.
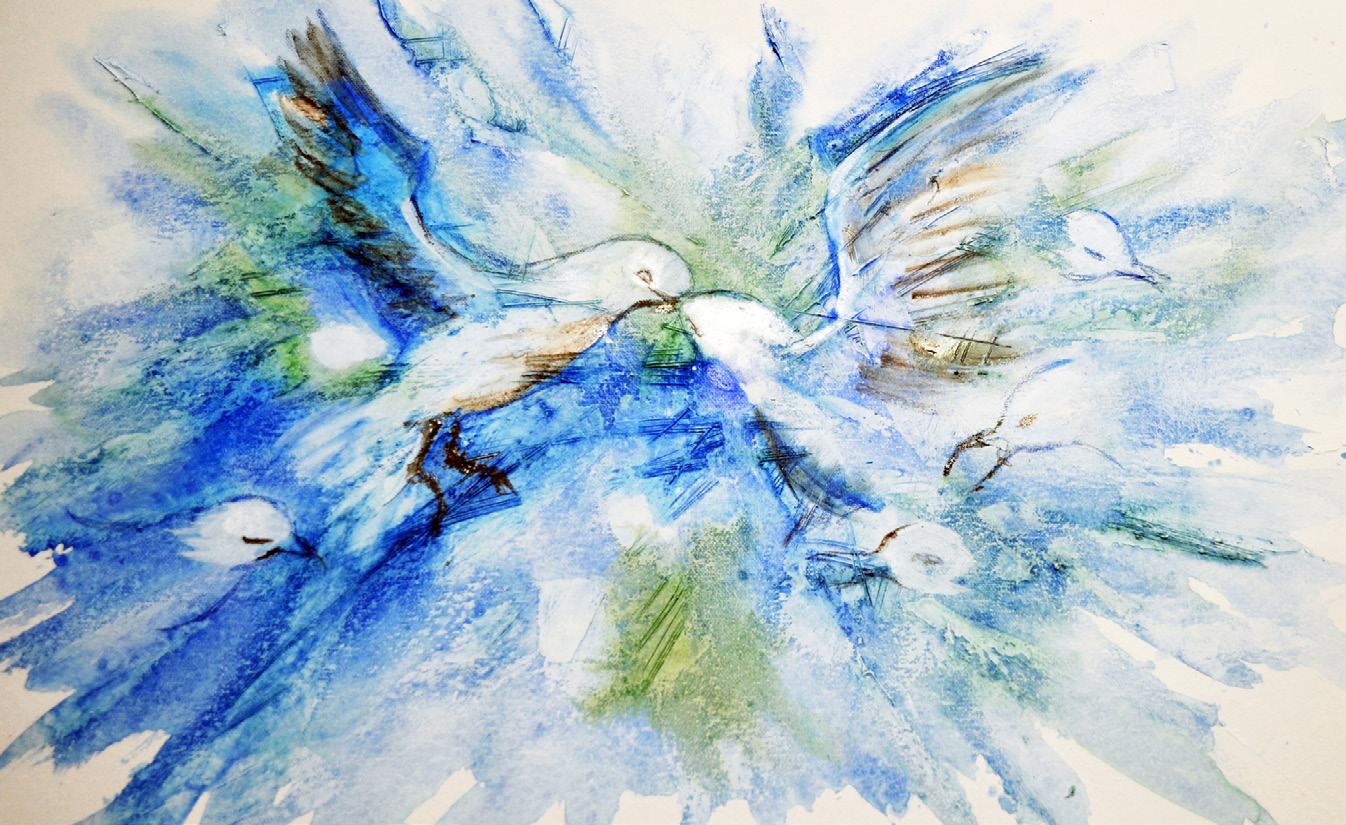 Once the paint is dry, I scan the background looking for inspiration to create birds from the random shapes that have appeared from the colour mixing. Having found heads and beaks of birds, I then use a Derwent Ultramarine Watercolour Pencil to draw around the shapes and turn them into seagulls. It is amazing how many birds I can see! It is such an exciting process.
 Now, it’s all about creating tones, using White gouache and watercolour pencils: the lights and darks that will make the painting exciting to look at and draw the viewer in to appreciate your vision. Once the painting is completely dry, seal the surface with two layers of Picture Varnish spray. The painting is now ready for a visit to the framer and, who knows, a happy purchaser?