
Flowers are an understandable obsession for many. Whether you are an avid gardener or a recipient of a beautiful bouquet, many of us appreciate the range of blooms that change throughout the seasons. Evoking special memories of occasions, loved ones or treasured trips – flowers make a feature throughout our lives. The fleeting nature of some of our most loved blooms makes them an ideal subject matter to become a permanent feature on your wall. For me, dahlias are my current obsession. With such variation in form and abundance of glorious colour – it’s no wonder these flowers are featuring heavily in garden design and artwork. I heard the comedian Joe Lycett describe flowers as the ‘slow motion fireworks of the garden’. I think this is the perfect way to think of dahlias – I hope you enjoy painting them as much as I do.
Shop Daler-Rowney System 3 Acrylics
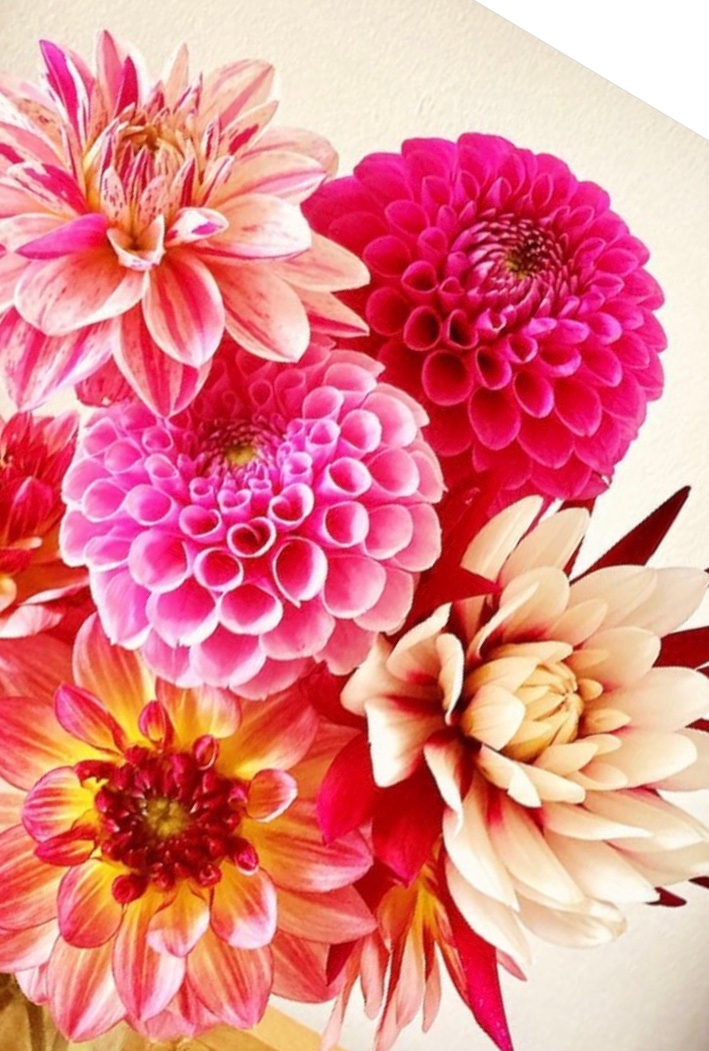 Begin by finding an image that inspires your creativity. This is the step where I can get completely absorbed and tend to clog up my phone with thousands of photos! These dahlias were grown by my friend Kim (@Dahliafarmerama on Instagram, thank you for the photo!). I then took the image and edited it until I found a composition that I was happy with and that suited the scale of the canvas board. Here, I wanted to fill the entire board with a burst of colour – so they are almost spilling off the edge. By cropping, flipping and rotating the original photograph of the vase of dahlias, I was able to achieve a composition that would create impact and celebrate this gorgeous subject matter.
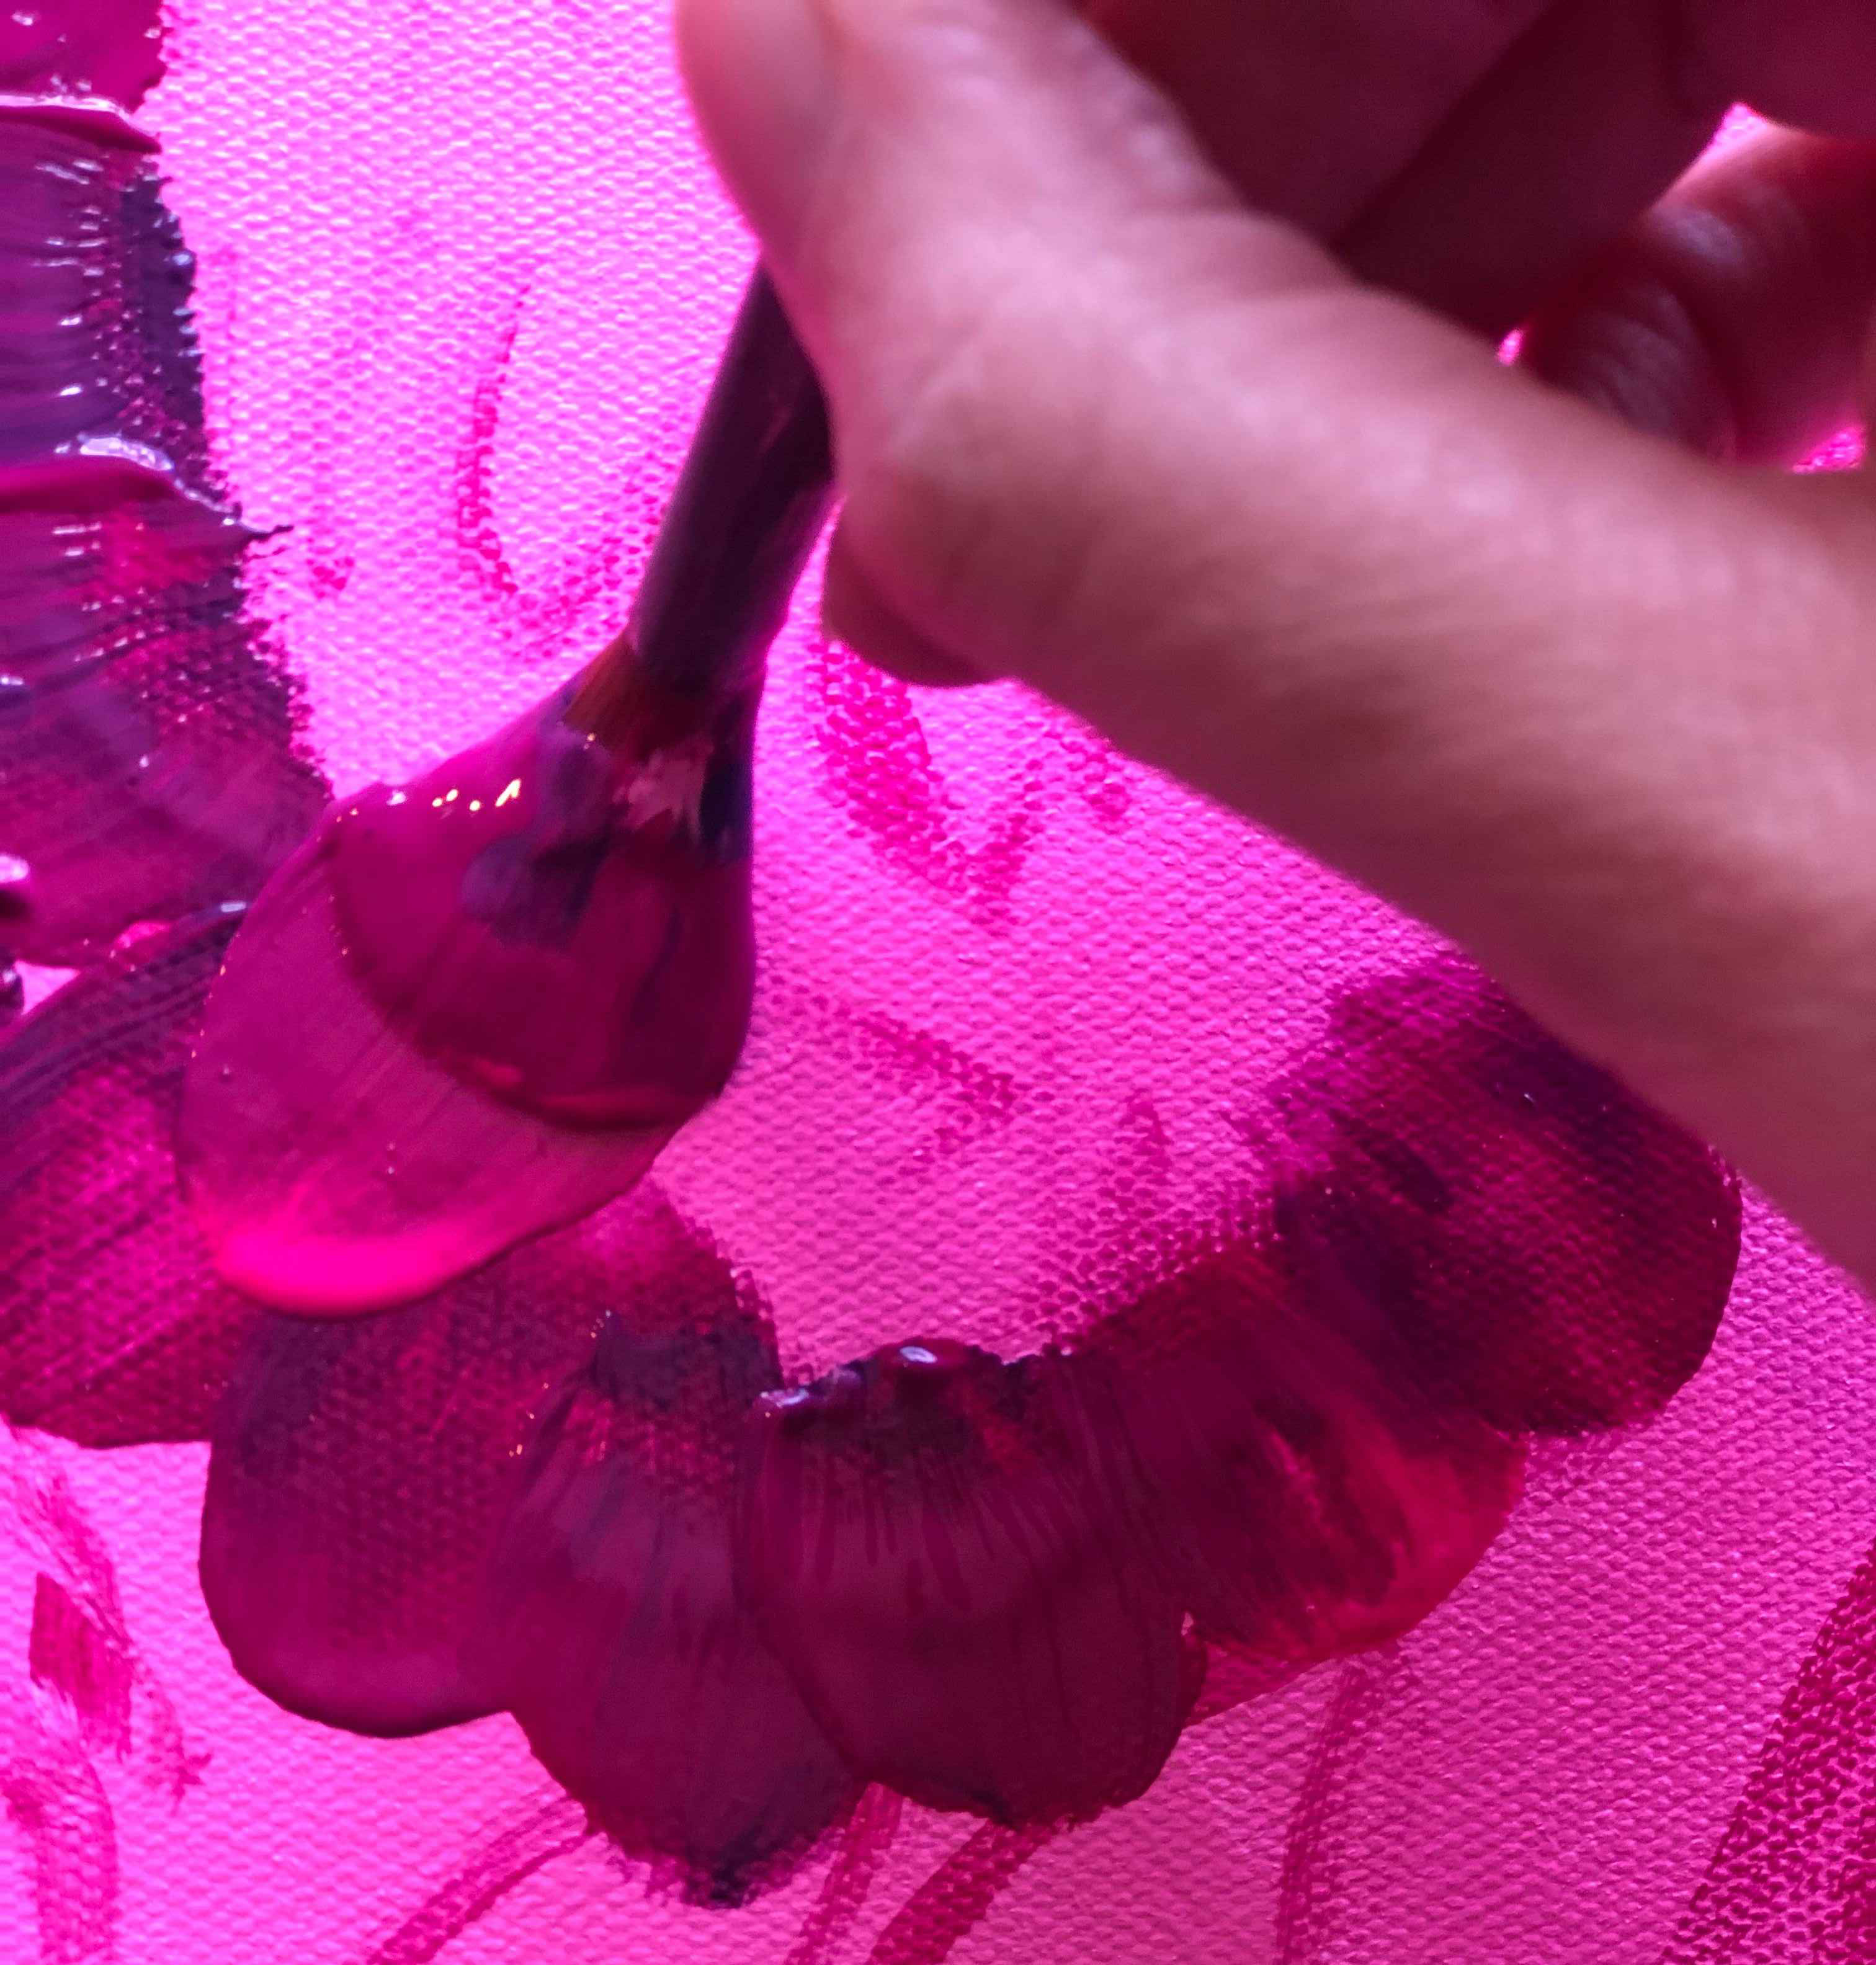
 Although not always necessary, underpainting your artwork can solve a few issues, and can be done in different ways. I often feel a little daunted when looking at a blank canvas. Getting some paint down alleviates that initial feeling and gets the process started. I used a vibrant pink (Fluorescent Pink mixed with Titanium White) applied with a flat brush. This sets the vibrant tone for the painting and will help with creating a greater opacity to some of the acrylic paints. It will also pick up the warmer tones in the bright dahlia colours.
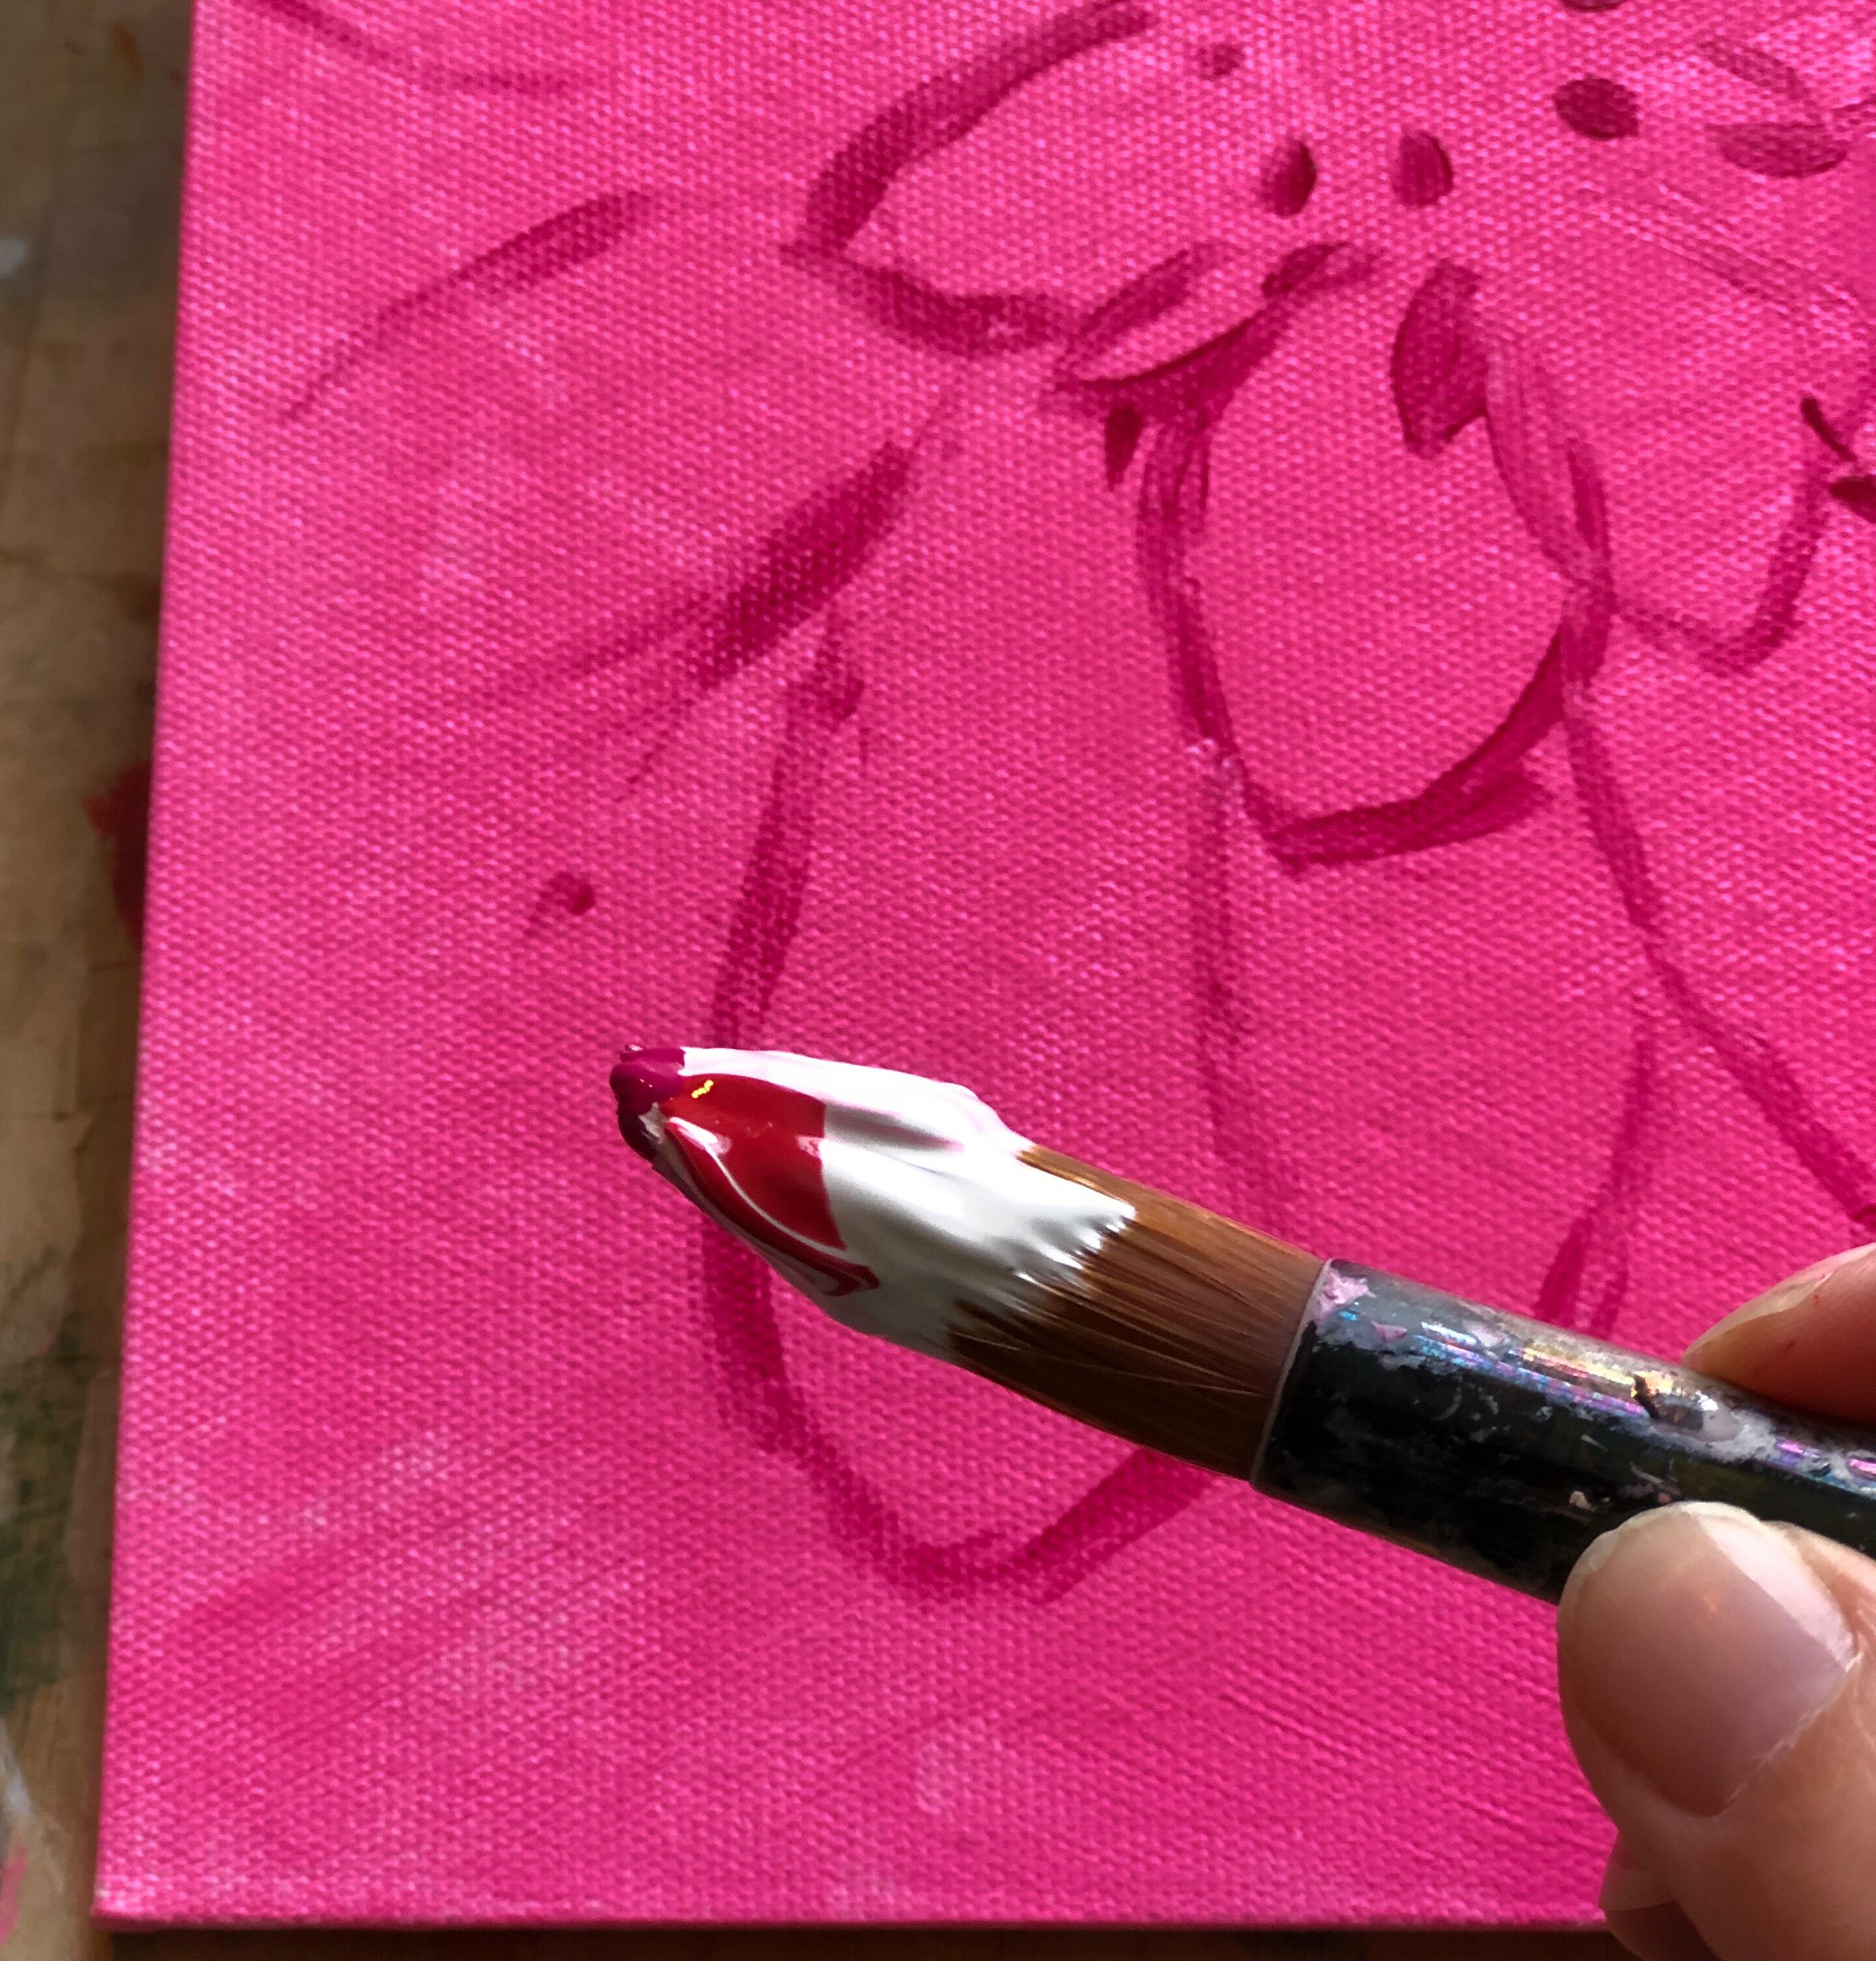
 I like to sketch out my composition using some watered-down acrylic in a darker colour – sometimes blocking the darker tones in the painting. If using paint directly at this stage feels a little too permanent, try using chalk or a charcoal pencil. This way, you can easily remove any mark marking and try again. However, the beauty of acrylic paint is the ability to paint over it – something I often have to remind myself of when I make those inevitable mishaps!
 Start with the flower that is most in the background. Acrylics can often dry a touch darker, so take this into account when mixing your colours. Mix paints that go from the darkest to lightest so they are ready to use. For the dark pink circular dahlia, I used Process Magenta mixed with Phthalo Turquoise for the darkest areas, graduating to lighter tones using Fluorescent Pink and Titanium White. Load your round brush no.20 with the darkest mixed pink, and then add a lighter tone to the tip of the brush. Adding plenty of paint to your brush in this way will create a lovely variation of colour for each petal, and a beautiful texture.
 Working from the outside petals inwards, use your brush to lay the paint down with firm pressure and then lift. As the petal size decreases, change to a smaller round brush, adding increasingly lighter colours to add depth to your dahlia.
 The dahlias with the more pointed petal shapes (top and bottom left) have more variation in their petal colour. Using a similar technique as in the previous step, mix the colours on your palette from dark to light for the next dahlia. Loading your round brush with the lighter colour, add the Cadmium Red down one side of the brush only.
 Using the tip of the brush at the end of the dahlia petal, gradually apply pressure to create the more pointed petal. Repeat the petals, again working from the outer part of the dahlia and changing to a smaller brush as you reach the centre. Use Process Magenta and Fluorescent Pink for the stripes on the top left dahlia. Adding the dark Cadmium Red acrylic and Process Yellow to your brush for the bottom left dahlia will create a dramatic stripe.
 As the dahlia that is most at the forefront, I wanted this flower to be the most prominent. Painting white flowers can be a challenge. To highlight this dahlia as a prominent feature, using changes in tone and an increased texture will bring it to the foreground of the composition. As in previous steps, mix your main colour (Titanium White) with a darker tone on your palette. I used the Cadmium Red and Phthalo Turquoise in very small amounts to achieve this. As before, start with the background petals and work your way in using increasingly lighter tones. Using greater texture for the inner petals by loading your brush with more paint will create that depth.
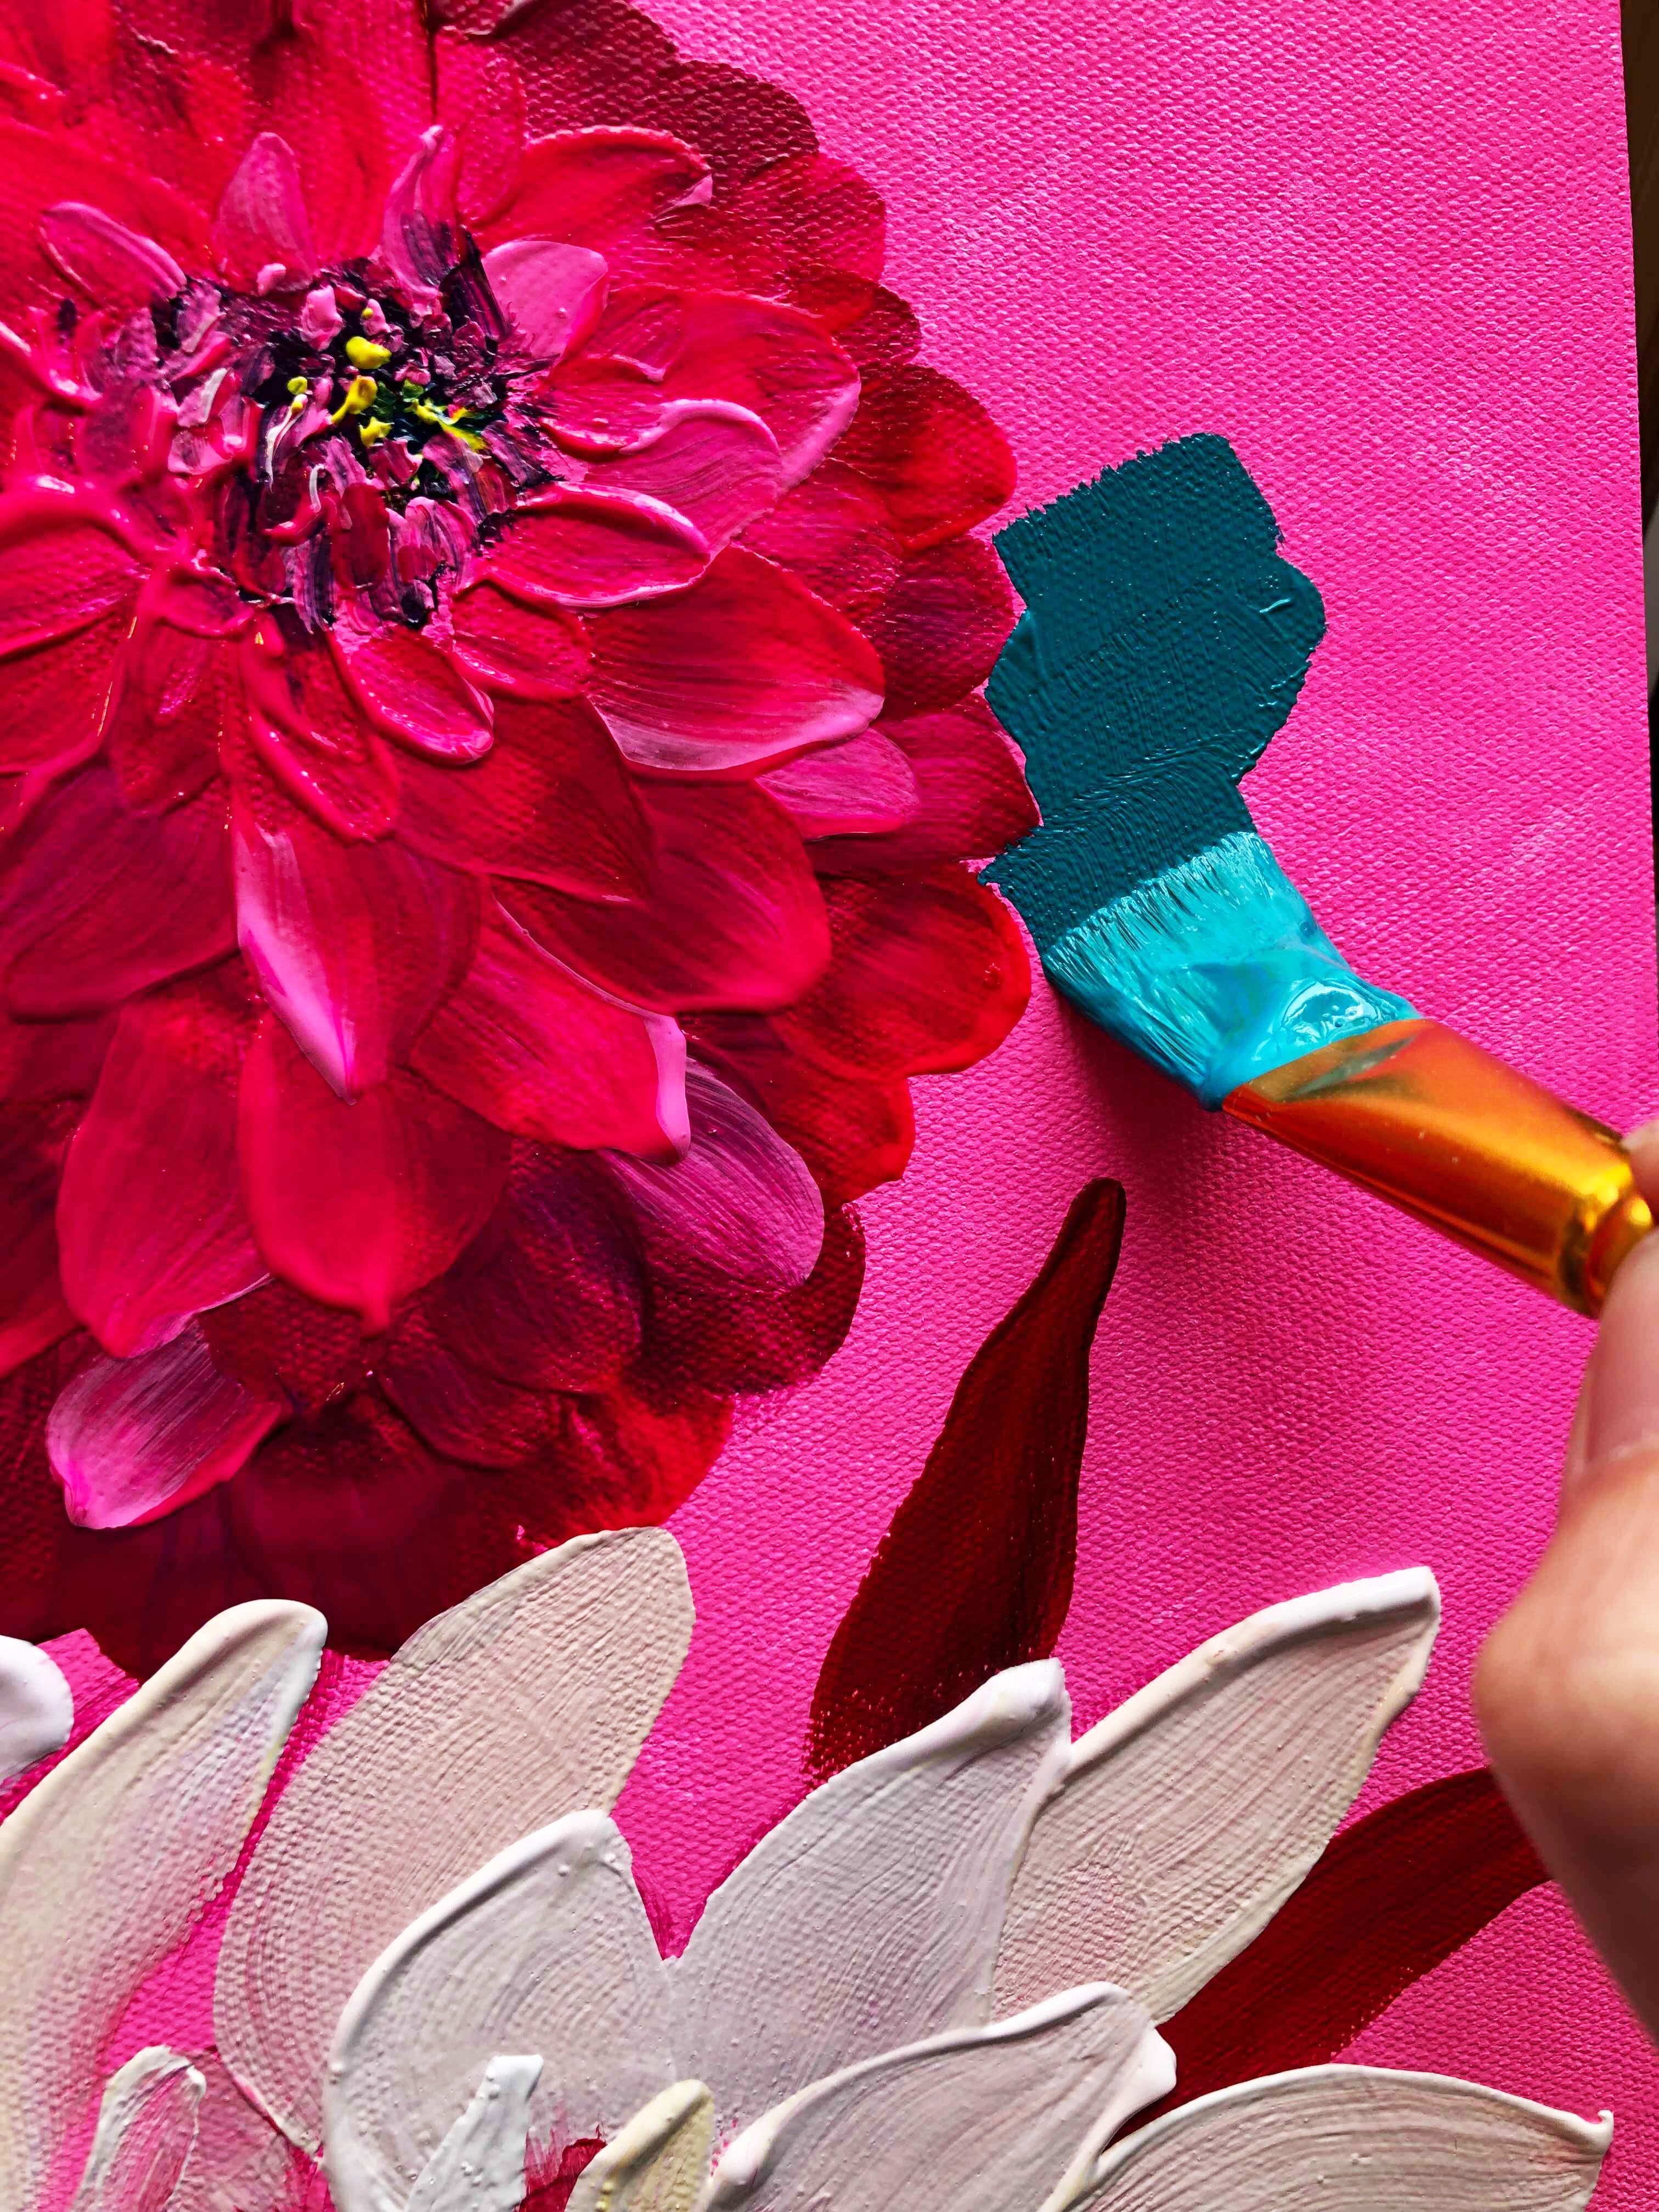 Adding the background is where your painting can totally change! Adding a background colour that will make your subject matter ‘pop’ brings your painting to life. This can be in a complementary colour or one that is darker. Mixing Phthalo Turquoise with a small amount of Process Yellow and Titanium White, use your flat brush to paint the background. Using less variation in colour and texture when applying this paint will contrast with your dahlias to make them stand out and create depth in your work.
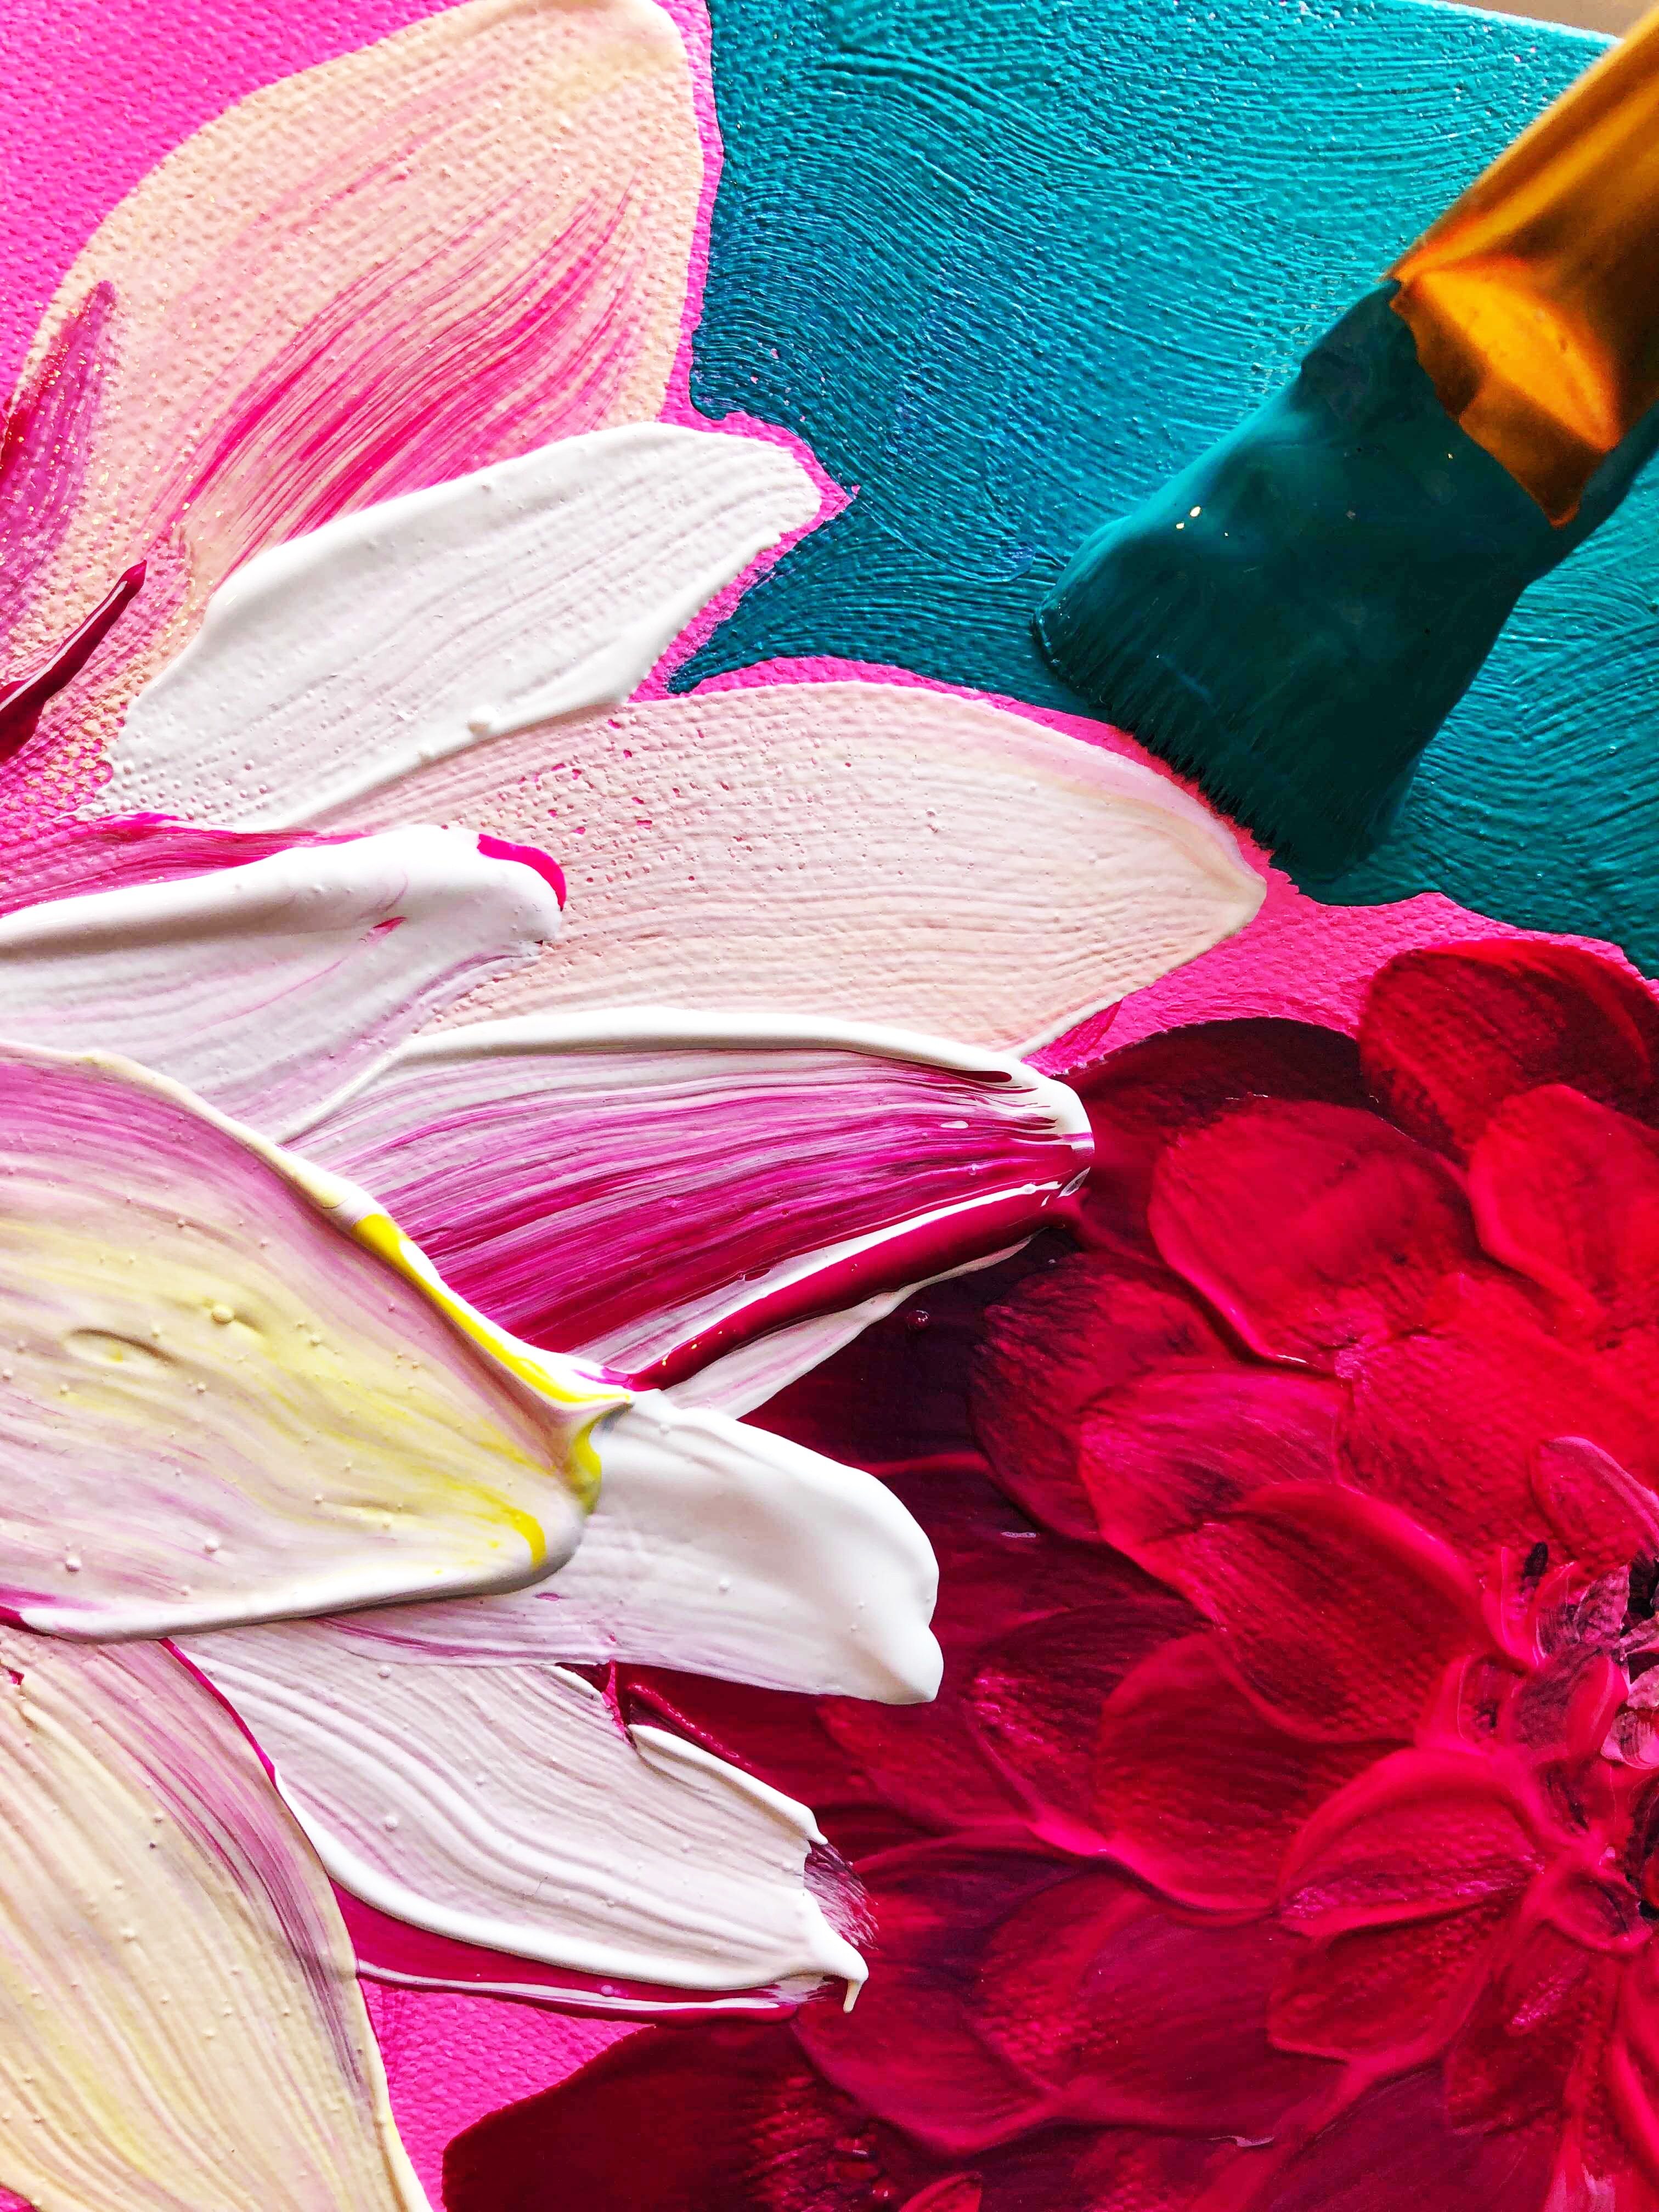 Another way to highlight your main subject is to leave some of the bright underpainting around the edge. Even a couple of millimetres will be enough to make your flowers ‘glow’.
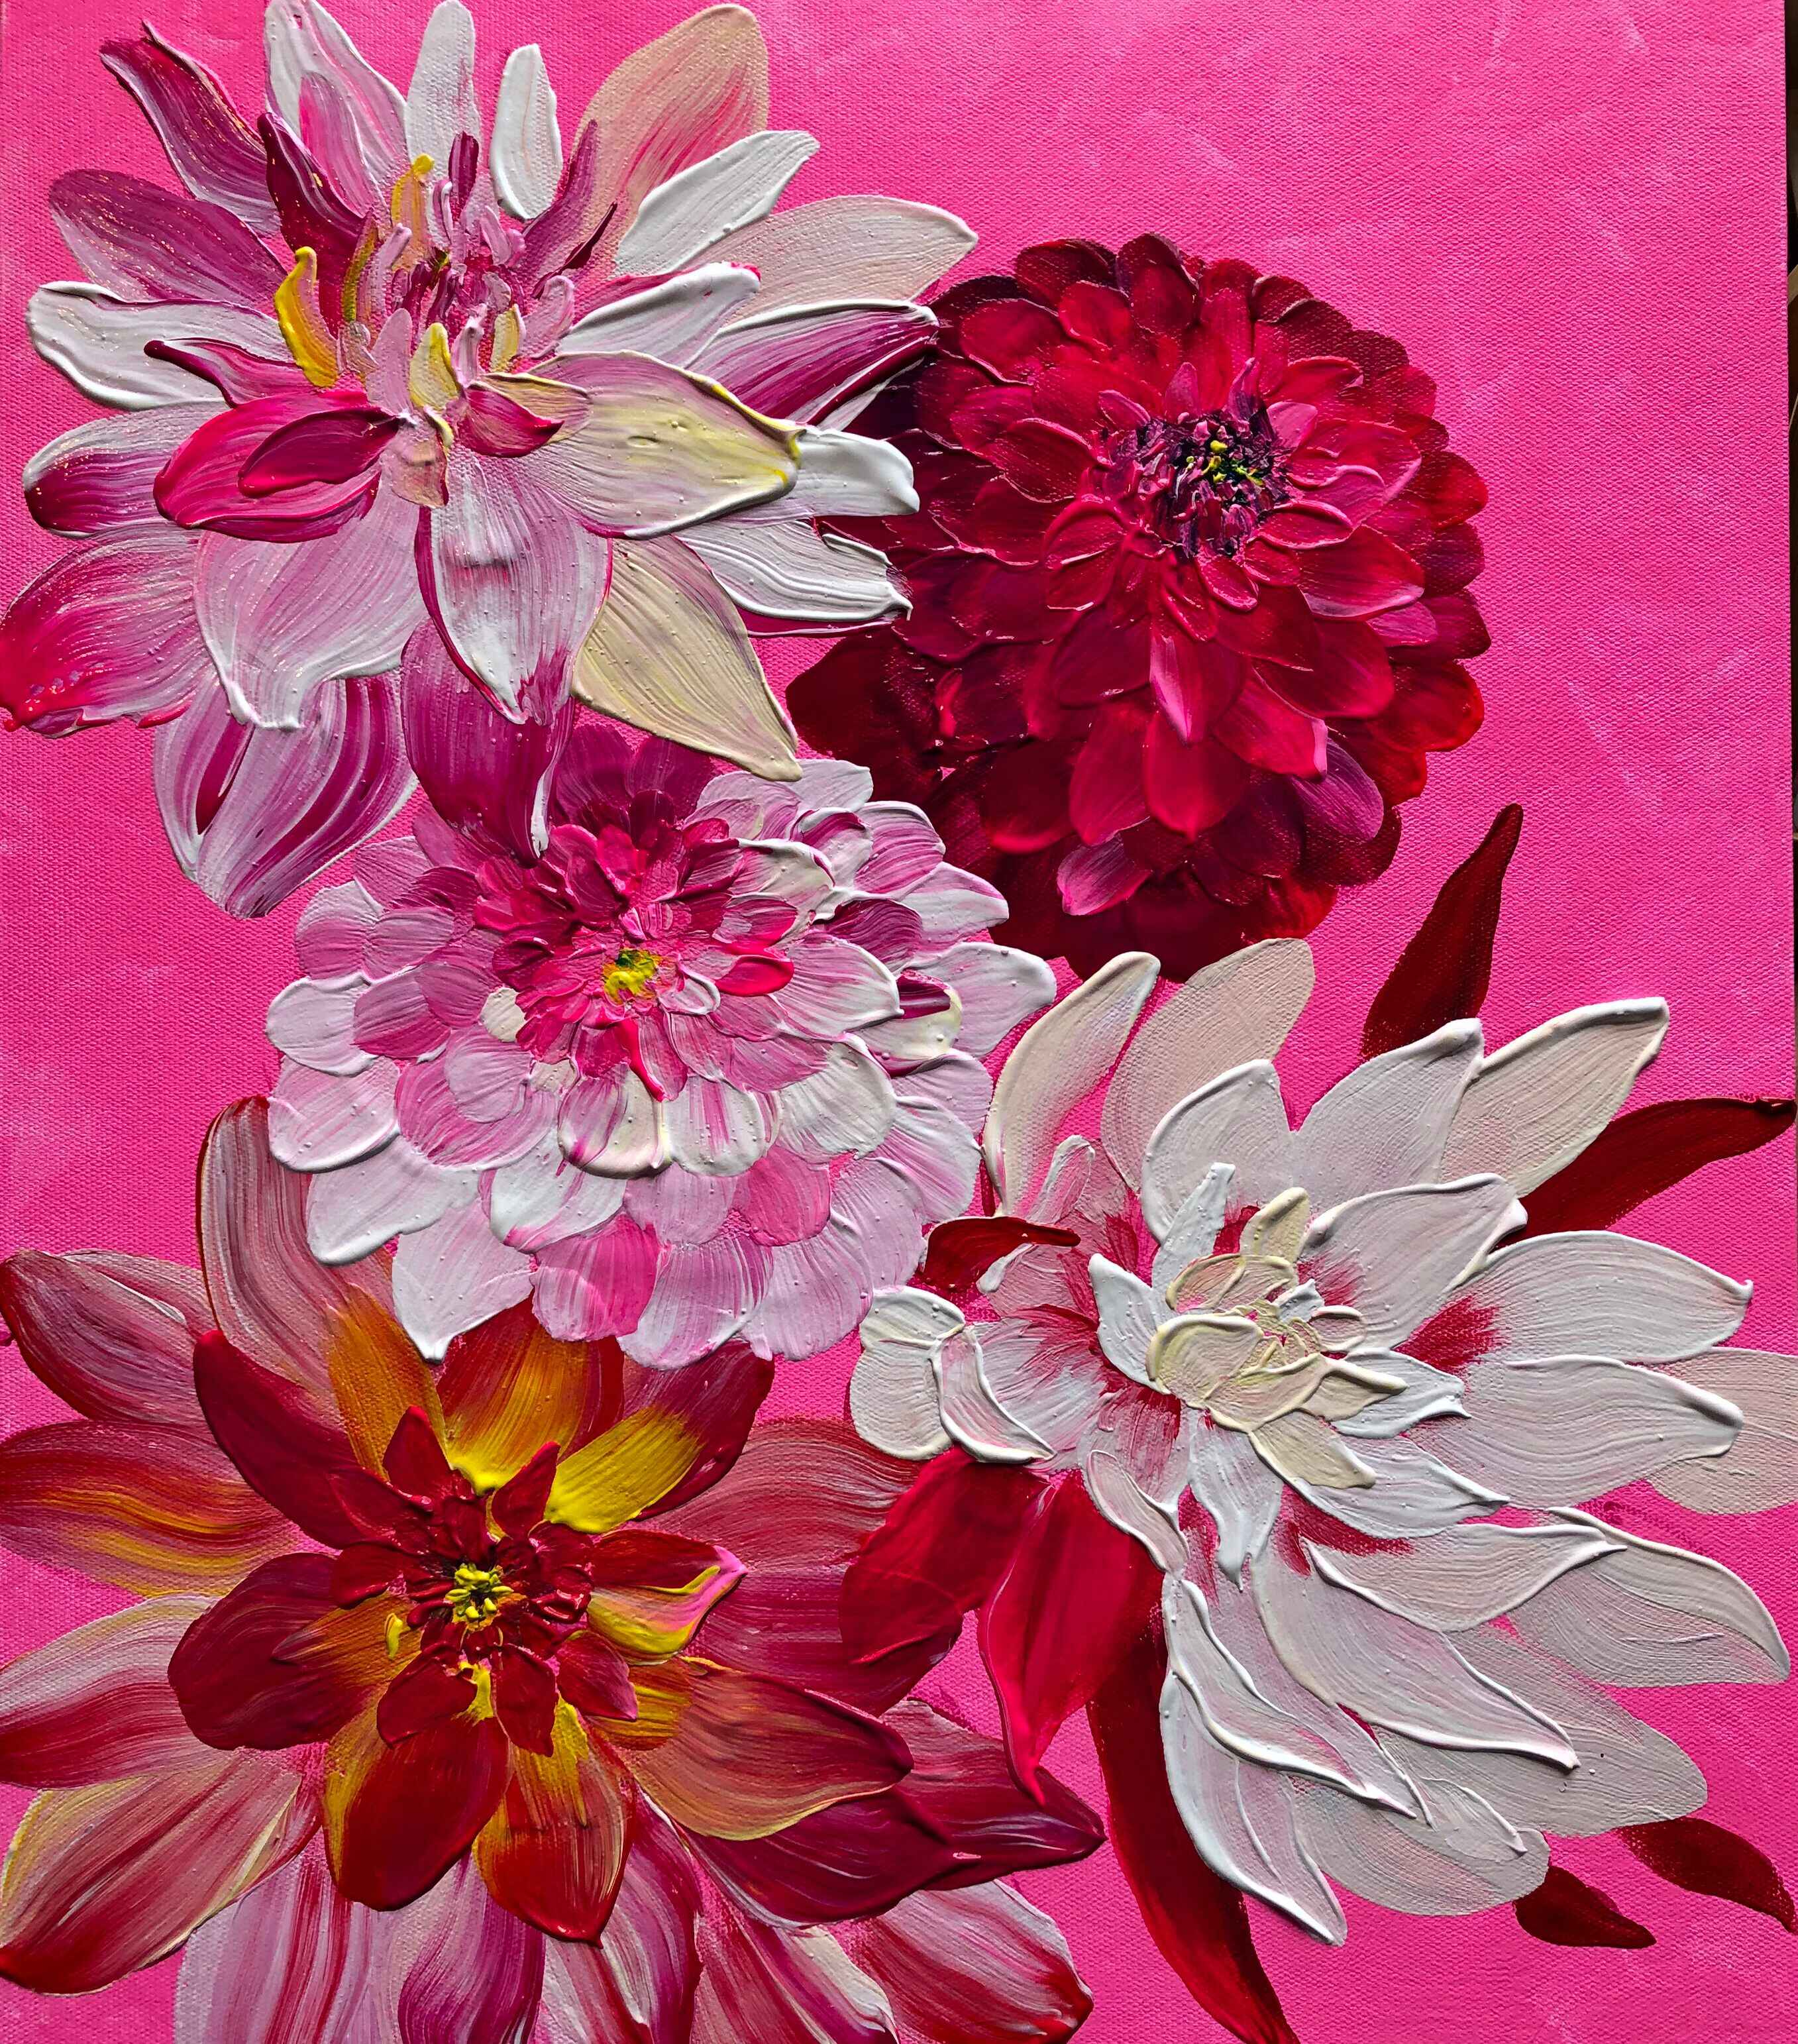
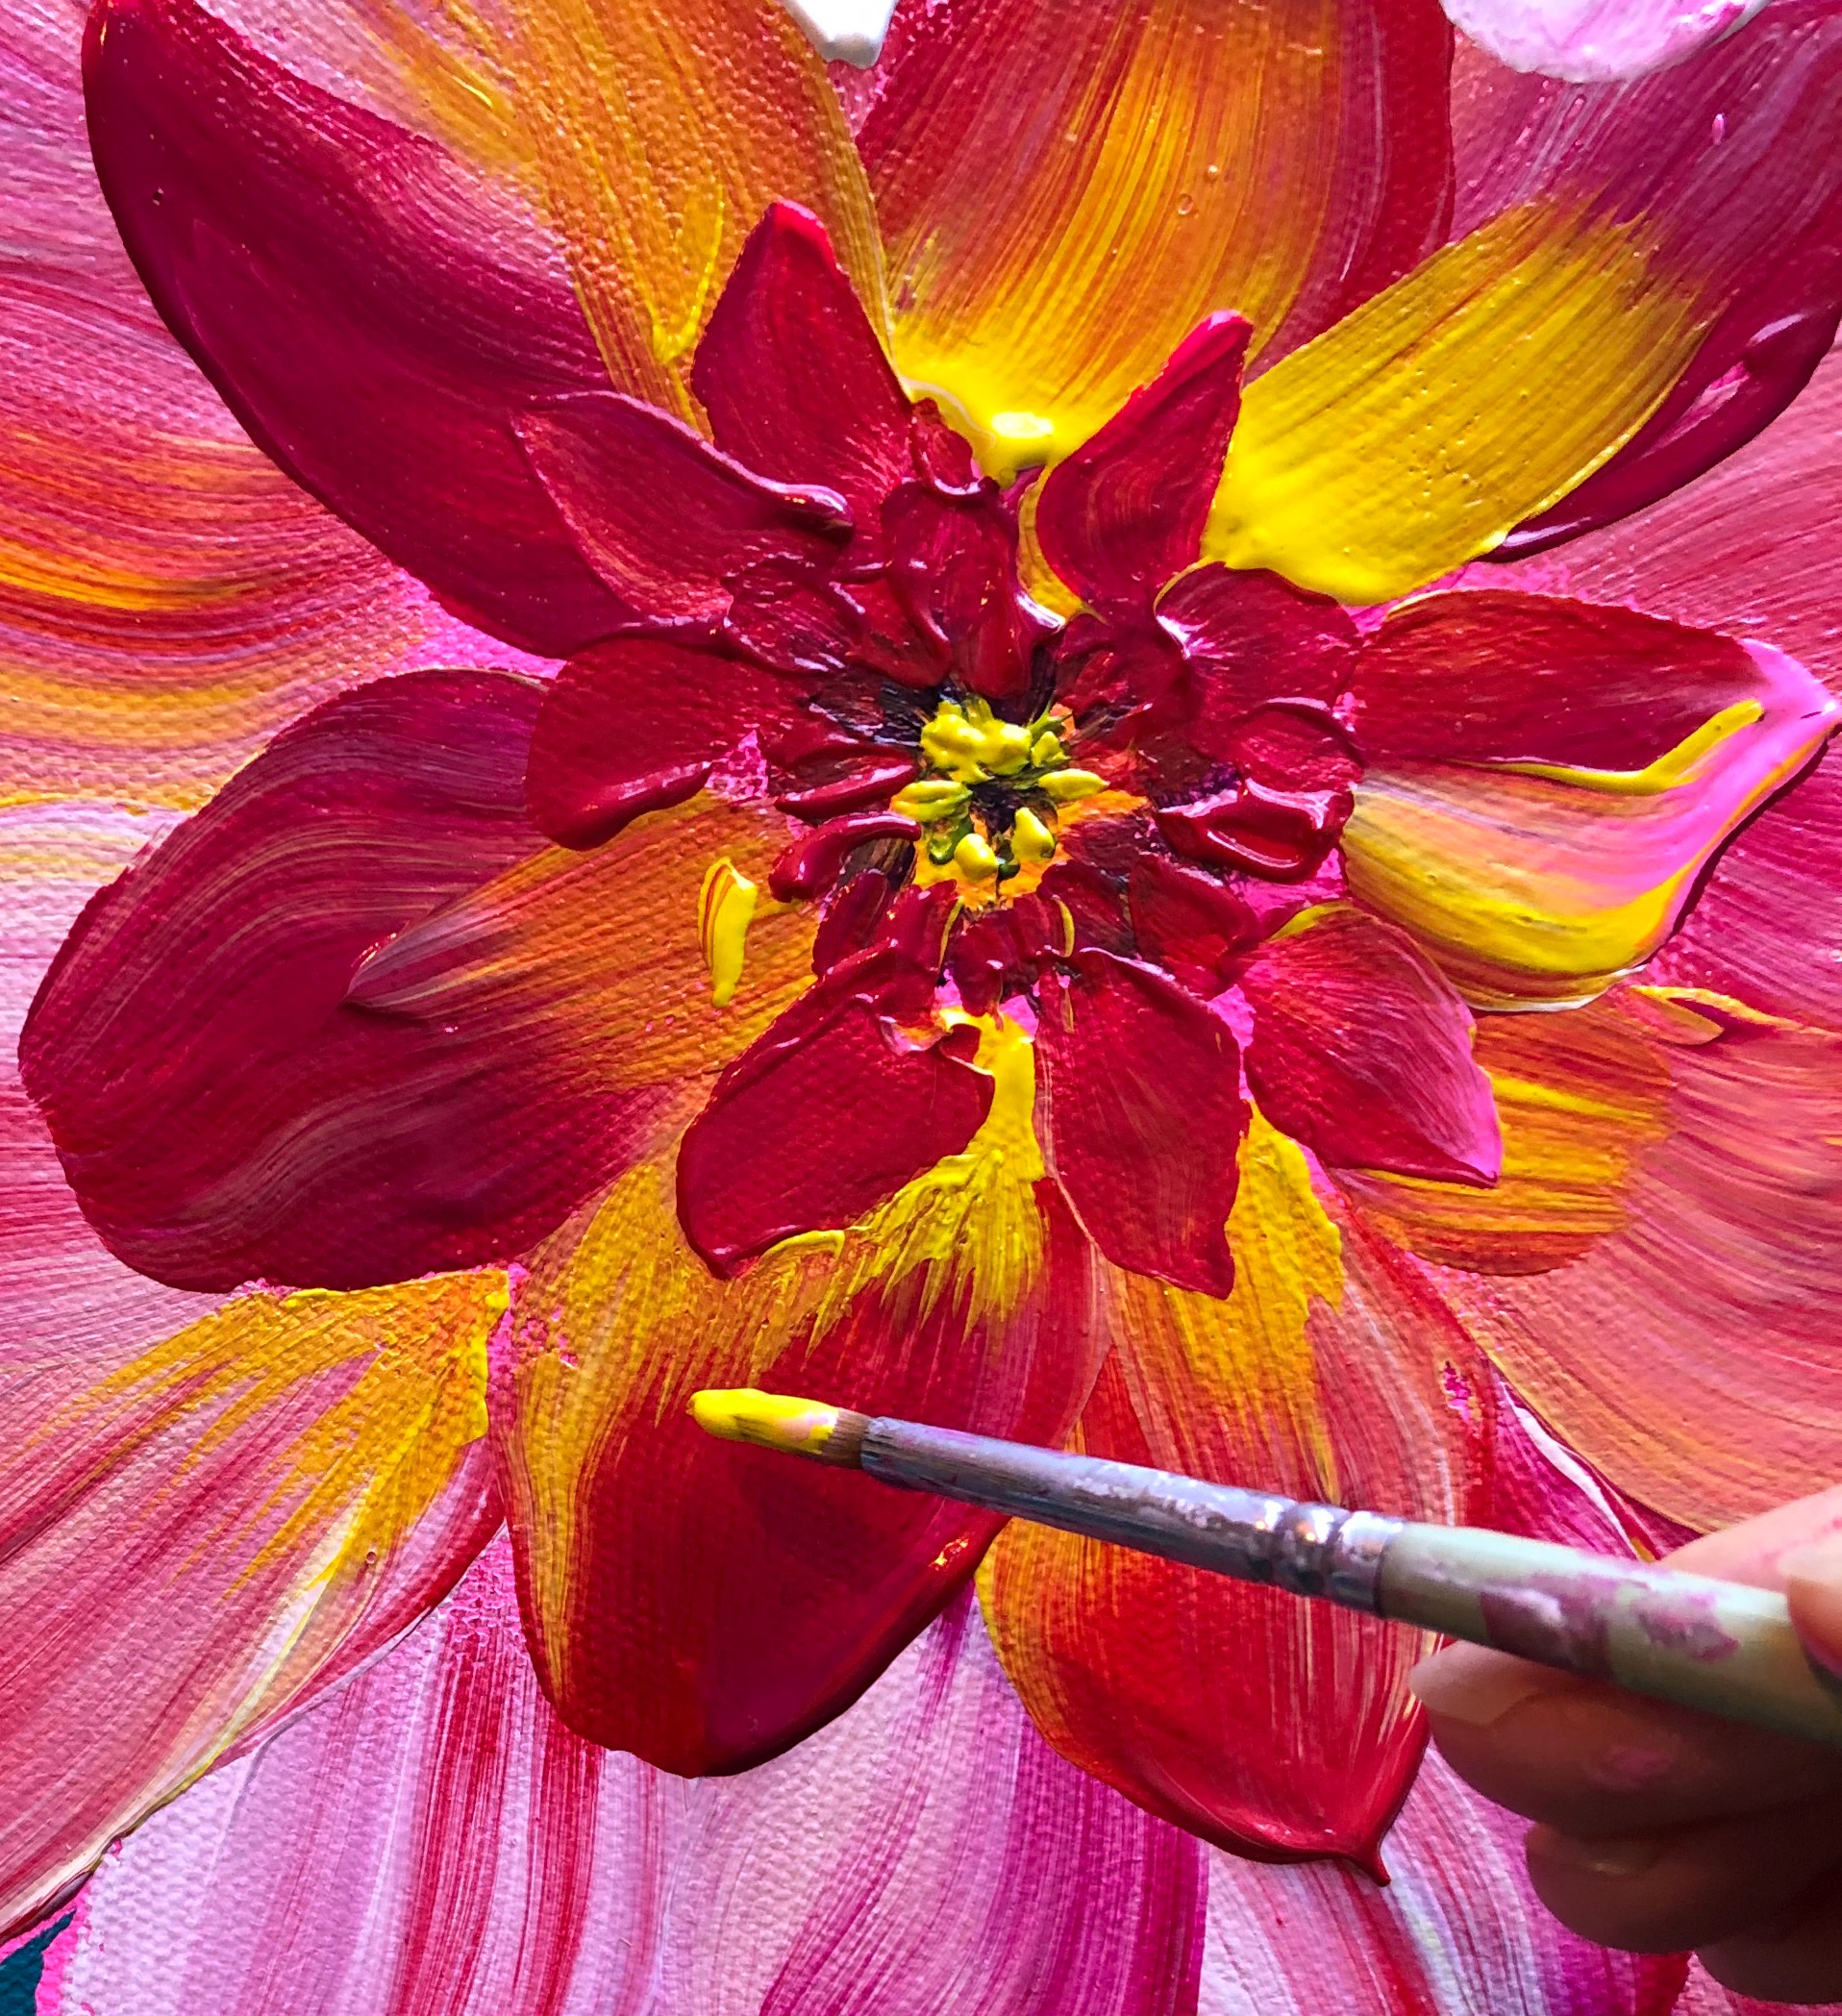 Using a fine round brush, check your reference photo for any areas that need highlighting. On this painting, I used Process Yellow and Titanium White to add highlights to some of the petals at the forefront. Dots of acrylic were also added to the centres of the dahlias to create more depth and focus.
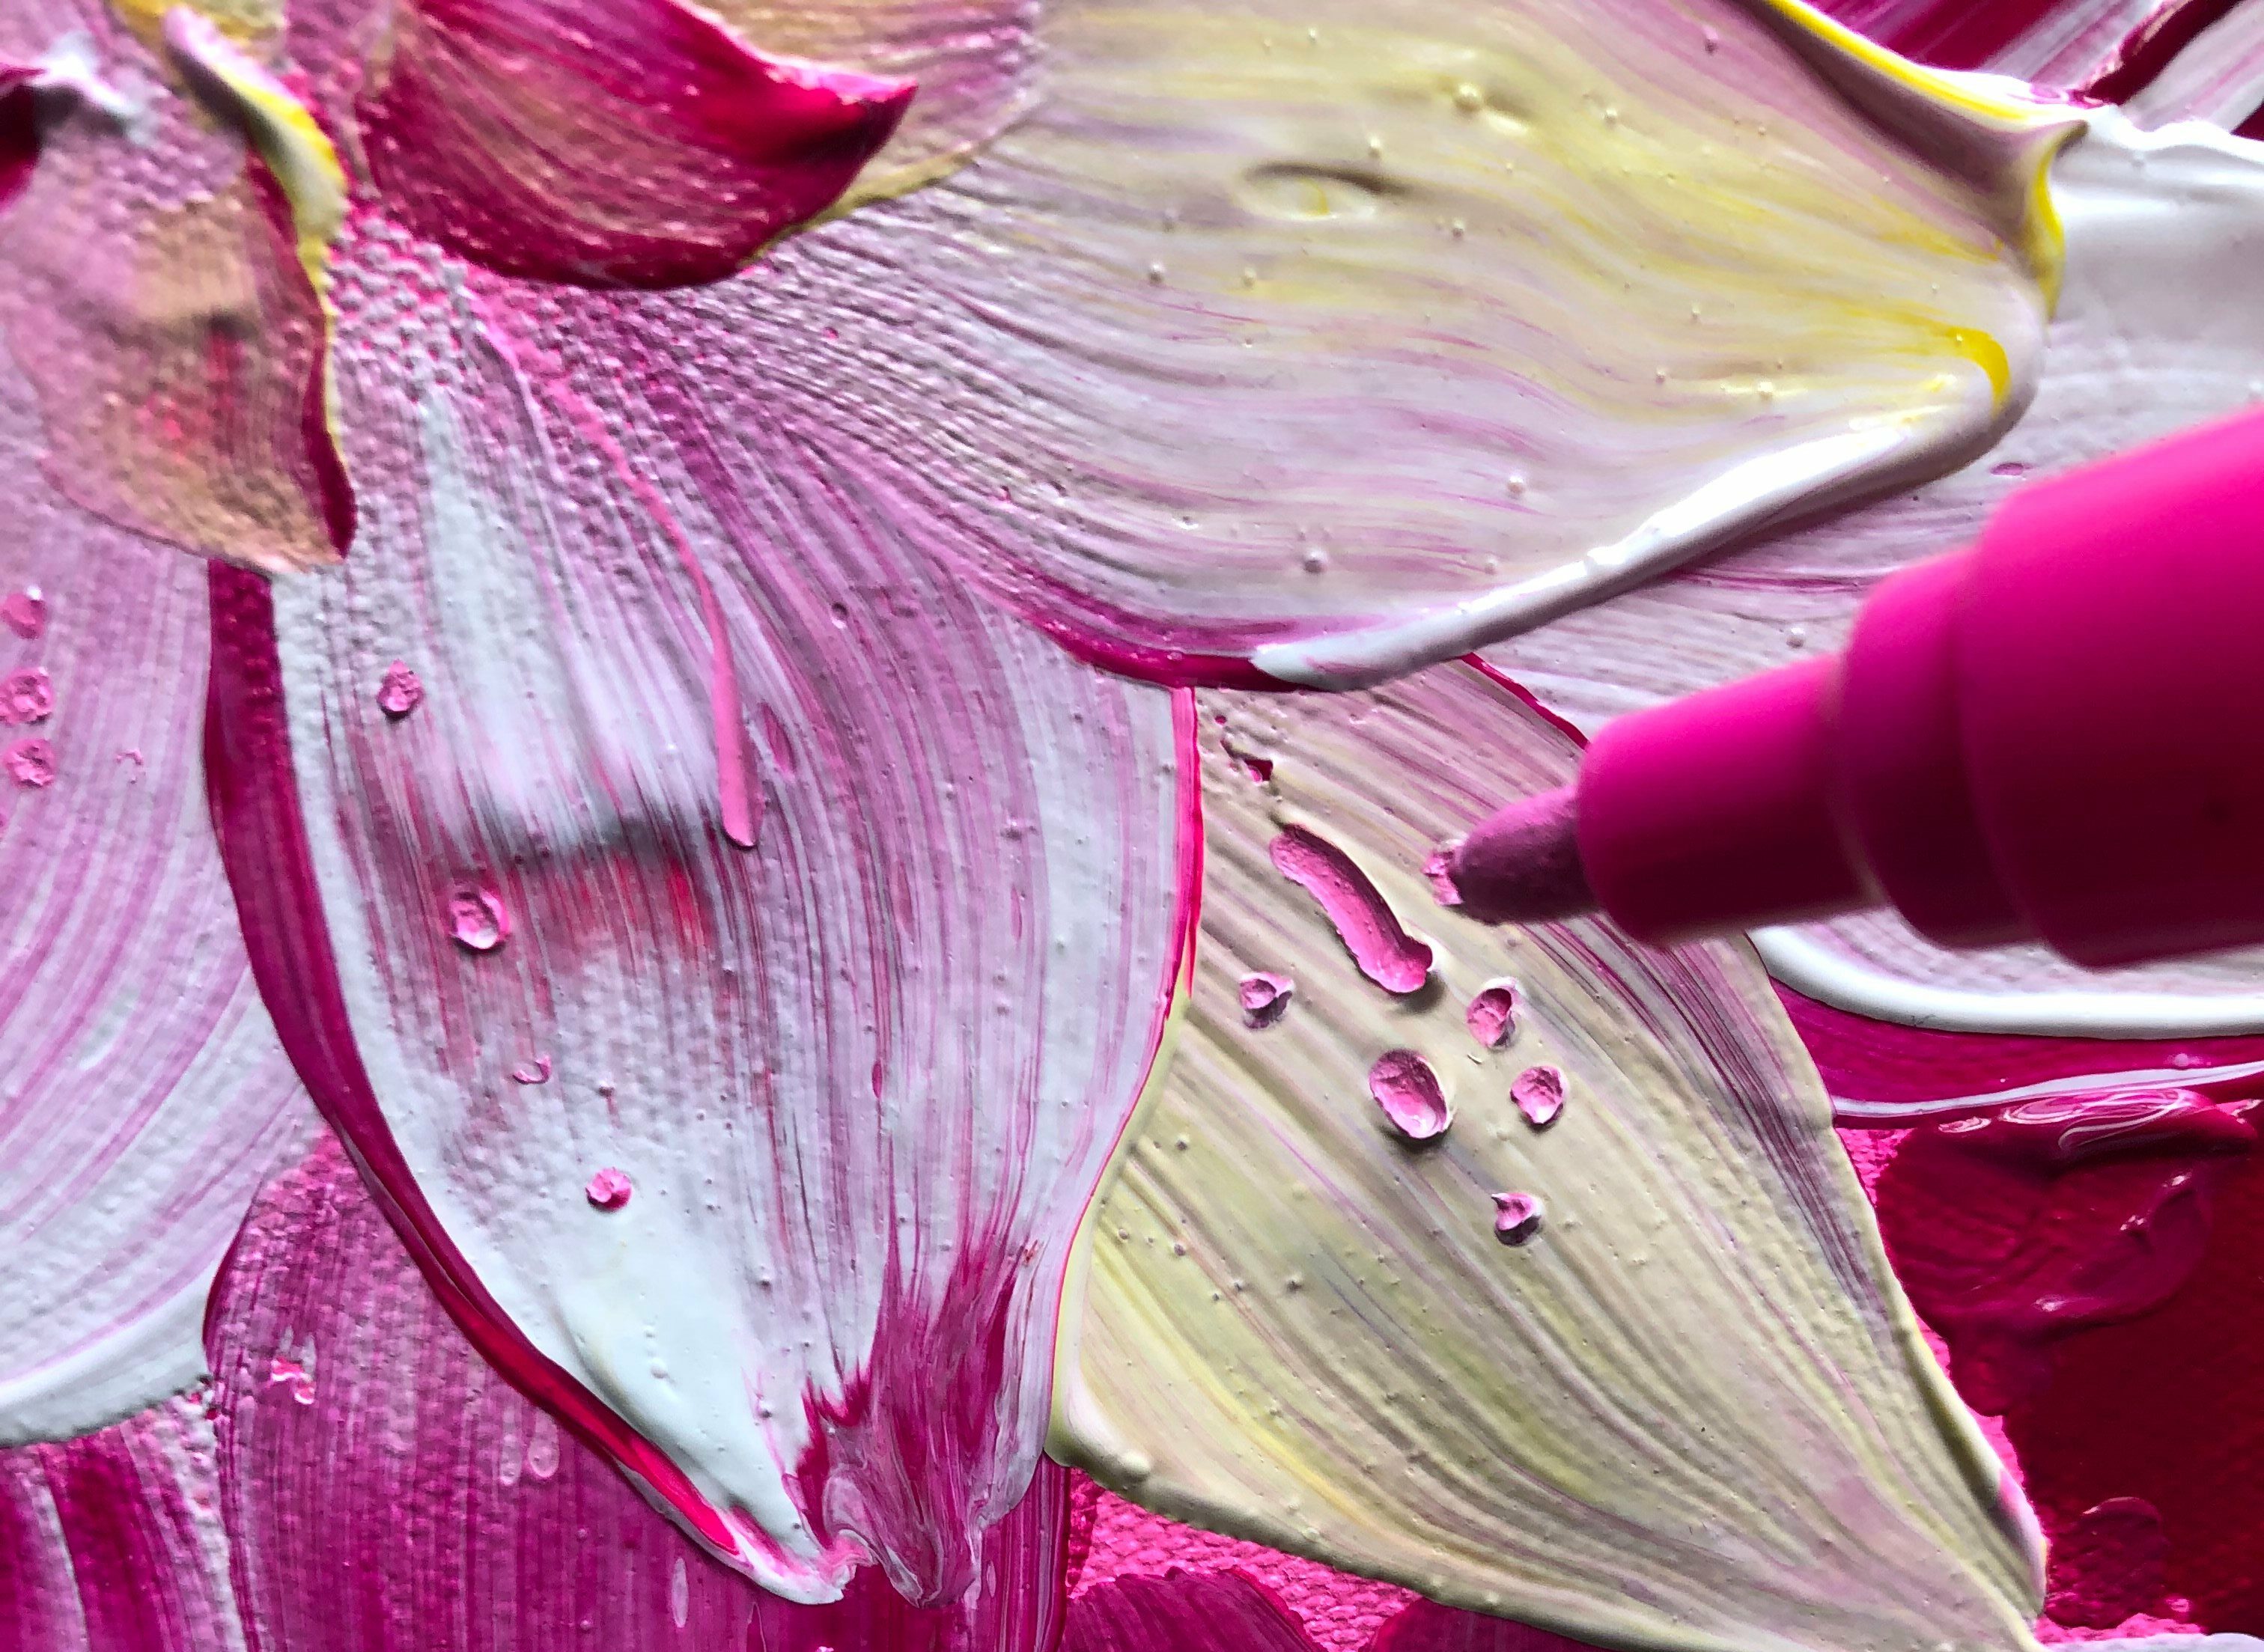 Once your painting is dry, additional finer details can also be added using acrylic paint pens. They come in a variety of nib widths and colours, making it easy to add those central pollen highlights. This final layer of minute detail creates more interest for the viewer, drawing the eye in and contrasting with the bold texture created in the larger petals.
 Katie Goodwin is predominantly a floral artist working mainly with acrylics. She provides workshops in the Nottinghamshire and Lincolnshire area and online tutorials. For examples of her work, visit: katiegoodwinart.com or follow “Katie Goodwin Artist” on social media