
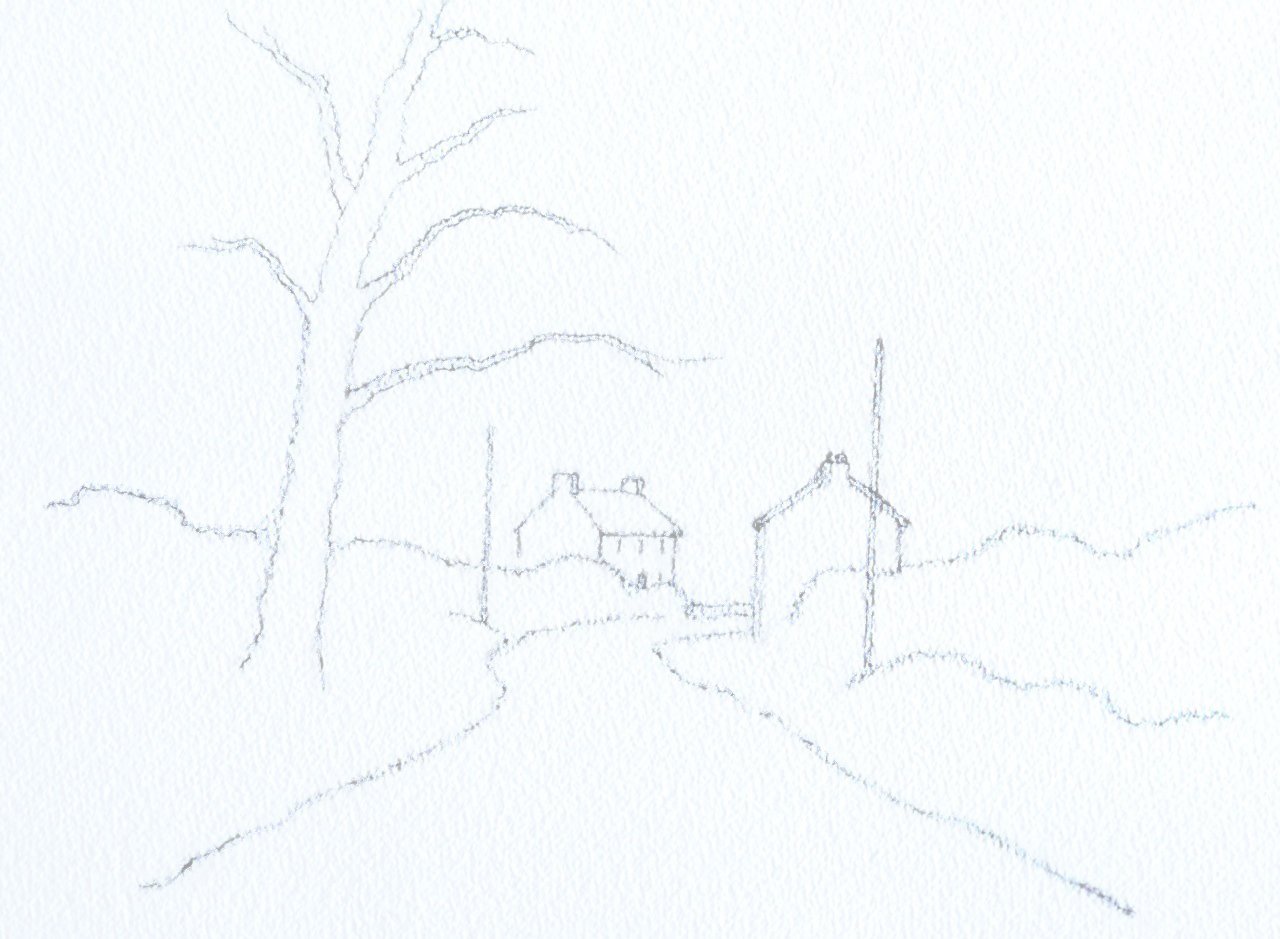
 Firstly draw the road, paying particular attention to the bend where it narrows as it disappears behind the house on the right.
Draw in the buildings, telegraph poles, top of the hedges and finally the big tree.
 Shake your masking fluid and let it settle for a few minutes. If using a masking fluid brush, dampen it before use, then each time you need more masking fluid, rinse your brush in water first, remove the excess water onto tissue, then dip your damp brush back into the masking fluid. You don’t have to be too fussy if the masking fluid blobs a bit here and there because snow does get very blobby when it settles and gathers on things. Don’t worry if you’re not sure exactly how much to mask, you can always touch up the snow with white gouache or white watercolour at the end. Remember to wash your brush thoroughly after using masking fluid. If brushes become clogged, use Zest-it masking fluid remover, or white spirit or turpentine, always washing your brush finally in hot water with soap or detergent afterwards.
 Mix the following colours:
Burnt Sienna mixed with Ultramarine. This will give you dark browns and greys, depending on how much of each you add to the mix. The top of the sky wants to be a fairly pale blue-grey, so you won’t need to add much Burnt Sienna to the Ultramarine. The cloud colour wants to be dark grey rather than dark brown. The background trees can be either, or both.
Cadmium Yellow with Cadmium Red or Vermilion will give lovely oranges, and this is for the lower sky, and underneath some of the clouds subtly.
When you have tested these for strength on a bit of spare wet watercolour paper you are ready for the big picture! Tip: Just use a small brush for your testing so you don’t use too much of your mixed paint.
Wet your sky area with a big clean brush. Starting at the top, brush in your blue-grey part of the way down your sky and while this is still wet, add your dark grey clouds so they disperse a little. N.B. If your cloud and tree mixes are too watery they will spread too much, so make sure they are reasonably strong. Lower down, add your orange clouds and then add little bits of orange to the underside of the clouds if you wish.
At the bottom of the sky, drop in your background tree colours, and if you want some variation in strength, add a little water from your brush here and there to make some tree areas paler.
You will need to do all this quite quickly before any of it dries in order to achieve the soft, diffused effect all over.
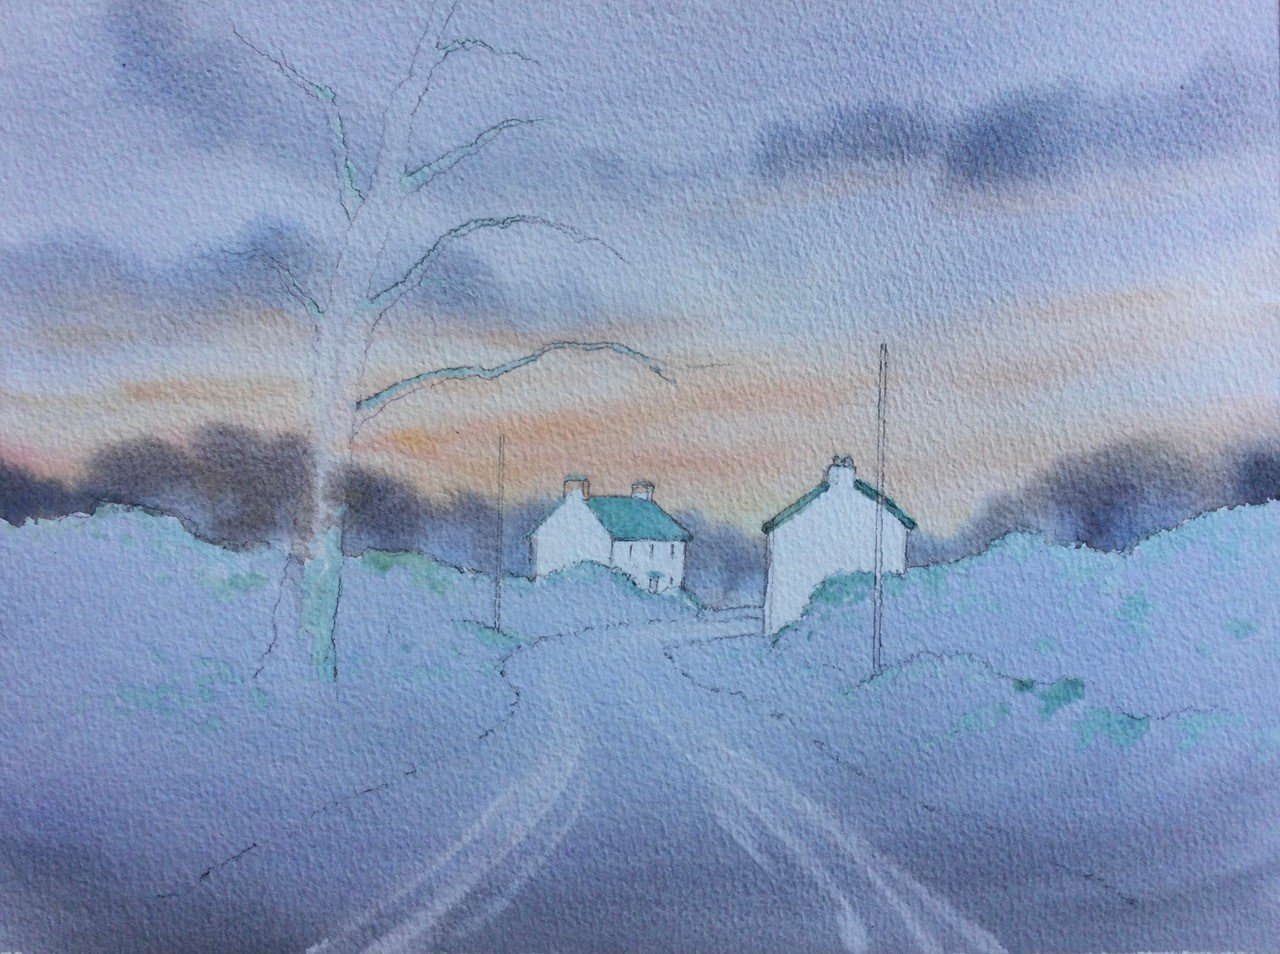 Once stage 3 has dried, mix a blue-grey as before but slightly bluer than your top sky. Wet the paper from the hedges down, avoiding the buildings, and while wet brush in the blue-grey for the snow, adding a little of the dark grey cloud colour right at the bottom, across from one side to the other. While this is wet, or even when damp, use a dampened flat brush to lift out the tracks in the road.
 When Stage 4 has dried, add darker grey to the tracks of the road and bits of the hedges. After this has dried you can go a bit darker still and use an almost dry brush to get a hit-and-miss or rough effect to create depth in the hedges. Practise dragging a partially loaded damp brush over a spare bit of watercolour paper, and also touch the whole body of the damp brush (not the tip) onto the paper to achieve a broken effect.
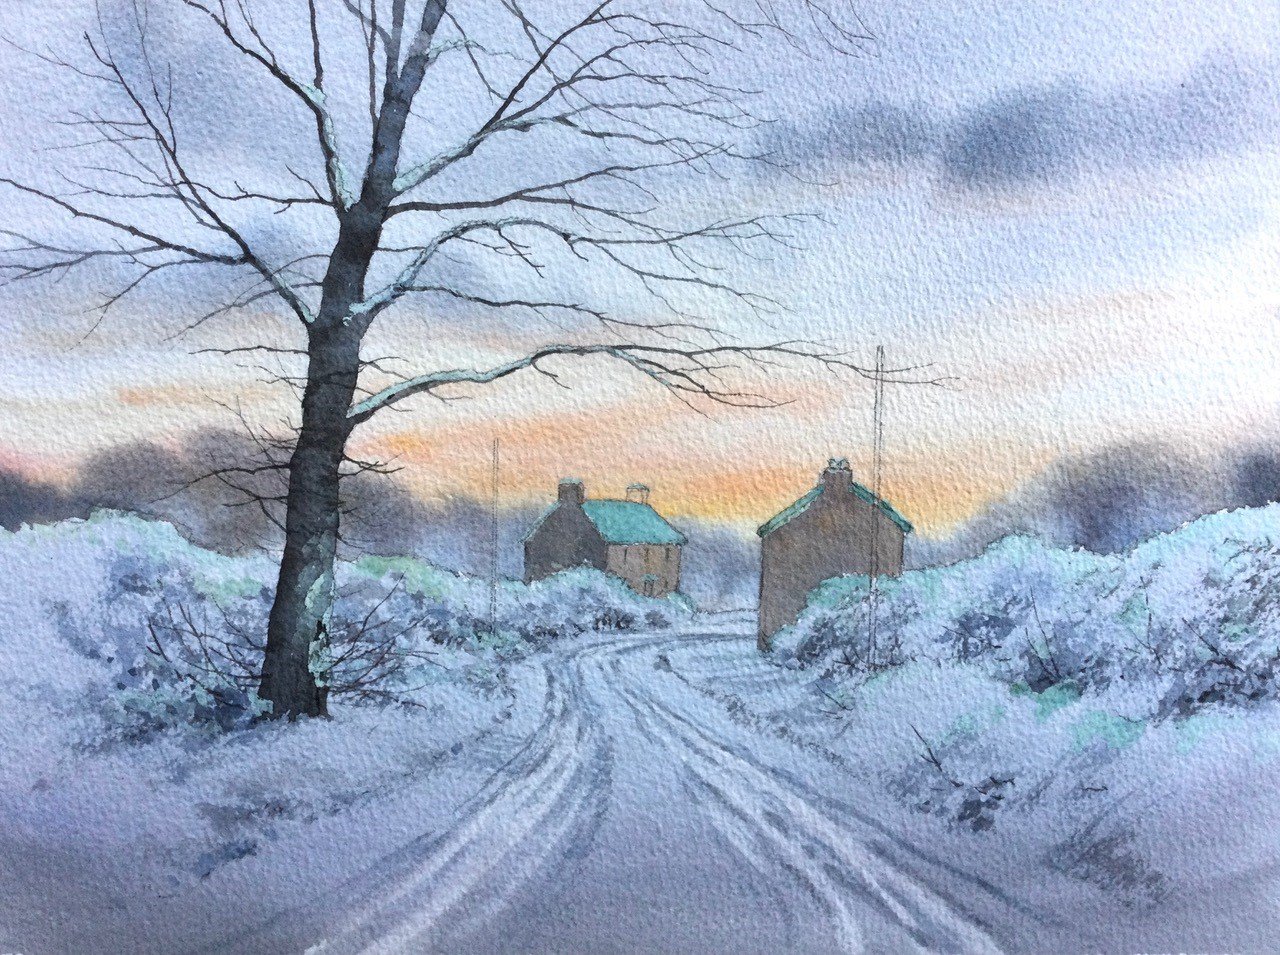
Mix a little Ultramarine with Burnt Sienna to achieve a dark brown and paint the buildings, making the one on the left a little paler than the building on the right, and when the left building has dried, darken the gable end by painting grey over the first layer of dark brown. Use the same dark grey to paint the windows.
Mix plenty of Ultramarine with plenty of Burnt Sienna to achieve a very dark brown or black and paint the tree, dropping in here and there some less dark grey for variation. Use a very thin brush for the fine branches.
 Carefully rub off the masking fluid either with your fingers, a clean eraser or Maskaway Block. Use a damp, almost dry brush to drag outwards or inwards for the very fine twigs. Cover any excess white bits with pale blue-grey if there are too many large areas of white paper. Some of the masked branches may need greying here and there if they are too stark or white. Paint the blue-grey shadows on the snow on the roof gable ends and possibly on the chimneys. Darken bits of stone on the houses with dark grey. Carefully paint the telegraph poles, and if you’re wary of painting the wire, just use a sharp soft pencil. Any areas that need more snow you can paint with white gouache or white watercolour. You can add it to your greys if you need to darken the snow anywhere.
Sit back with a nice drink, and admire.
