
The main weapons in our art “opposite” arsenal are light and dark; cold and warm; and, of course, rough and smooth. So we can enhance either one of each two by using them together. These can then be subdivided into colour hues (the warmer and cooler versions of every colour) colour circle, tones, and finally texture. How are these used? If I want something to look lighter I may place a darker colour around or near it. If I need something to look brighter I may use the same or use the complementary colour next it e.g. Constable used to include a red figure in his paintings a lot, why? Because red is the opposite to green in the colour circle and will enhance the greens. If I wish to make a colour look fluorescent, e.g. a figure wearing a bright green jacket, I may place both darker and opposite colours, or colours with purple in, around it. If I want a bright sunset I do not have to keep adding more reds, oranges, yellows I may simply add more cool colours ( blues ) around the composition to enhance the warm colours. This starts to link into texture when you use broken colour methods such as Impressionism and Pointillism. The use of smaller dots of marks together to fool the eyes into mixing the colour e.g. red and yellow dots will give the illusion of orange. How does this also work directly with a textured surface? If my lower surface on a painting is one colour and I then drag a brush, and another colour, across the upper tips of raised texture we will have the same effect PLUS being able to gain a sparkle if the tips are a lighter colour. As if actually “catching the light”.

We are often using texture and hardly realising it! For instance with pastels on textured paper, watercolour using dry brush on rough paper and impasto oils or acrylics. This brings me directly to the very many textures and effects that can be created for many different subjects. There are lots of commercial textural materials for sale but one of the most versatile and useful is simple P.V.A. white glue!


A close up of using acrylics with a sponge roller
There are many wonderful products on the market, including silicone oil to make acrylics cells! I mention a few above.
Yet there are so many ways to make our own textures with far greater freedom and fun! I mention P.V.A. glue as you can mix almost anything with it, tissue paper, sand, rice, grain, broken polystyrene, spaghetti, wool, powder filler, shavings, even dried plants and straw! Also by adding some to ordinary household filler you can make a lovely textural paste. Adding the glue gives it plasticity and adhesion so it does not rack off a canvas or board. M.D.F. board is possibly the safest base for it, though. Let me share the process of a few paintings made in this way, some then coated with a resin making them look like ceramics and even able to withstand use in kitchens etc.
 We will be using these inexpensive items to create a wonderful textured winter beach scene, with this photograph of a winter scene on a Lincolnshire Beach.

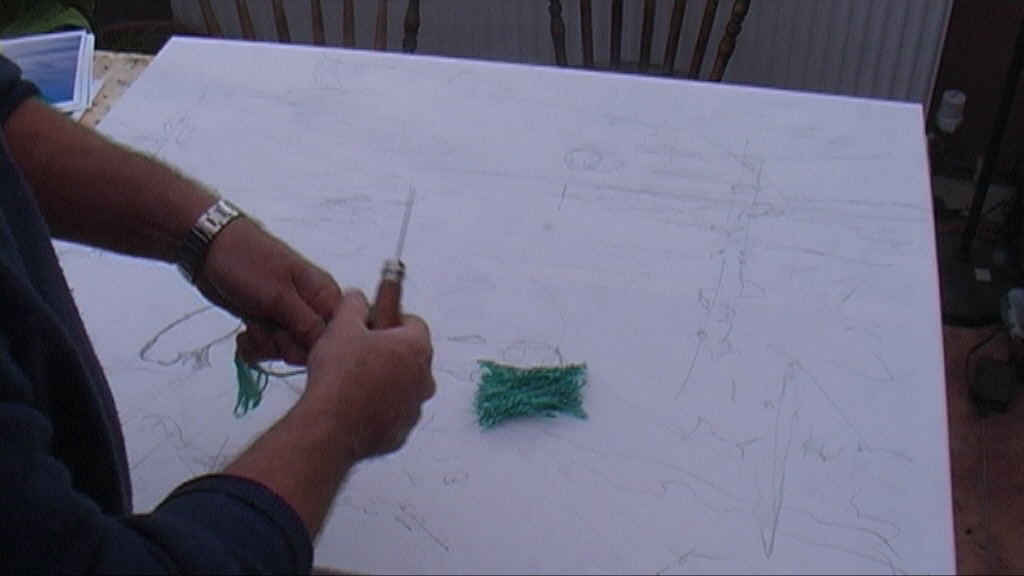
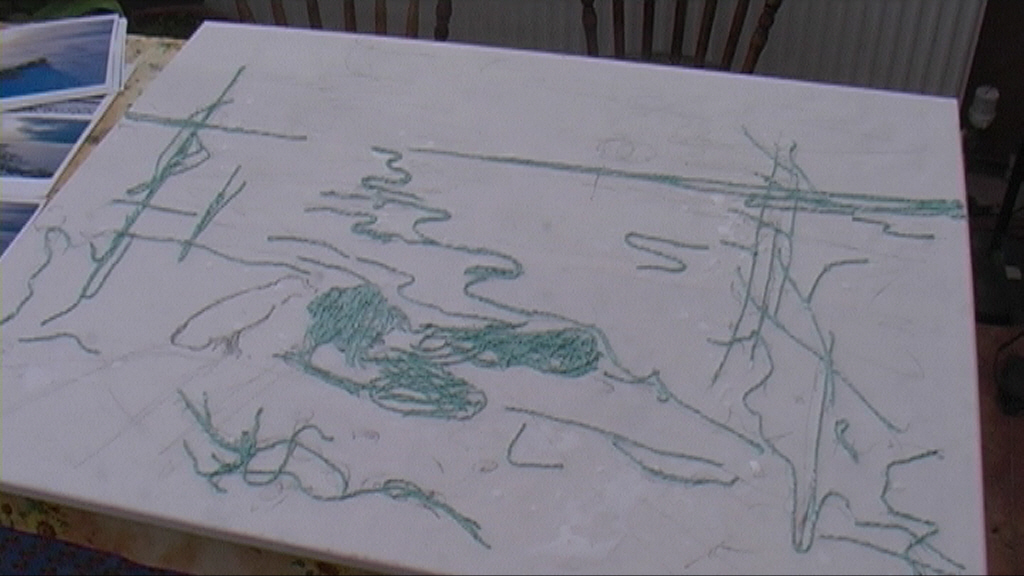
I drew out the basic composition on a white stretched canvas. Added cut wool to watered down P.V.A. glue in a plastic bowl and lay these lengths as if drawing the shapes and outlines.
 I used the same bowl to mix fine house-hold filler with water and a little more P.V.A. glue to keep adhesion and give the mixture more plasticity. This is less likely to crack, especially on a canvas, and sticks better.
 Rice, peas and grain were added to the glue mixture in the bowl, this was then applied to the canvas to imitate pebbles, sand and weed textures. To speed up the drying process of your texture layer, you could use a hair dryer.
 Once dry, I coated it, entirely, with black emulsion. Make sure that you brush the black right into all crevices, in all directions, or you will have an effect of white snow, especially if air pockets or blisters remain.
 After the black layer, it’s time to paint the undercoat, medium tones and colours. Starting with the darkest tones first, build up so the creams, pinks and whites are highlighting only the highest surfaces your painting.
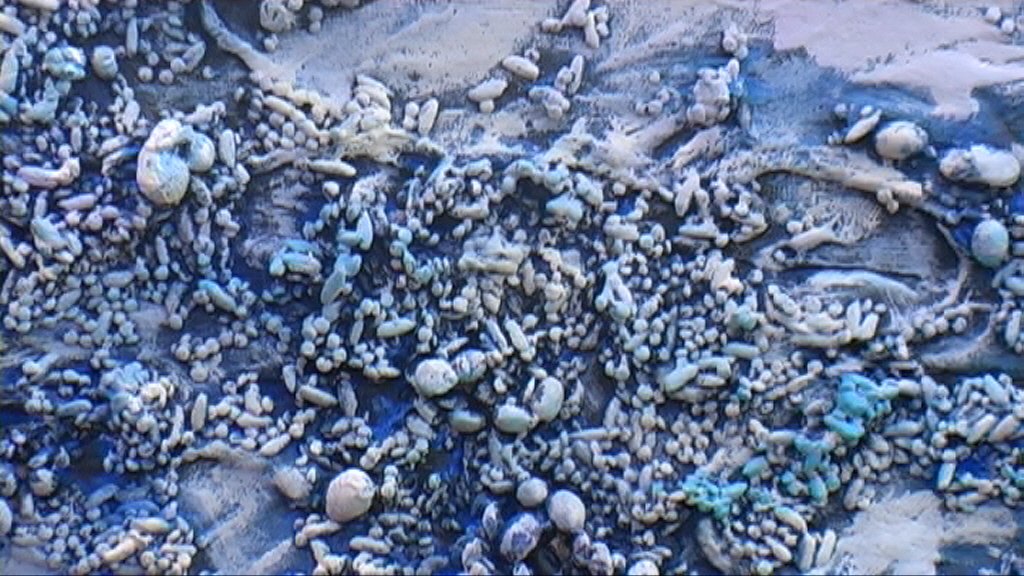
Click the images to see the textured artwork up close.

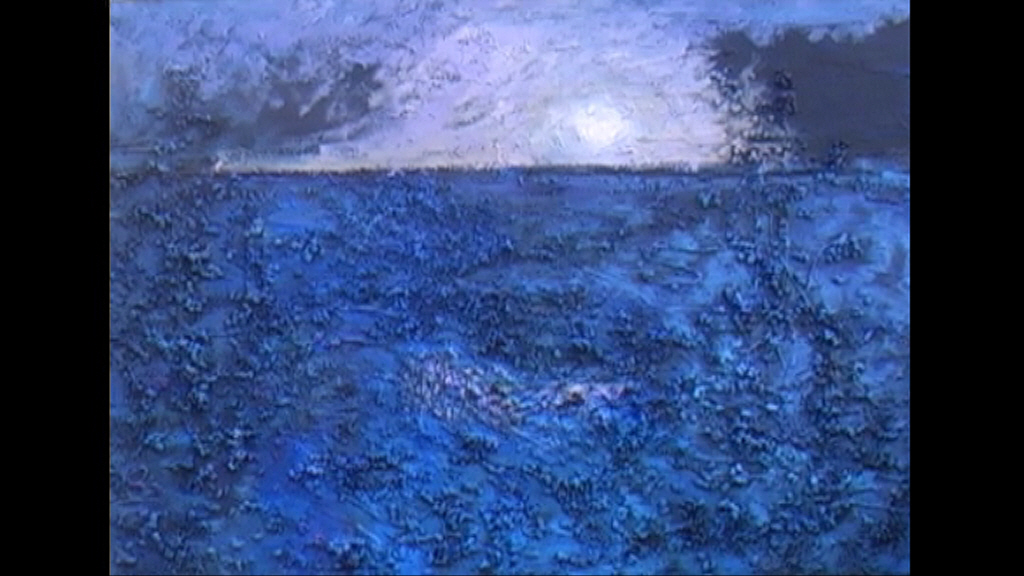
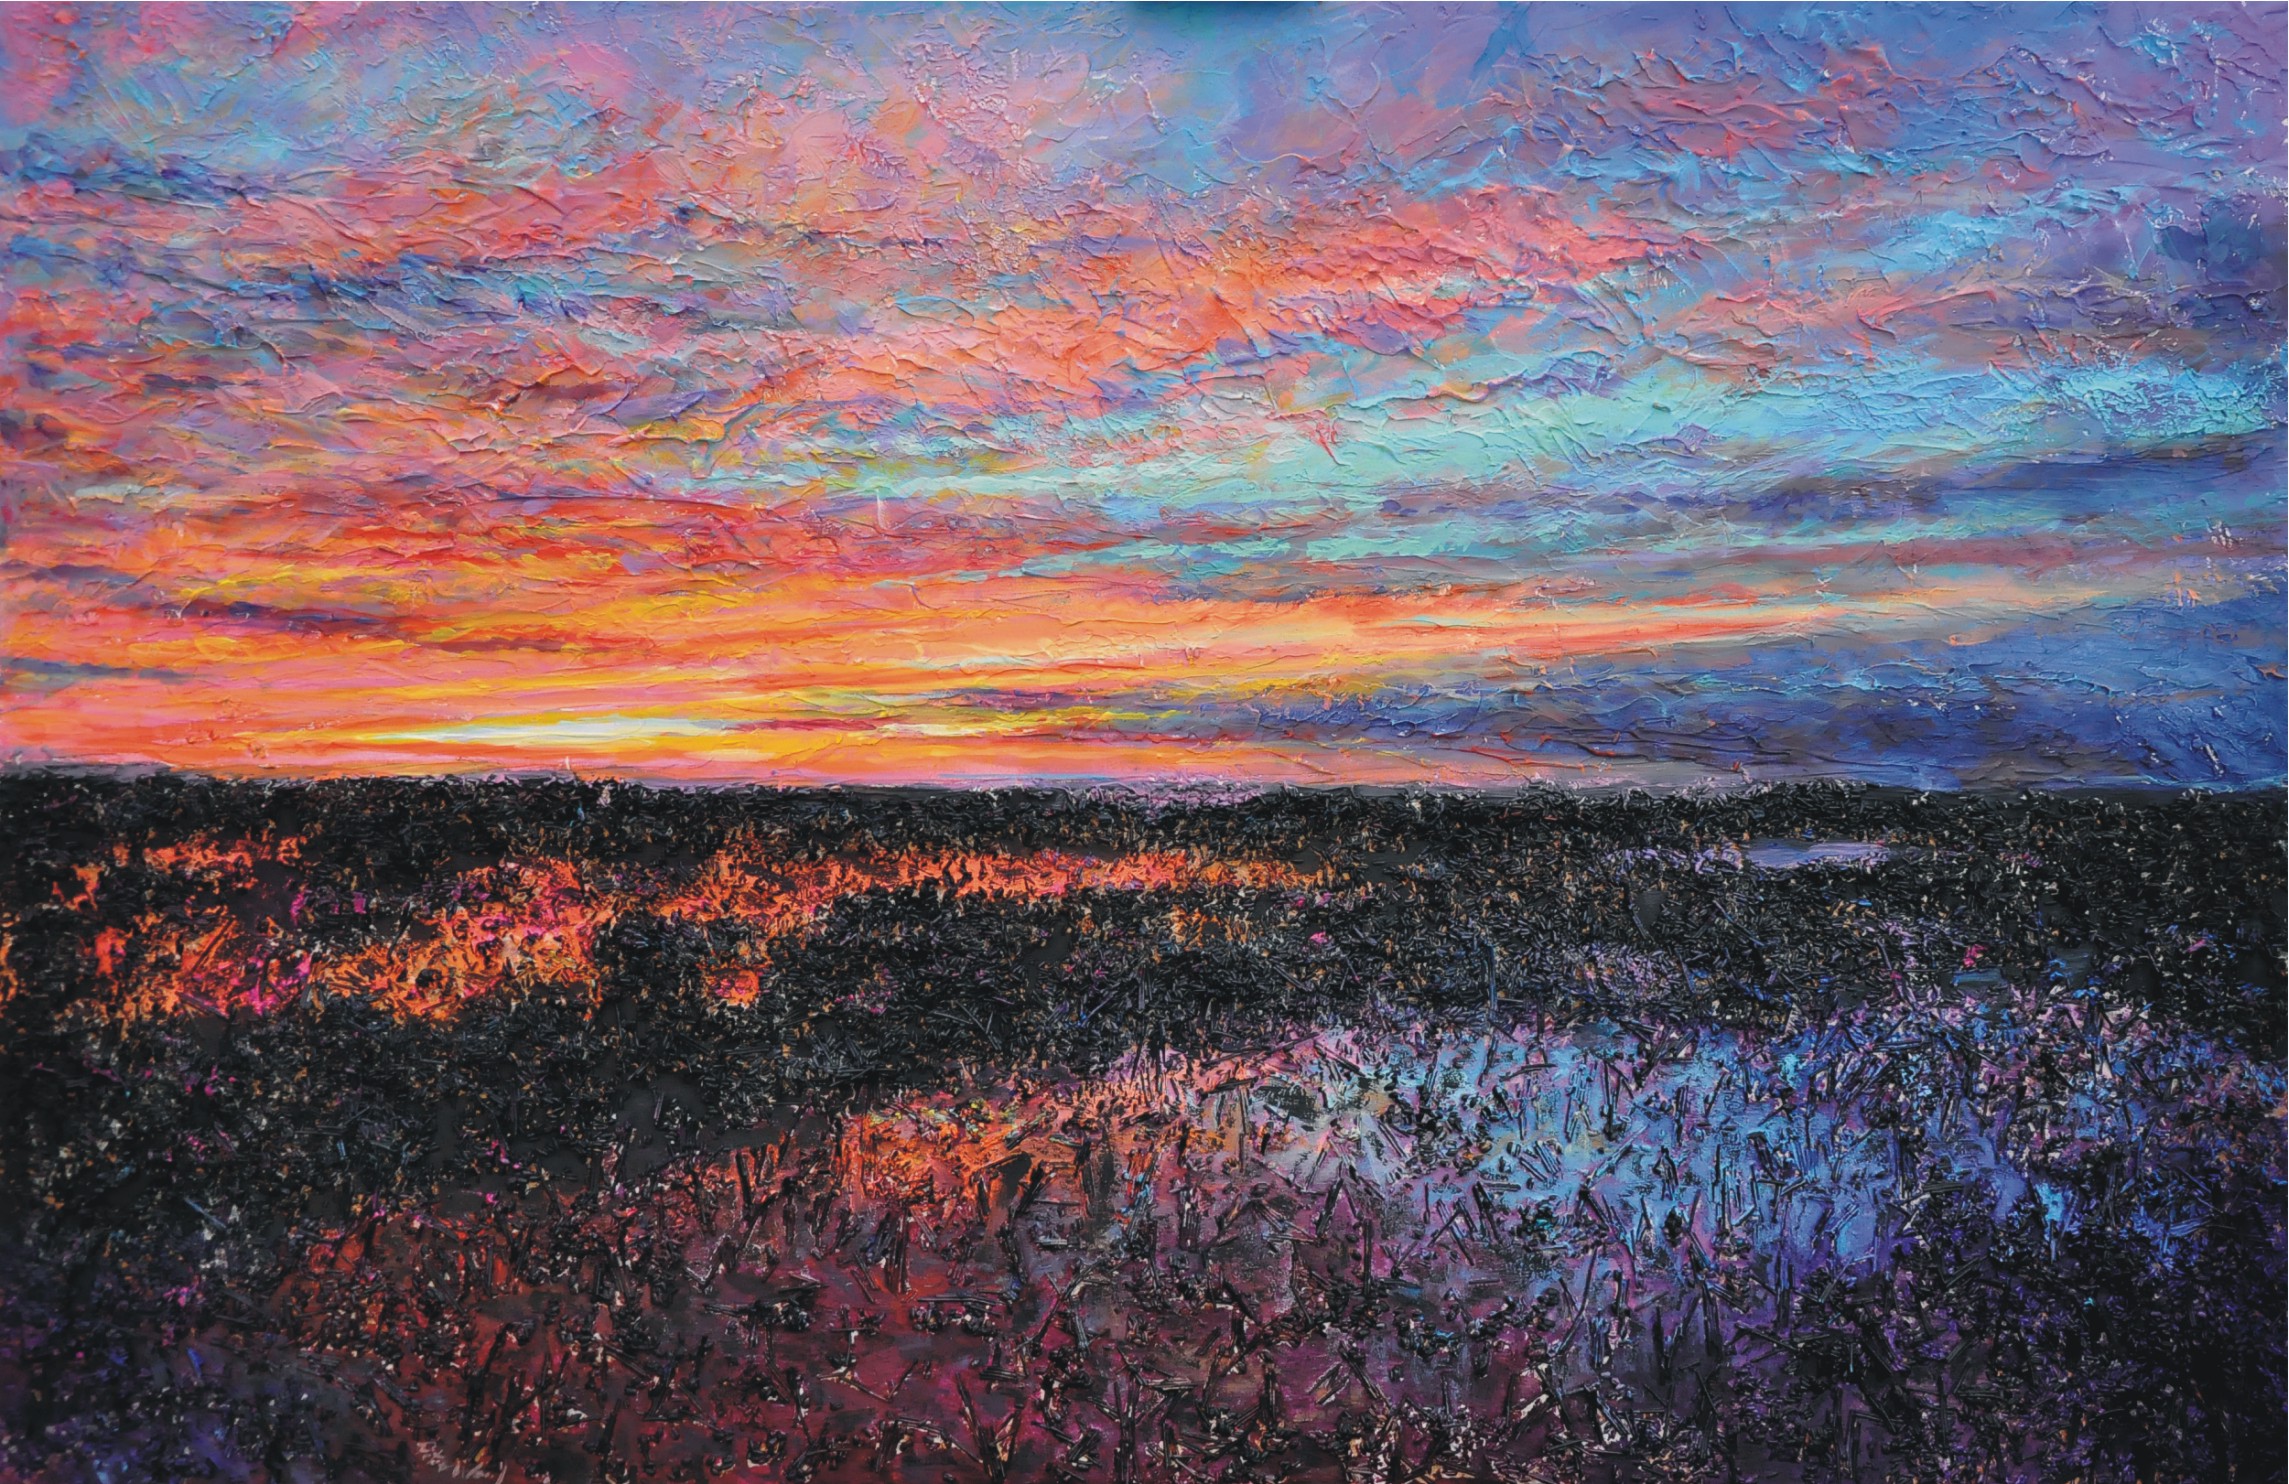 With the marsh sunset I have used spaghetti for the reeds. Plus rice and filler with P.V.A. glue. In this case working directly onto un-primed M.D.F. smooth board. Drawing out the shapes firstly, then using painting knives to layer the clouds with filler and P.V.A. glue. Finally mixing broken spaghetti pieces with the glue, into a bowl, and adding them by hand. The painting being done in a similar way as previously. Black emulsion firstly, then mid tones down into the water, but then black again over the reed areas as they are dark this time and highest, being opposite to the previous! Finally, just “scumbling” a hint of highlights of the setting sun over the surface tips of reeds.
 Using either oils or heavy body acrylics, use a painting knife to paint these objects or build up heavy bodies using a light touch to keep the strokes clean, pure and with lots of paint!
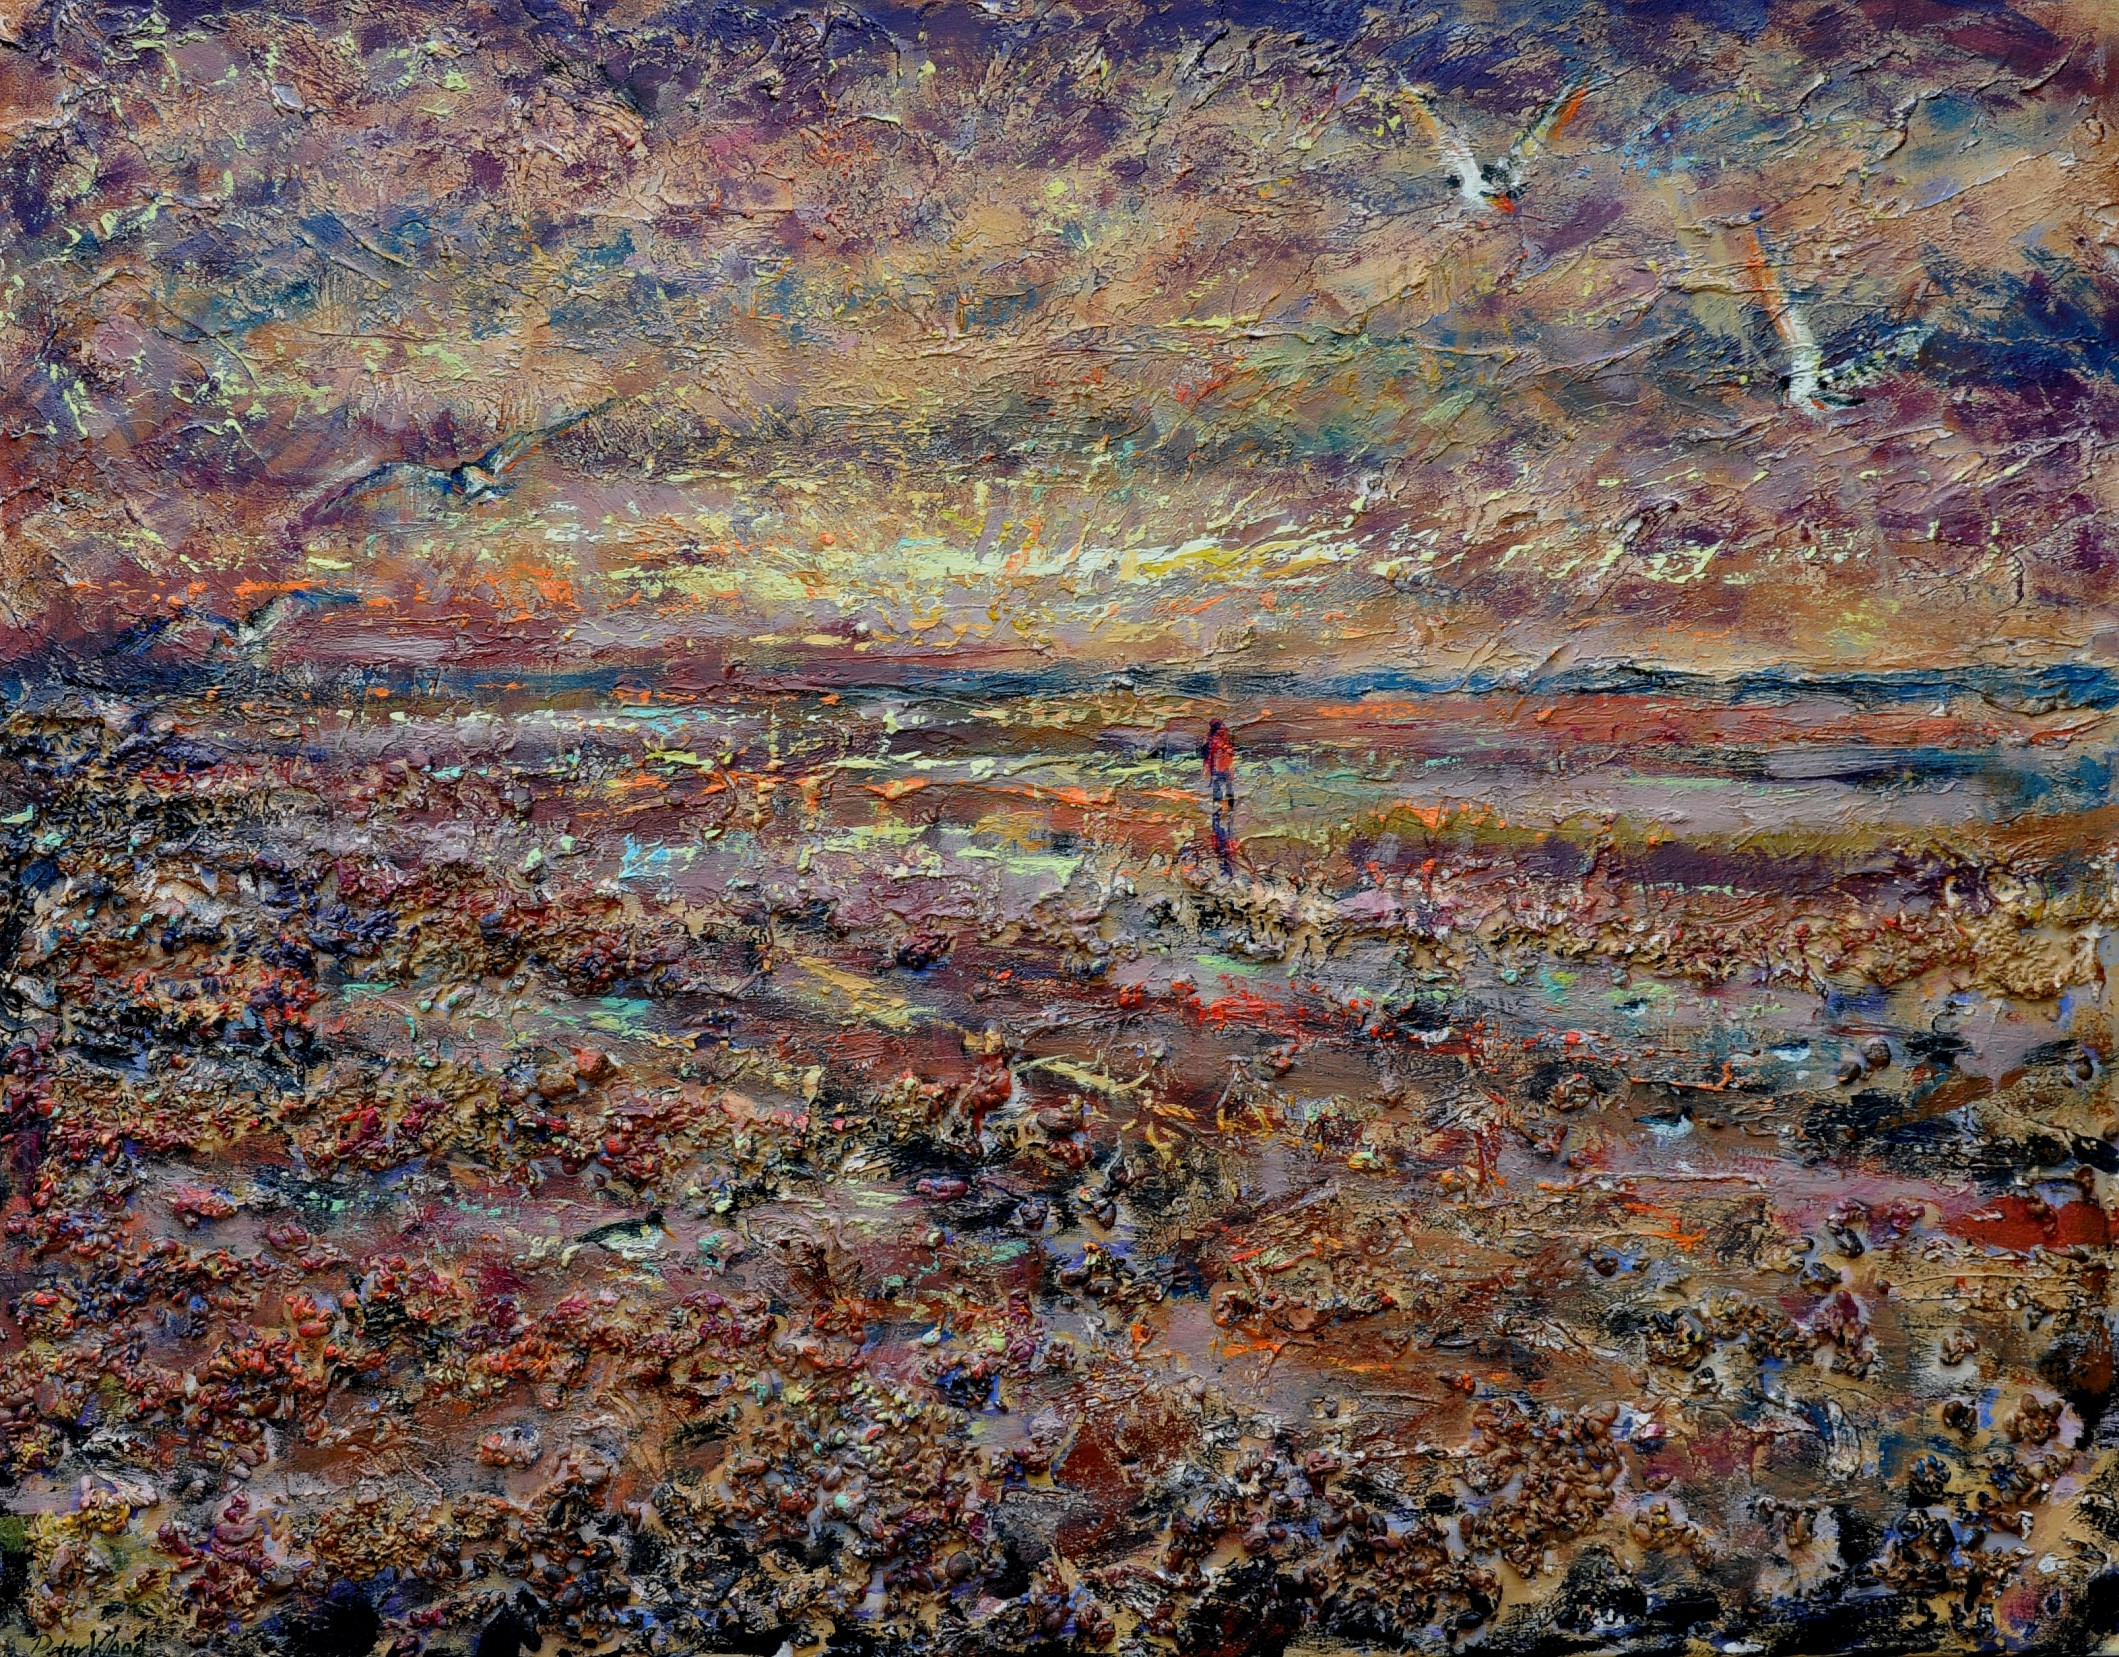
 A wet in wet sky. Wet over damp and dry for the distance. I painted the water by lifting out using a damp but nearly dry brush. Masking fluid for some of the beach rocks and weed. A rake brush and sponge for the foreground grasses.
For more

 Use cut card, filler and glue as texture mediums but you can also use several different tools for textures, e.g. forks, knife, fingers, sponge. Placing a flat blade painting knife and lifting it gives a lovely sticky texture. Piping sets for icing cakes are great! They can make long worms, threads, stipples and more.
 A lot can be achieved just through the use of filler and glue, and perhaps some tissue paper.
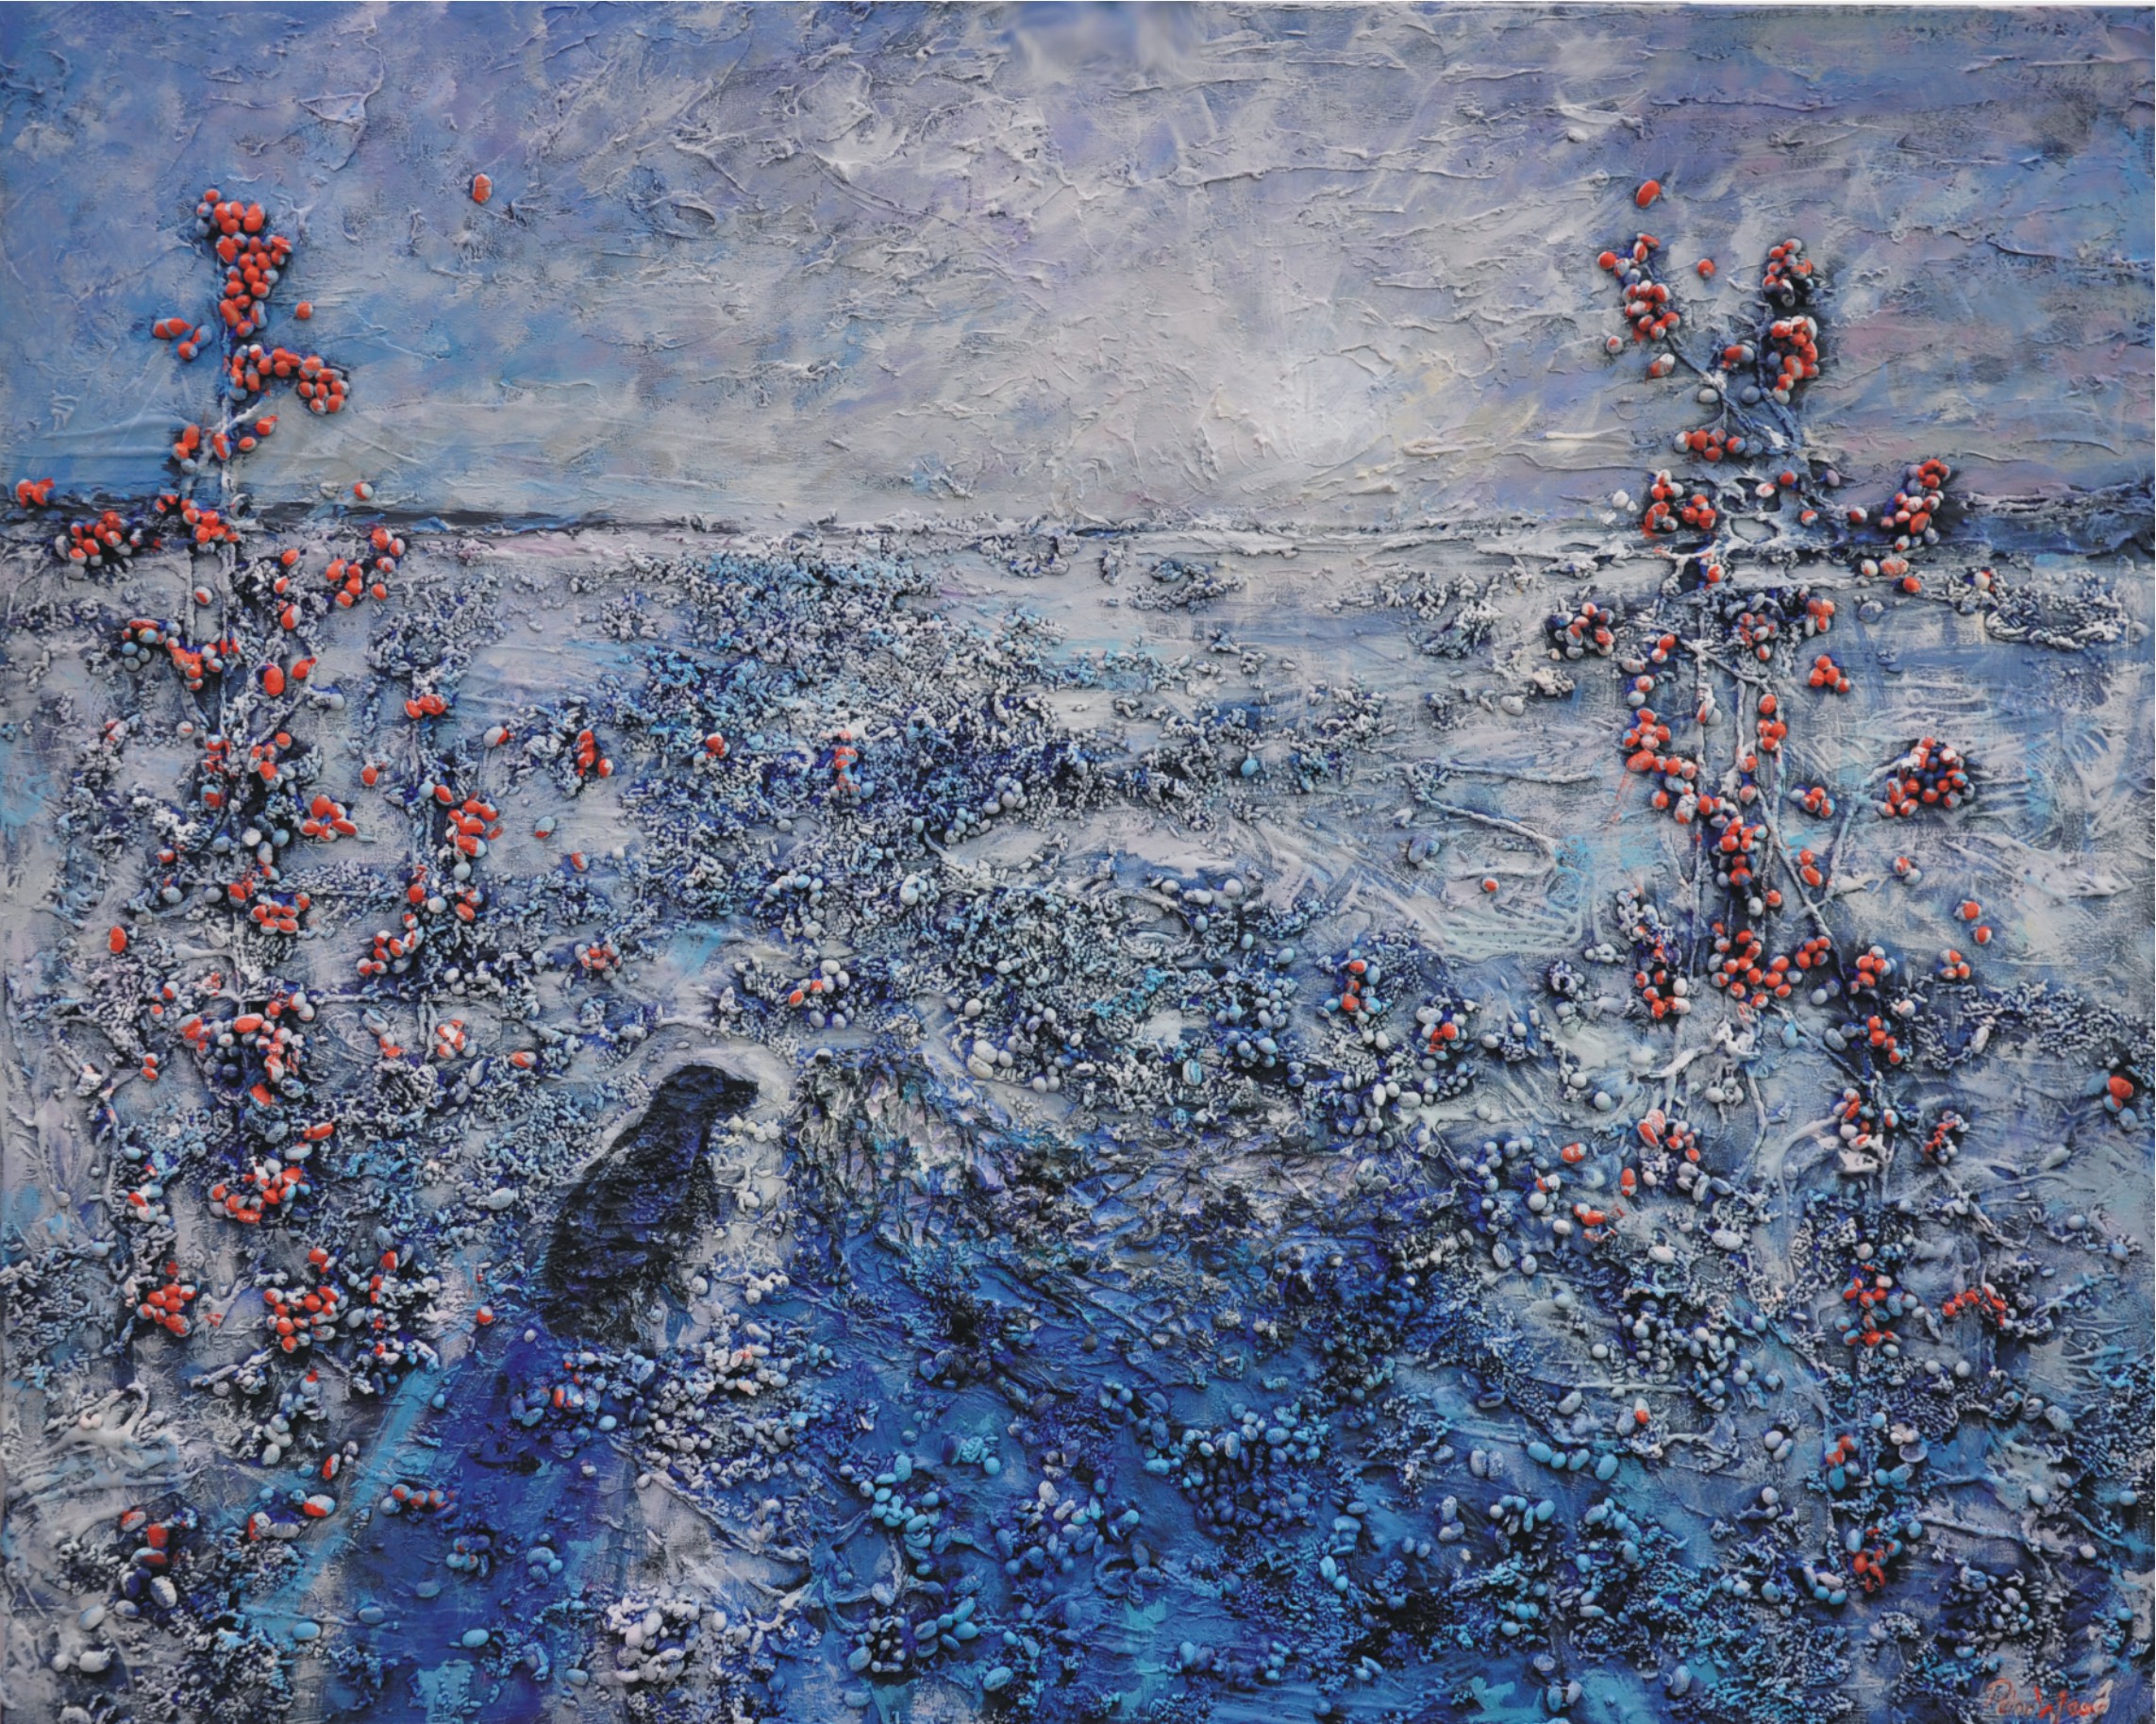
 This painting of Loch Teacuis used a combination of filler, glue, wool, broken polystyrene, grain, beans, rice and was finally resined. The steps and methods used to resin a work are covered in my film (click here to watch on YouTube). I use one of the slow drying resins from a firm called “Elichem“. Not cheap – a 5 foot by 4 foot work using it will cost about £60.00 in total in materials to complete. Yet well worth it and beautiful, giving an almost ceramic finish that’s washable, and touchable once fully cured, so could even be hung in a kitchen.
If you have enjoyed reading this blog, you can watch these videos on the same topic on my YouTube Channel:
