
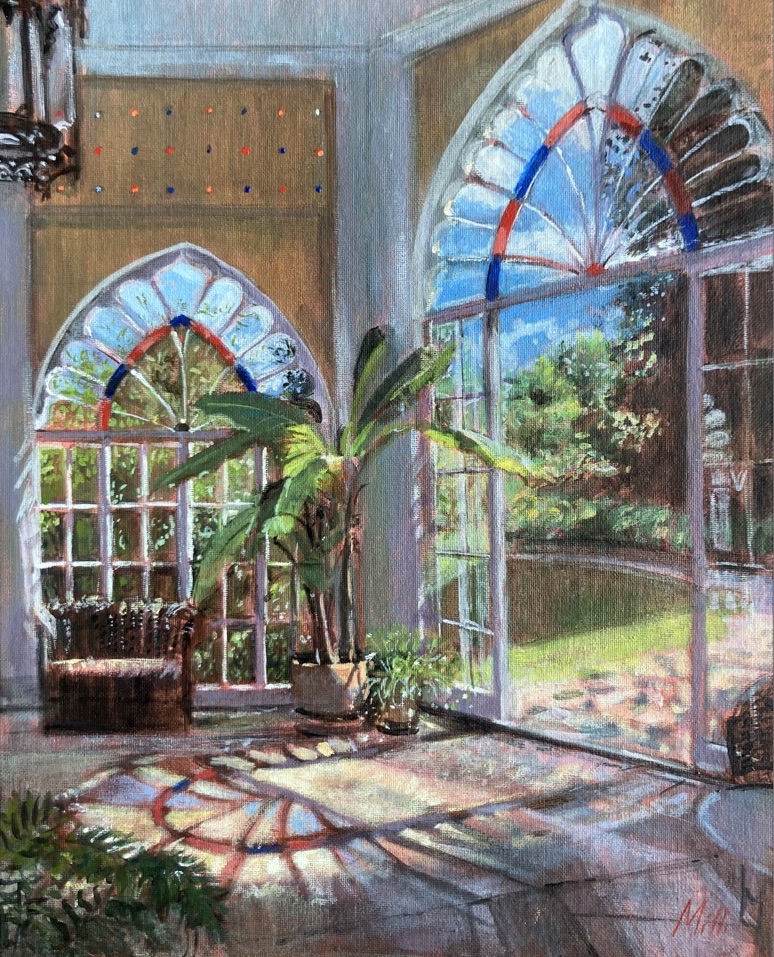
During my visit to Sezincote House last summer in Moreton-in-Marsh, Gloucestershire, I was inspired to paint an interior scene. Interestingly, the light on that particular day was exceptionally strong, granting me a collection of atmospheric photographs to draw from.
What fascinated me about this particular scene was how the outside and inside seamlessly blended together. This effect was achieved through the interaction of light, shadows, and the beautiful colours emanating from the red and blue stained glass, casting a gentle glow on the floor.
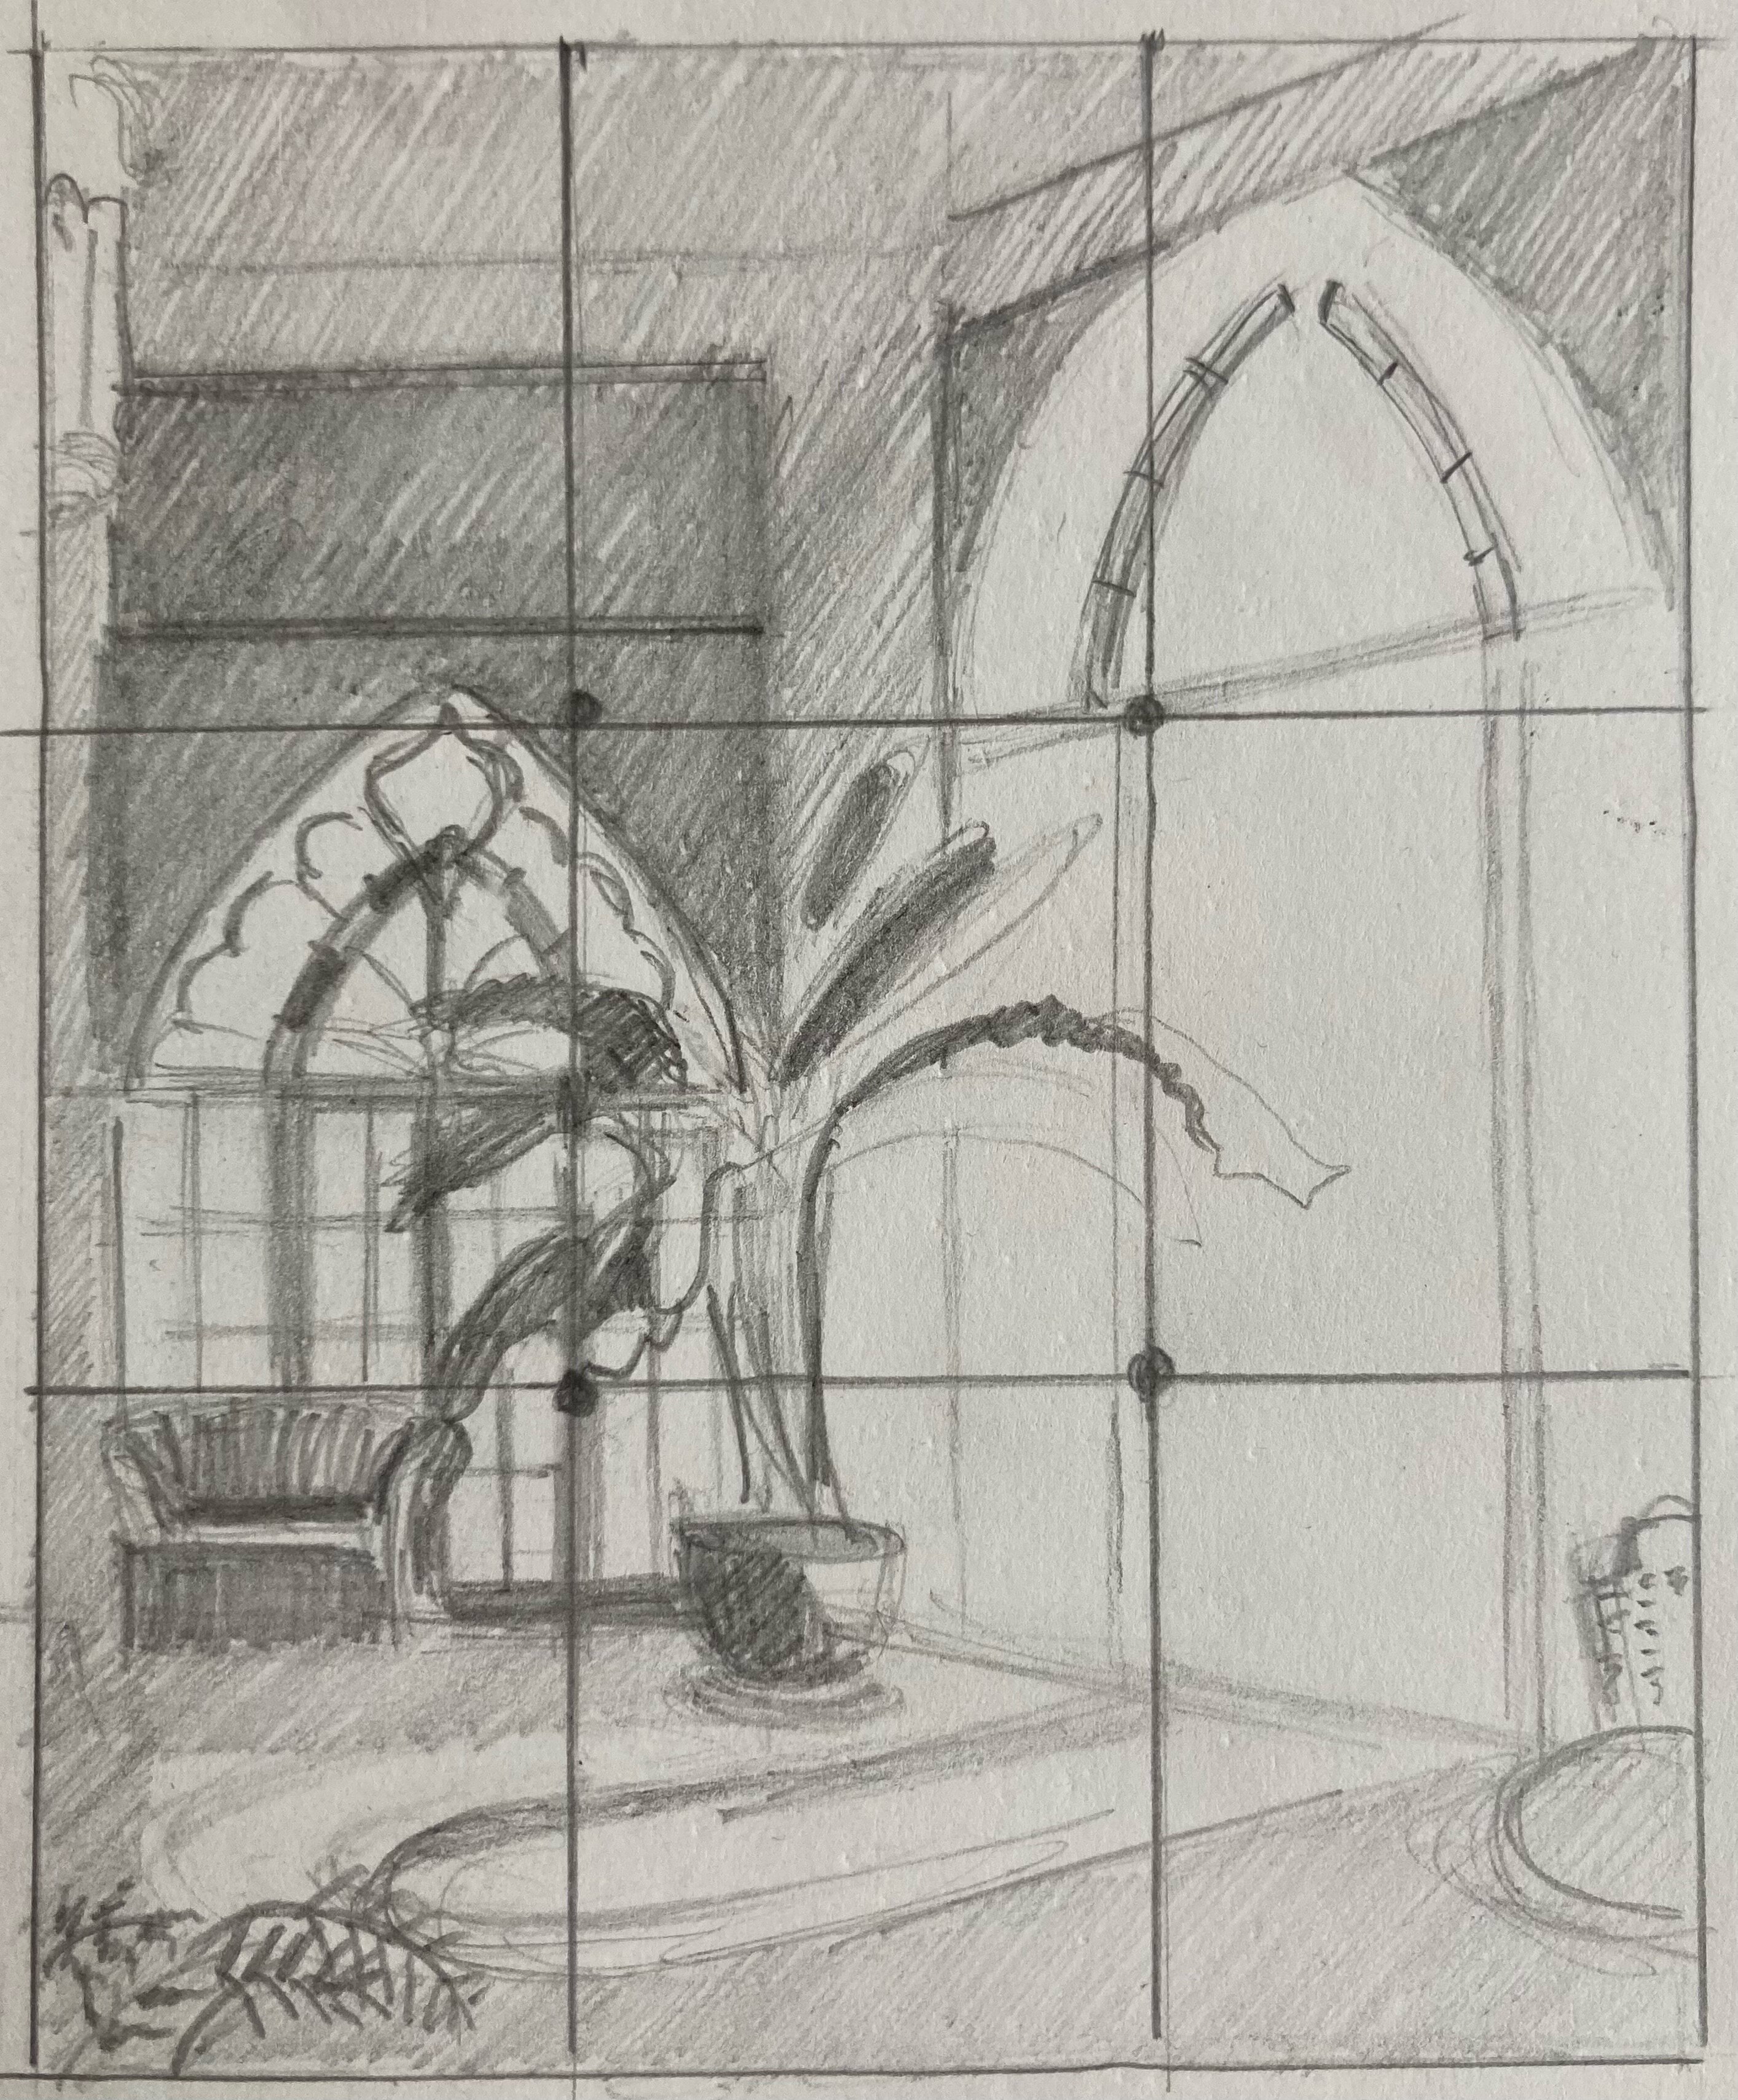
I sketched out a composition with a 2B pencil, using the Rule of Thirds. Where horizontal and vertical lines intersect, is where an important part of the scene should be. So, a blue segment of stained glass of the larger arch falls on an intersection in my composition, therefore I drew it on an intersection or ‘golden point’. The vertical door frame also falls on the vertical line of thirds, as does the frame of the other arch. The garden lawn and trees give distance and perspective to the scene. It’s also a good idea to shade in the darker areas with pencil to get an idea of how the tones flow through the painting.
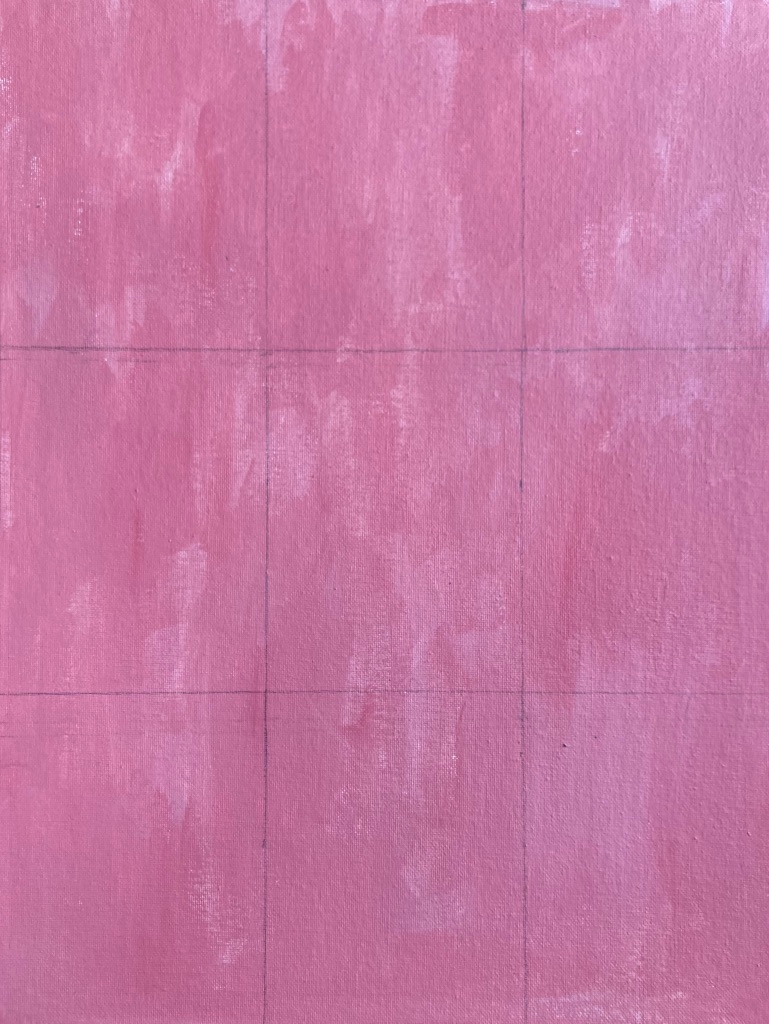
Canvas boards usually say they’re already primed, but regardless of this, I always add two coats of Gesso to the surface, allowing it to dry between coats. Mix a small amount of Cadmium Red with the Gesso and apply two coats to the canvas with a 3″ decorators’ brush. These colours make a pink which complements the green in the painting, and when it comes through it gives a summery glow. Wait up to an hour for the second coat to dry before starting painting with the acrylics. Use a ruler and 2B pencil to draw grid lines onto the canvas, dividing it into equal thirds horizontally and vertically.

Refer to the pencil composition sketch. Using the gridlines and tonal composition sketch as guidance, take the Size 8 brush and mix Burnt Sienna and Cobalt Blue, then start to paint in the windows and shadows.
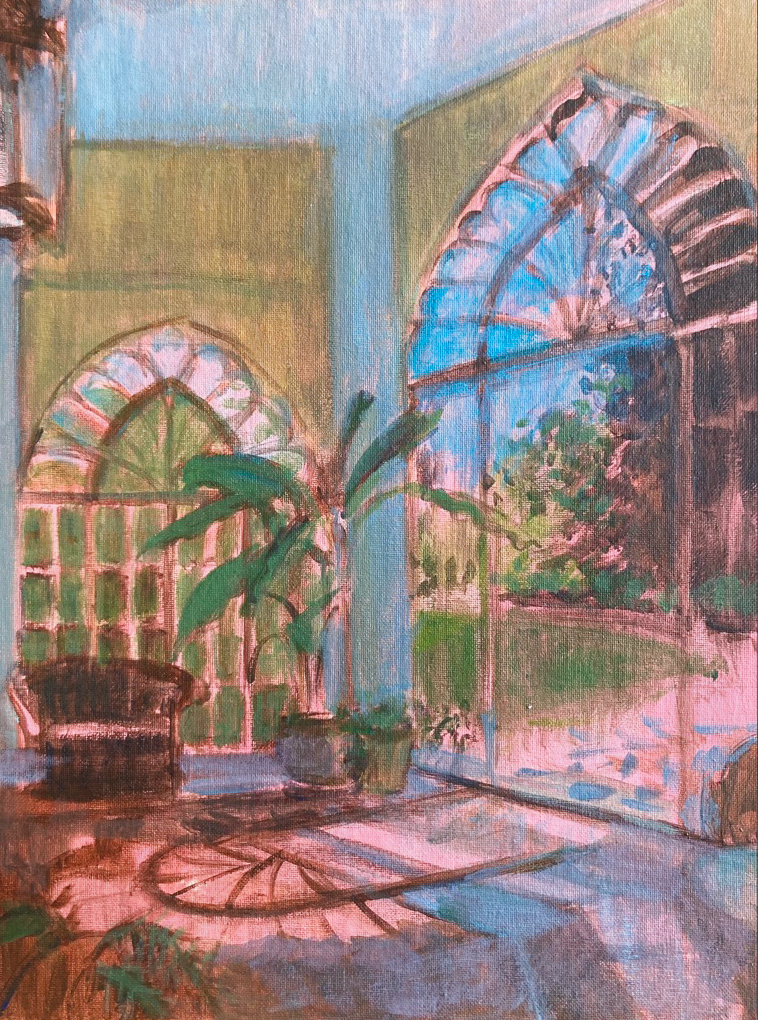
As a general rule, work from darks to lights. Continue to add thin paint to the dark tone areas, then switch to a 1” Flat brush to paint in the larger areas. Once dry, build up the layers, thinly adding Cadmium Yellow over the thin Burnt Sienna and Cobalt Blue mix on the interior walls. Continue to add darker colours into dark tones and lighter colours into lighter tones, for instance: mix a dark green for the darker area of the large potted plant and use Lemon Yellow to add highlights to it. The light and dark tones add atmosphere to the painting.
Still using thin layers, mix a purple to add to the dark areas, particularly parts of the floor. I mixed two purples, one using Cadmium Red and Cobalt Blue, the second Cadmium Red and Turquoise Blue. Add Lemon Yellow, Turquoise Blue and some White for the grass, with Cobalt Blue mixed with Titanium White for the sky. As a general rule, use darker and warmer tones in the foreground, keeping lighter and cooler tones in the distance. A limited palette helps to create balance and unity within a painting. Start with thin paint and work up to a thicker consistency as your painting develops.

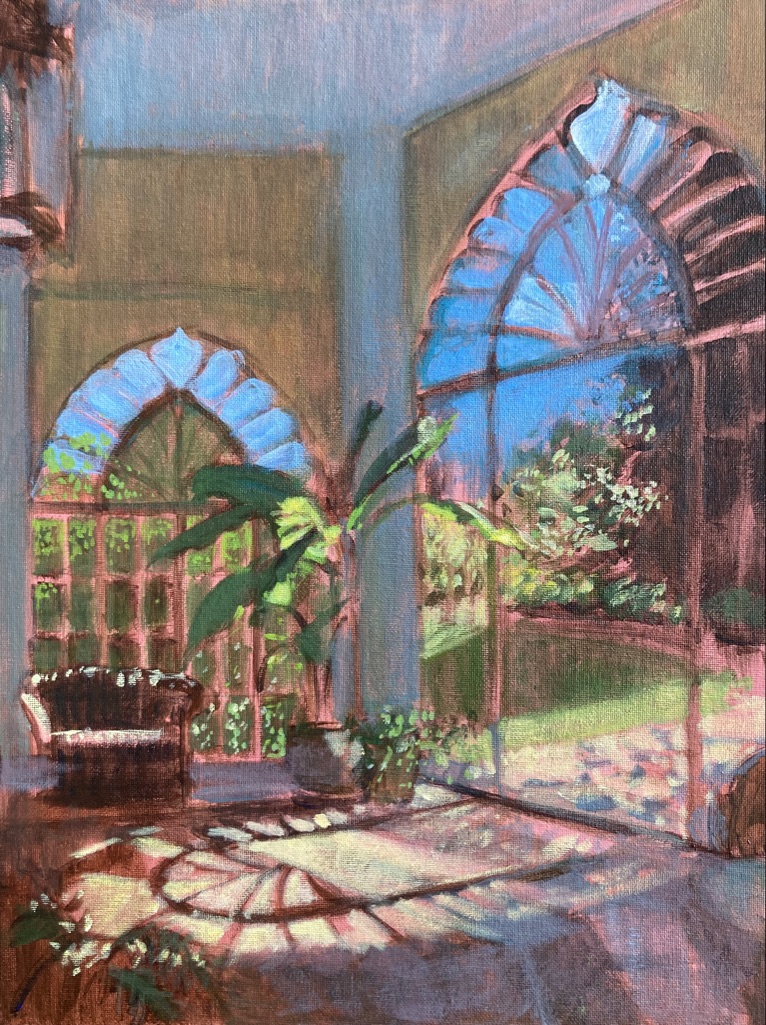
Look at using lost and found edges – they’re an important part of painting, creating mystery in the finished work. I don’t like putting too many hard edges into my work as I want to keep my work fairly loose and feel hard edges take away from the atmosphere I’m trying to create.
Now to add detail. Take a Size 6
Round brush and a 0.5″ Flat brush and start to add in more highlights to door and window frames, along with some dots of light paint to add texture for the rattan chair in the interior and the light fitting. Don’t forget the tiny blue and red stained glass dots above the left-hand arch.
To find out more about Milli and her work visit: www.milliart.co.uk
or follow her on instagram: @milli_artist