
 Having sketched in, I wet all the paper with the size 20 brush and added Natural Orange above and below the horizon, working the brush upwards and downwards to fade the colour. Next, with a clean brush, I added Natural Blue, above and below the Orange followed by Natural Violet from the top down and bottom upwards. The clouds were painted while the background was still wet. I used Natural Grey for this and a size 12 brush, applying them in a twisting motion, smaller at the horizon and larger above. If the paper is too dry to do this, as you want soft feathered edges, leave it to dry fully then wet again and add the clouds. While still wet I added a few horizontal ripples to the water.
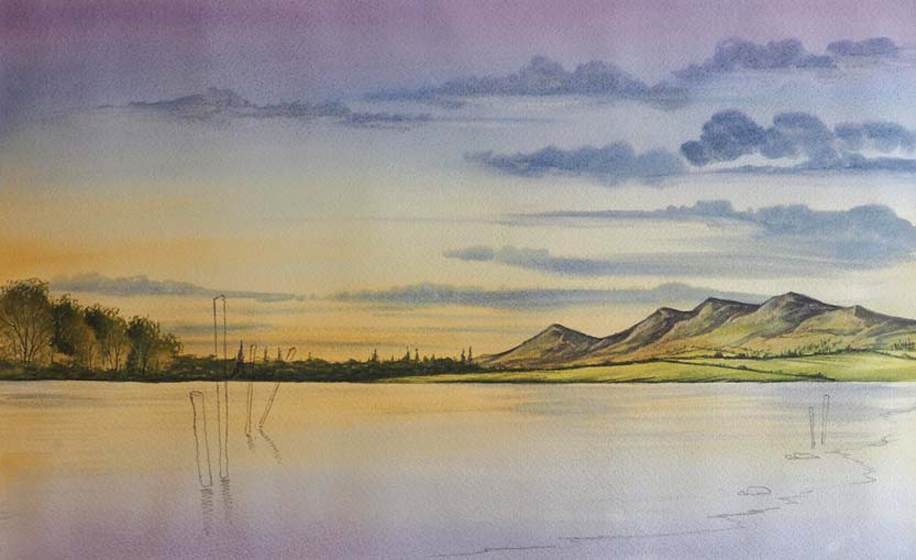 Once dry I painted the distance using a size 12 brush and Natural Grey for the top edge of the mountains, then worked in Natural Green Light while it was still wet – notice how the green mixes with the grey to give different shades. I then added a spot of Natural Orange to add interest. The Natural Green Light was applied right down to the water’s edge to create the fields. Once this was dry I used the darker Natural Green to paint a few lines for fields with dots for trees. A few shadows were painted on the right side of the mountain peaks, using Natural Grey. The final stage to the mountains was to lift out a few highlights using the flat edge of a slightly damp 12mm Flat, focusing mainly on the left of the mountains. I painted the row of trees to the left of the mountains using a size 6 brush and Natural Green, simply twisting the tip of the brush as I worked across, adding the occasional tall pine tree. I went over the trees several times to create dense woodland. I added a little Natural Grey to the water’s edge to give a clean line, continuing this all the way across.
 The taller trees to the left were painted with the small Matthew Palmer Tree and Texture brush. I roughly mixed the two greens together in the palette then gently stippled the flat tip of the brush to give a leafy effect, making the left tree the highest coming down towards the right, adding a few shadows using just the darker of the two Natural Greens. I scratched out branches with a palette knife then when dry painted in a few with the Rigger brush, using Natural Brown and Grey.
 Using Natural Green Light I added some horizontal reflections just below the trees and mountains, adding a few Pale Grey ripples in the foreground. The size 6 brush is great for this.
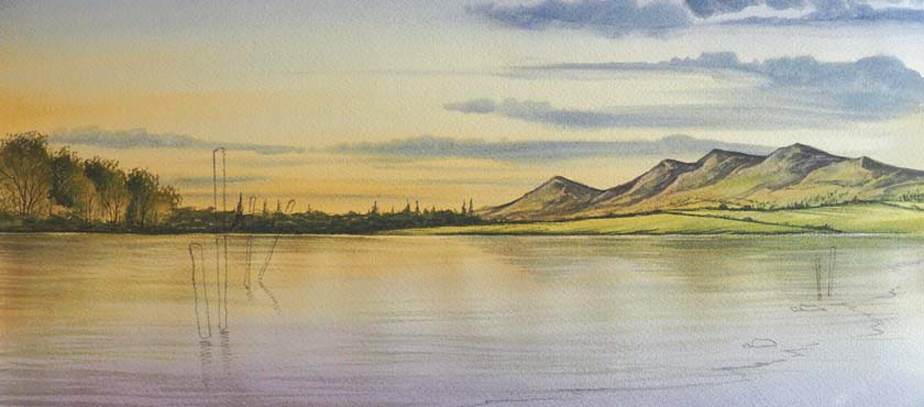
 The posts, their reflections and the boulders were painted with a size 6 brush using a mixture of Natural Grey and Natural Brown. Once dry I used the 12mm Flat to lift out the lighter left hand side of the posts. Next, with the size 12 brush, I painted the shore with Natural Brown and a touch of Natural Orange, with horizontal brush strokes, flicking the brush away to the left making sure the colour was fairly strong. It’s important to get the fade away effect where the water and shore meet pushing the water above the shore. Once this was dry I spent more time on this effect using a dry brush, dabbing any excess paint off the brush first. Next, using Pale Natural Grey I added a darker shadow to the bottom right corner of the water using Natural Grey and added a few more ripples with a Pale Natural Grey. I also added extra reflections to the water beneath the trees and some downward dry brush strokes to reflect the tree trunks, using the size 6 brush, to give added depth to the water. Finally I popped in the three birds using the Rigger and little ‘ticks’ with Natural Grey. After a break, I like to spend a few minutes looking over a painting and maybe add one or two extra bits of detail; a pine tree or two perhaps or more fields at the base of the mountains, but it is important not to fiddle.