Make a graduated watery wash. I used Gold Ochre, Burnt Sienna, Raw Umber, Violet, Winsor Violet and a mix of Ultramarine Blue and Brown Madder. Work quickly with big brushes and keep the board flat and you are ready to use the salt immediately.
 Grind salt so it’s ready to use. I used three types: table salt, sea salt and rock salt. Using the sea salt, pinch and sprinkle (more controlled than pouring). Place larger pieces of rock salt in the gaps and sparingly dash pinch-sprinkles of table salt. You don’t want the pattern to be too even. Repeat the steps to make versions, so you have options and are not waiting for another piece to dry if you don’t like the first. Leave to dry completely.
 Use the drying time to draw the horse on another piece of paper. Trace it onto greaseproof, or thin tracing paper and move it over the wash until you find a pattern that works over the whole horse. Mark the edges so that you can put it back in the same place, then tape it to another piece of card. Prick holes around the traced outline with a safety pin, putting them at junctions and changes of line direction. They are a guide, not a dot-to-dot, so the fewer holes the better. Practice will teach you how to place the dots so they make sense to you, but initially work in sections, so you don’t get confused. Re-tape the tracing in position over your painting and use a dry brush to dust powdered charcoal over the sheet and through the pinholes. Using the original drawing and dots as a guide, re-draw the horse then brush off the dots with a clean dry brush.
 Make a tonal underpainting. Use a Size 4 Mop brush and a watery mix of Ultramarine Blue and Permanent Rose, varying the mix as you paint. This establishes the tones and shape of the horse, which can become lost in the detail and texture. You can soften some of the edges with a shader brush so you are looking at soft and hard edges straight away. Wet the tail area with an atomiser or a brush and clean water, before painting it to get a feathery end.
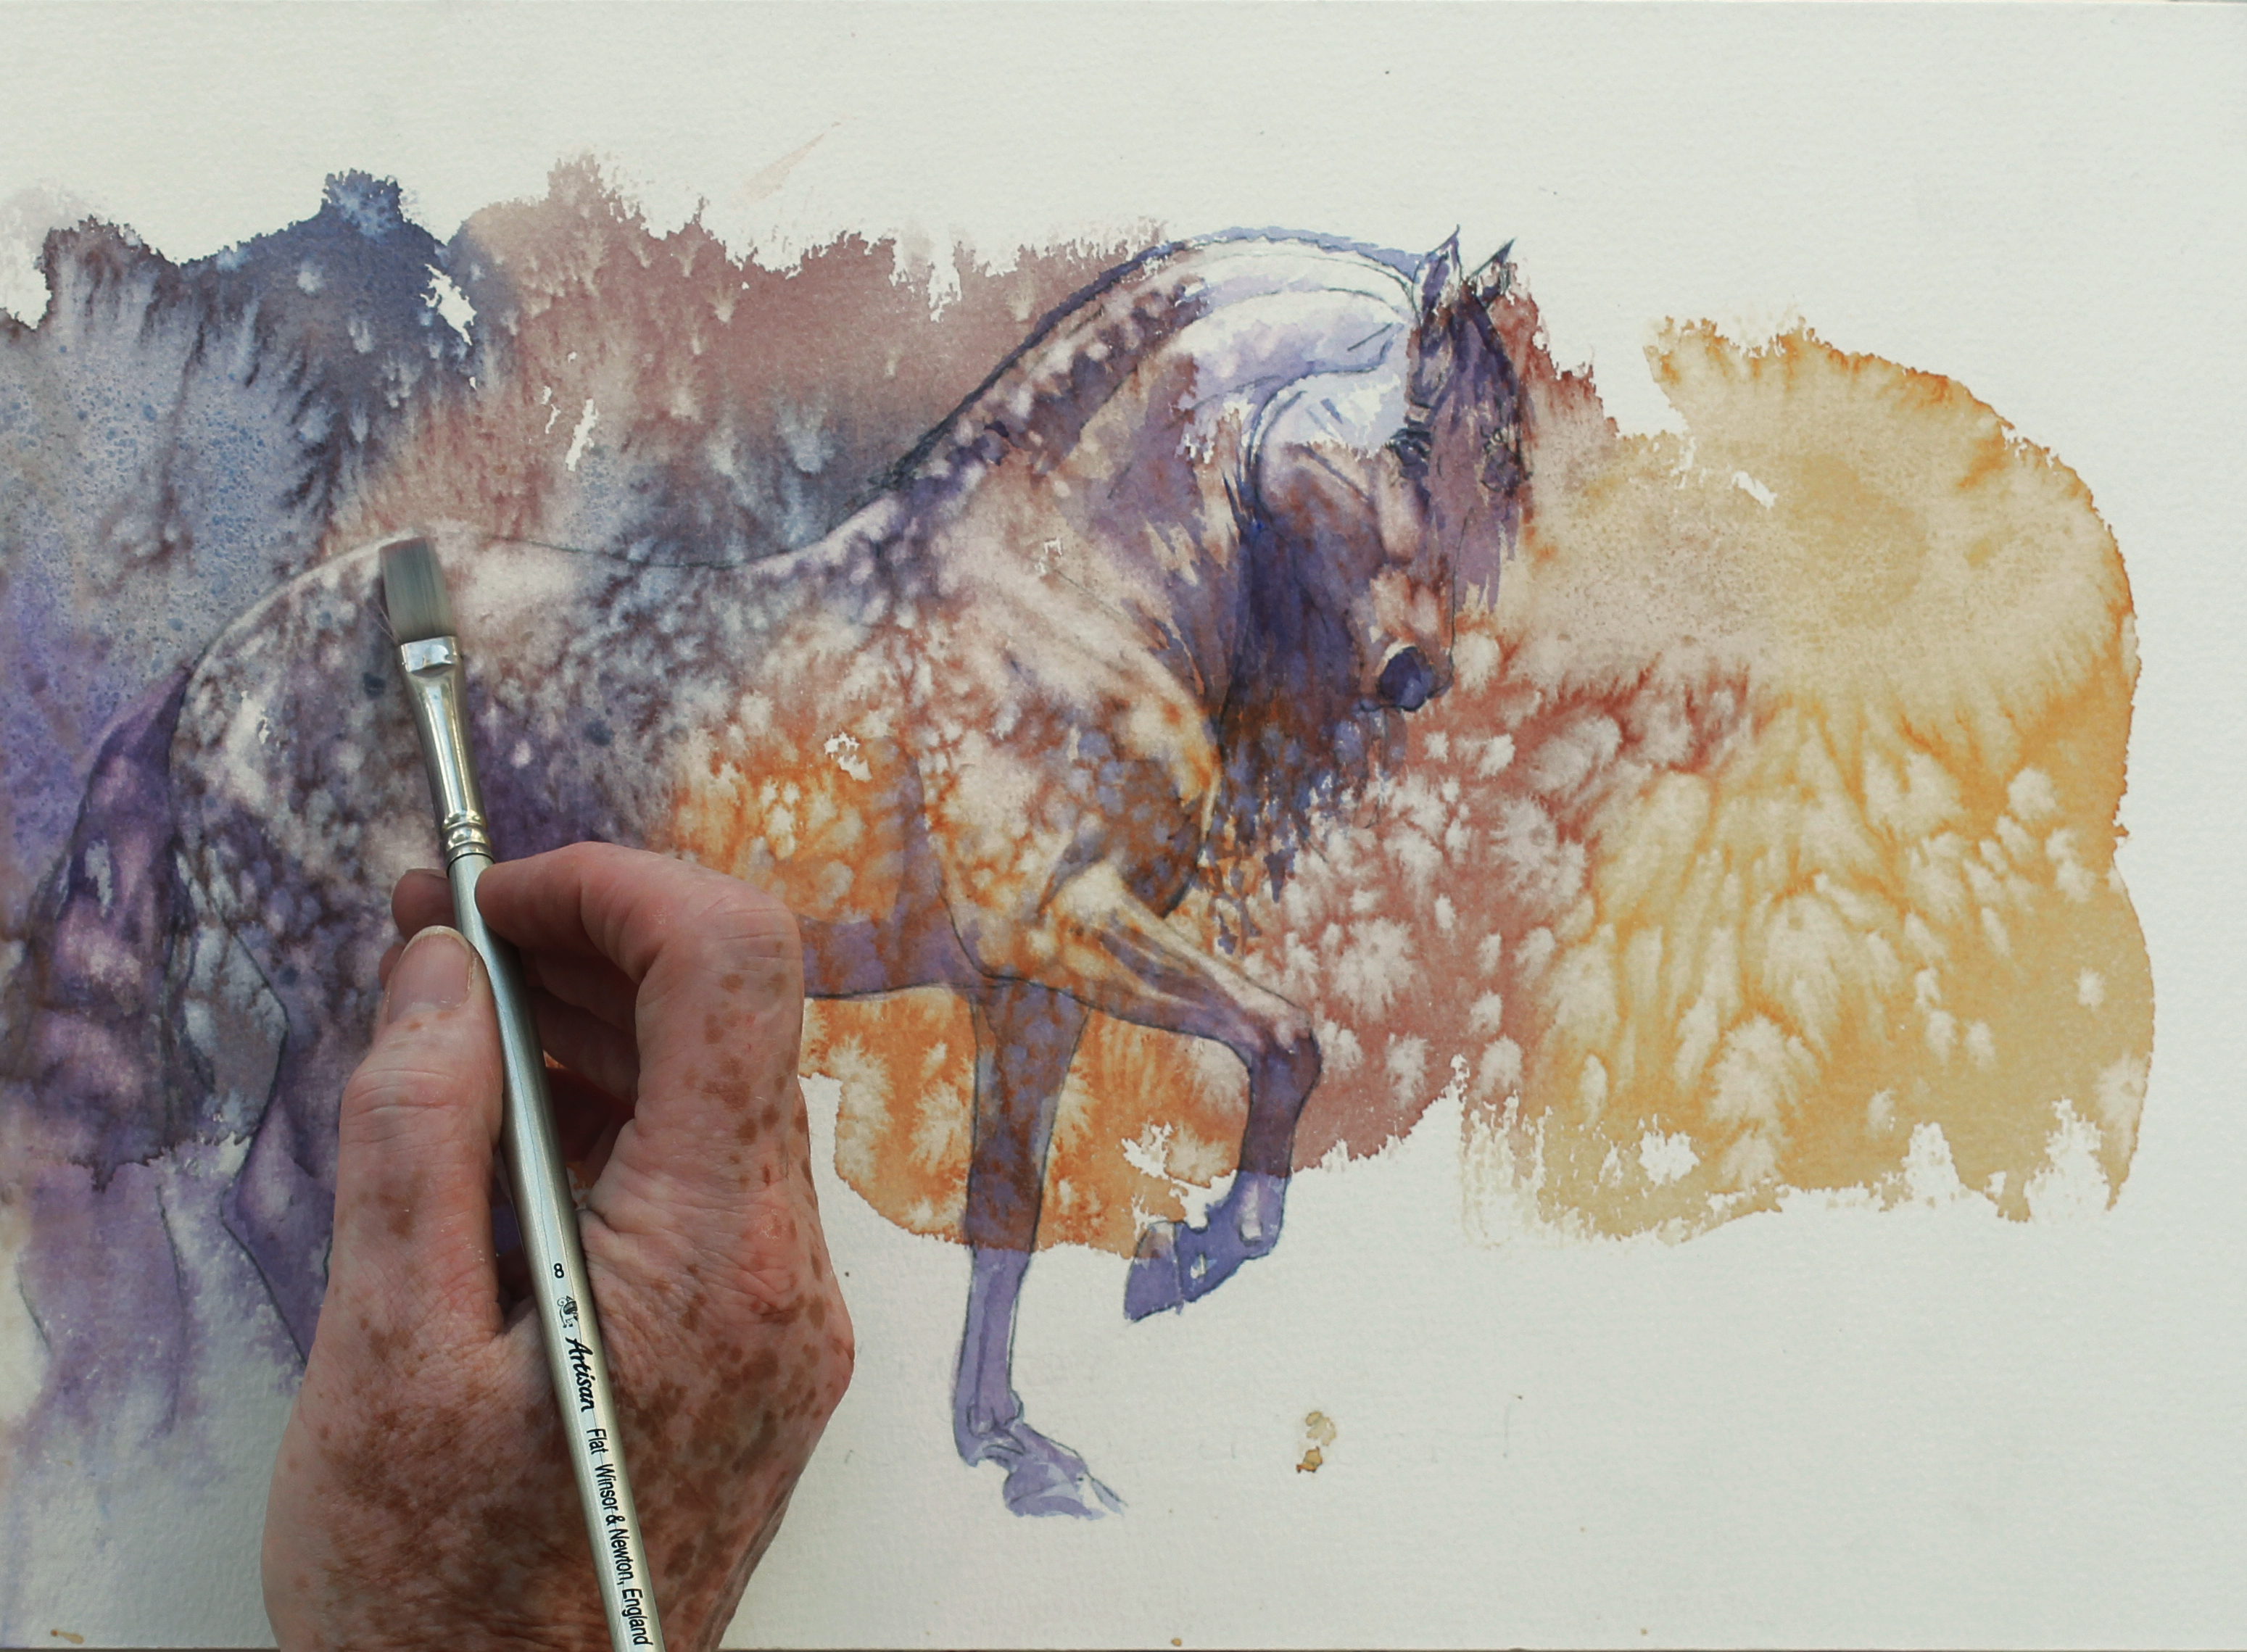 Work with the lights by using a lifting brush and clean water to gently wet and lift the paint. This is called subtractive painting. Look for large shaping lights first: top of the neck, line of the shoulder, top of the horse’s quarters. Use a more natural looking, broken line rather than an outline. You may have to rub gently; if you disturb the paper surface you will not be able to paint over it. Clean and re-load the brush with clear water at every stroke and blot with kitchen roll where you want a crisp light. Lifting creates lovely soft edges, and you can use a small ‘bright’ to further soften an edge by running it into, and lifting, a few dapples.
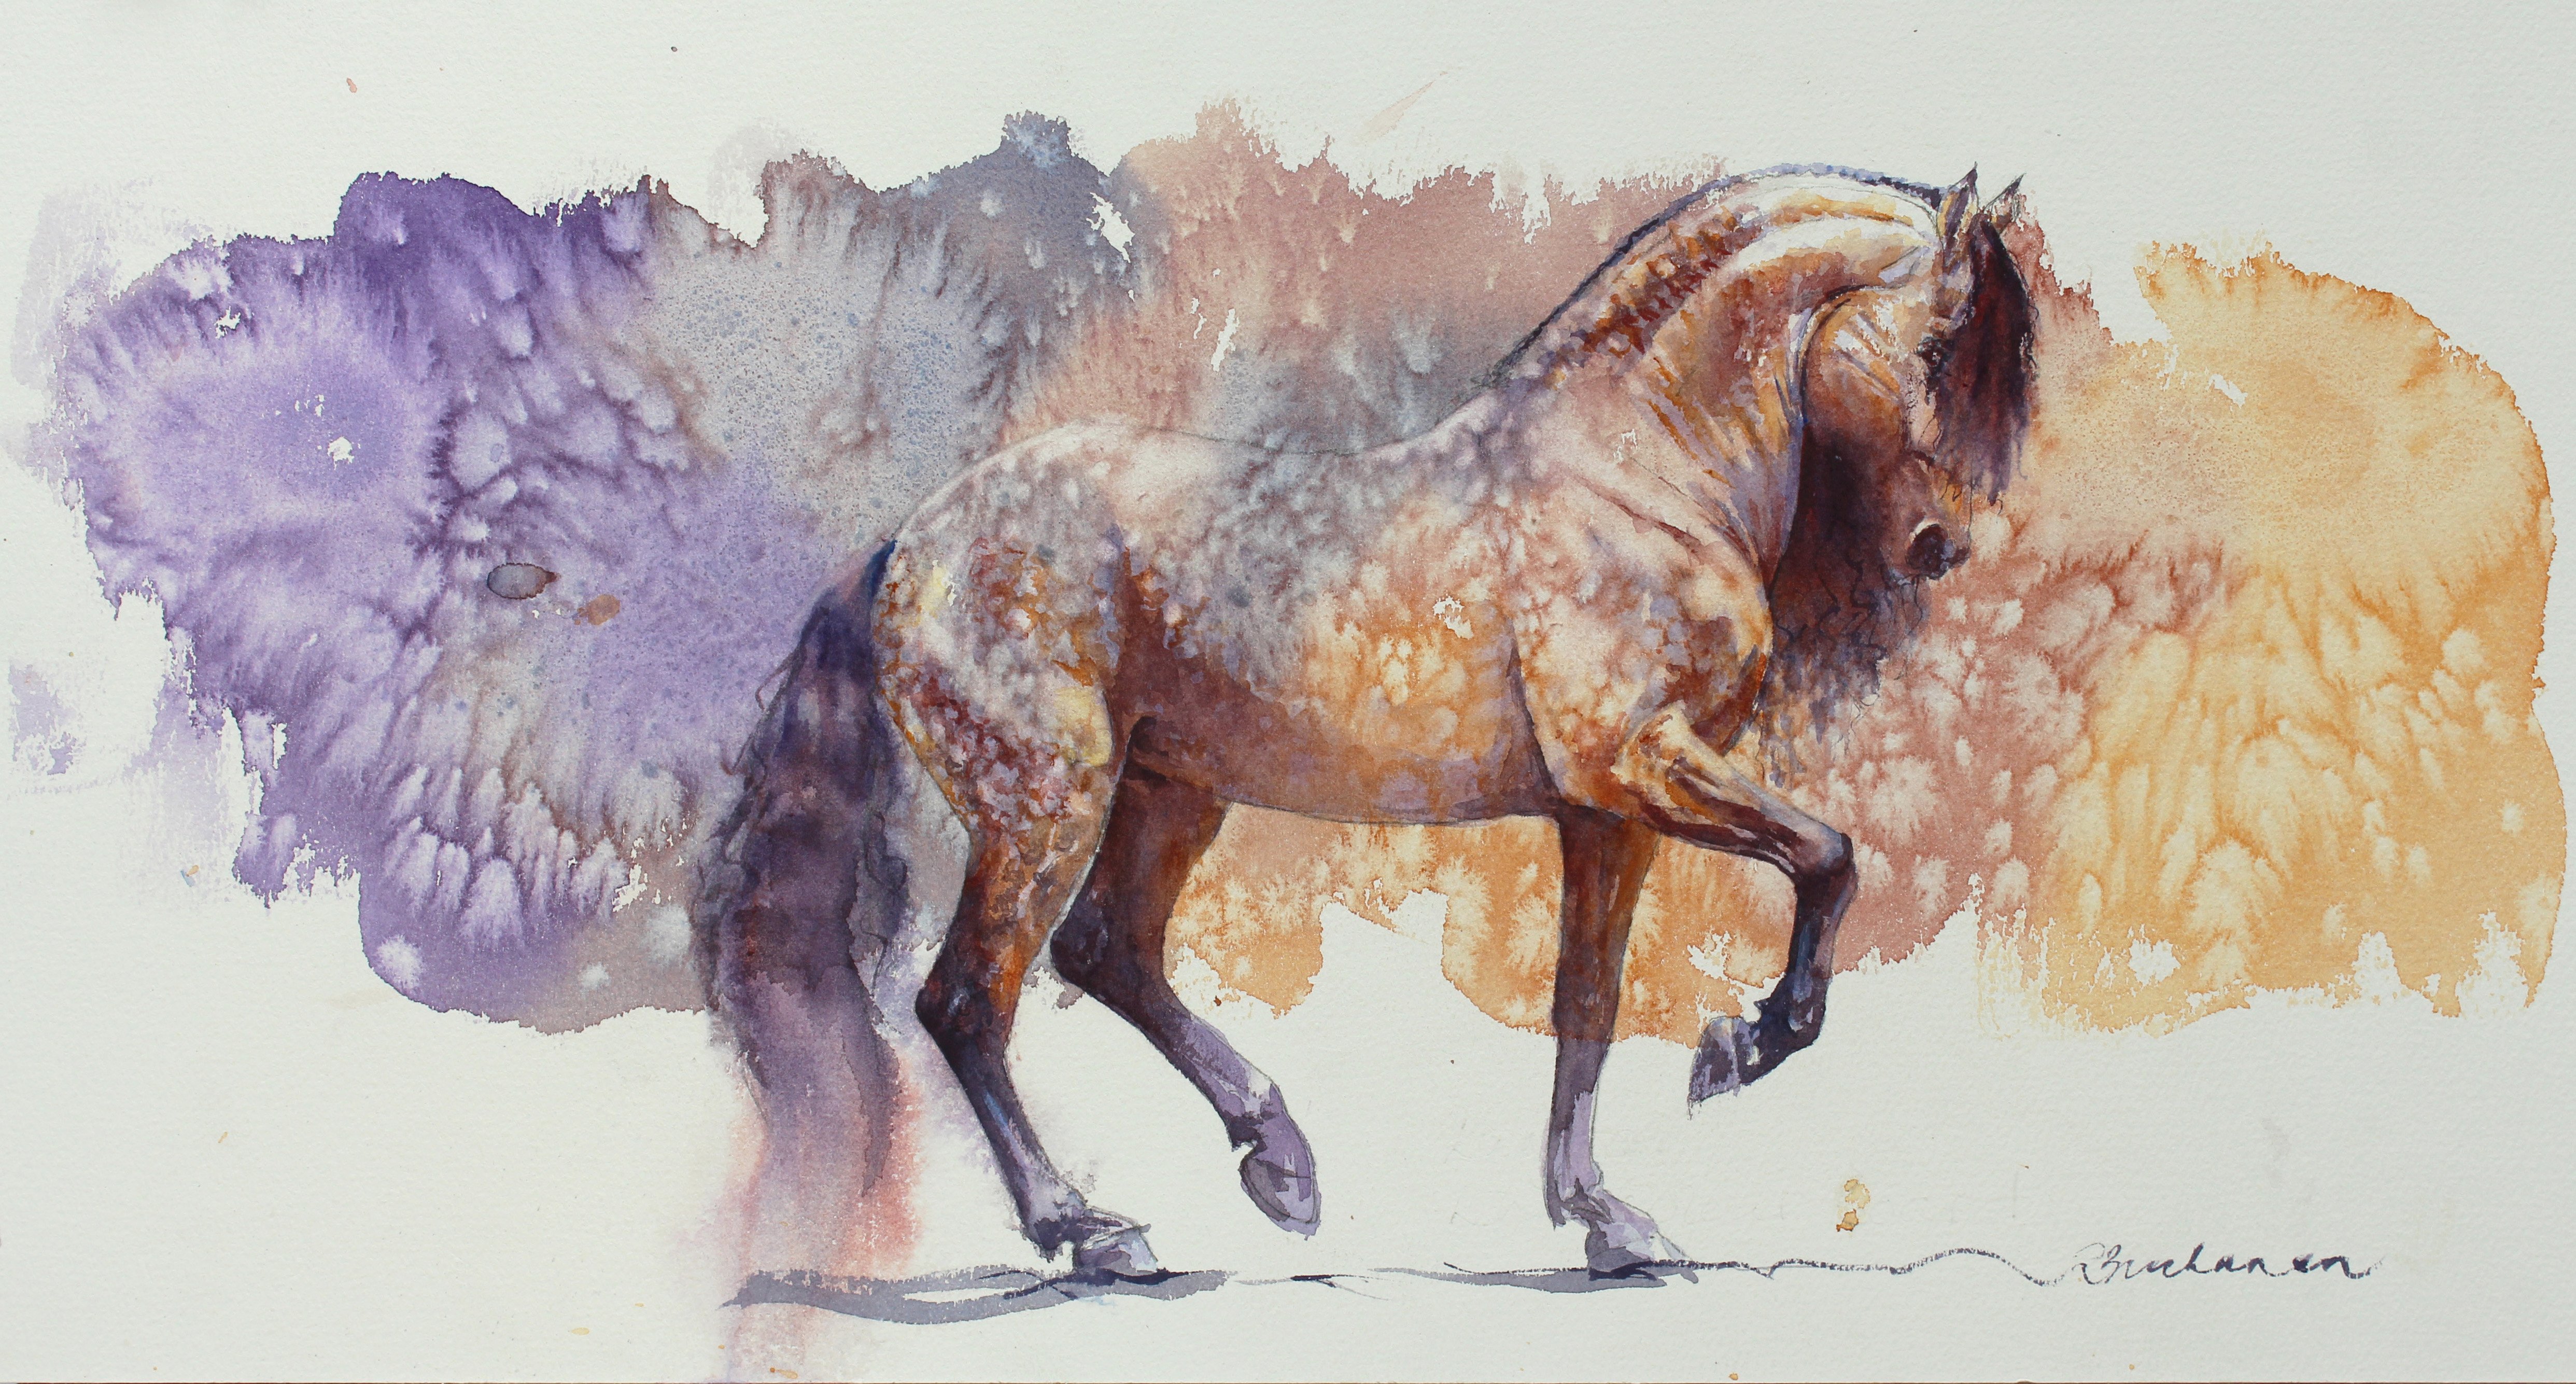 Now you have your lights and shades you can stop or continue. My final touches were darkening some areas using Rounds and an Ultramarine Blue/Brown Madder mix – which gives lovely purple-blue darks or red-brown mid tones – and adding touches of lavender on the leg joints. You can also place establishing shadow and choose to either keep or soften the background textures.