I love Derwent Inktense pencils, I have a tin of 36 beautifully vibrant colours and I have used them for years.
If you haven’t used them before, I suggest that you test them out because sometimes the colours are stronger or different to how you imagine they would look like.
In my opinion they work best on watercolour paper.
They are brilliant for taking out and about – they don’t take up much space; don’t make a mess and are versatile. I like adding them to pen work when sketching outside.
You can use them dry and then add water as I have done in the demonstration below or you can use them on wet paper or into wet watercolour and they glide effortlessly through the paint.
I absolutely applaud the SAA for bringing out the new sizes of detailer brushes – they are very reasonably priced and make detailed work much easier!
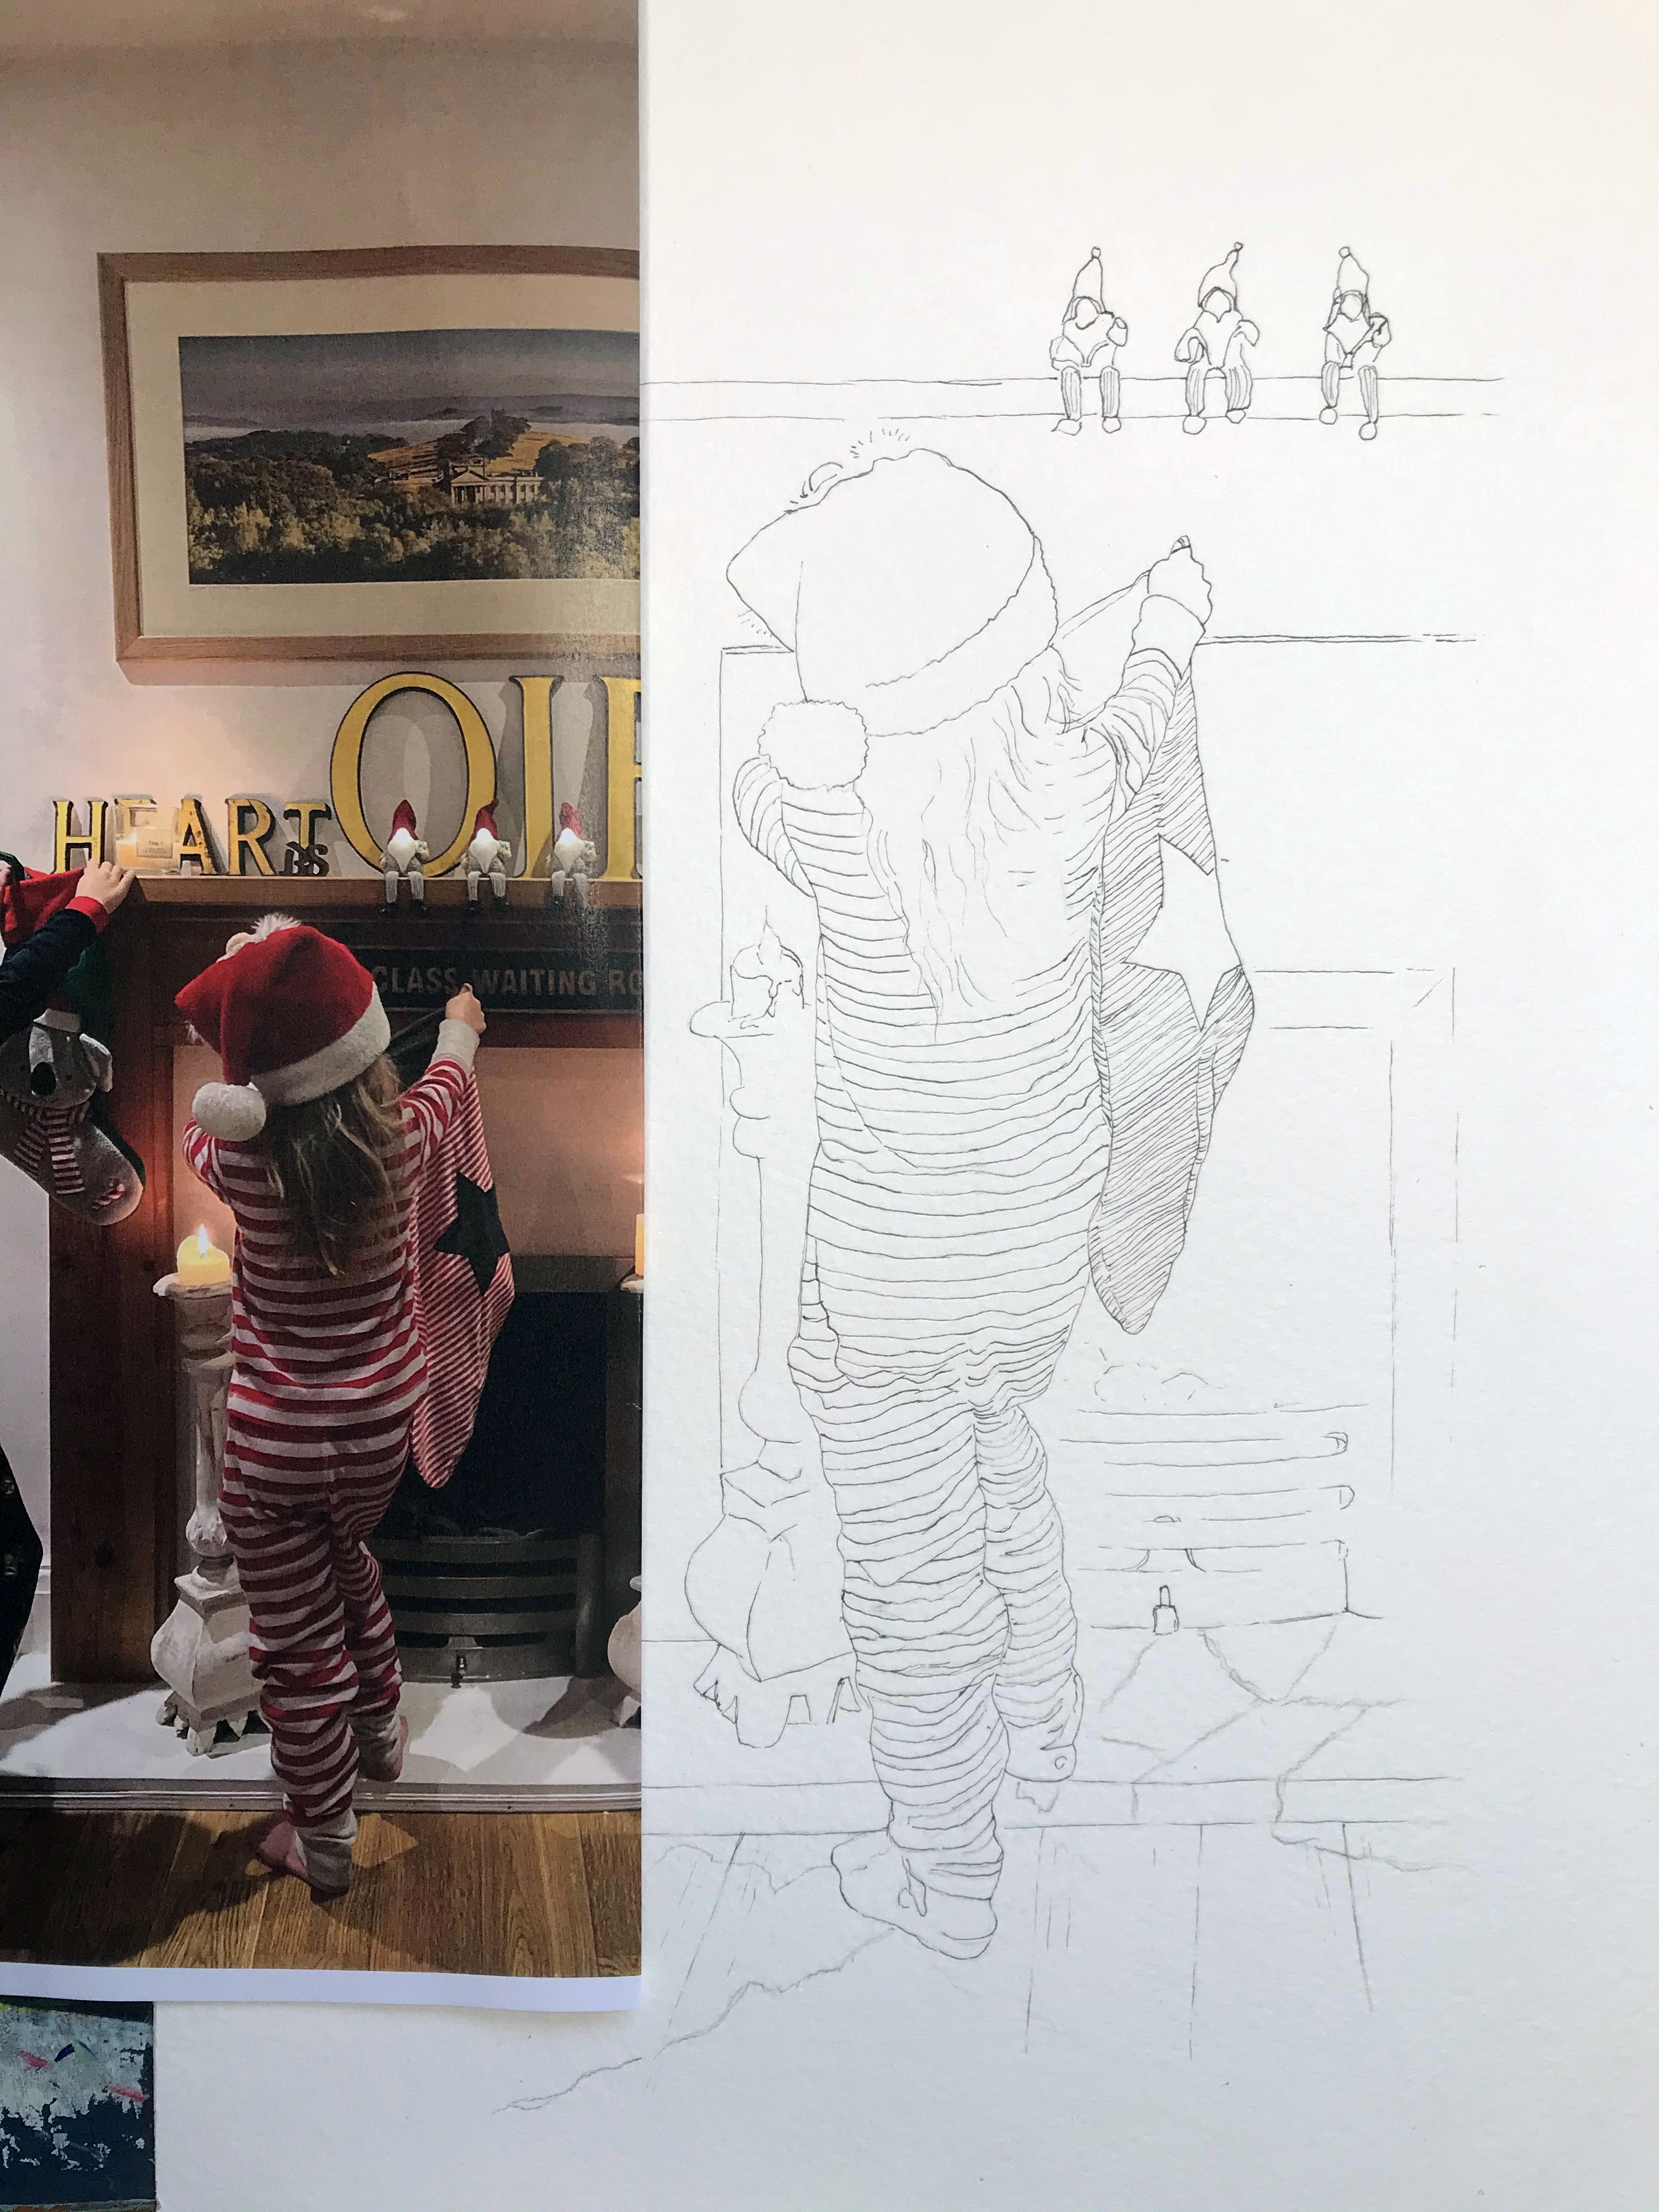 This is a photo of my friend’s children putting up their stockings. First of all I focused on the part of the photograph that shouted out at me. I love the way the stripes change direction where the fabric of this little girl’s PJs fold over and the finer stripes of the stocking complement the PJs. Even the little Father Christmas ornaments have stripy trousers. I believe that observation is incredibly important so take time to really look at your subject.
Then I produced a line drawing onto watercolour paper using a very fine permanent fine tip pen. I used a permanent pen so that the colours wouldn’t bleed when painted and I wanted the colours to be bright.
 I used Inktense pencils to add the colour. I love the vibrant colours you can get with these pencils. I used these instead of paints because I could get the fine details really easily. They are perfect for filling in the narrow stripes for instance. Keep the pencils sharpened throughout so that you can get into the finest spaces.
I coloured in the detailed parts first using the sharp end of the pencil and then the larger areas using the side of the pencils.
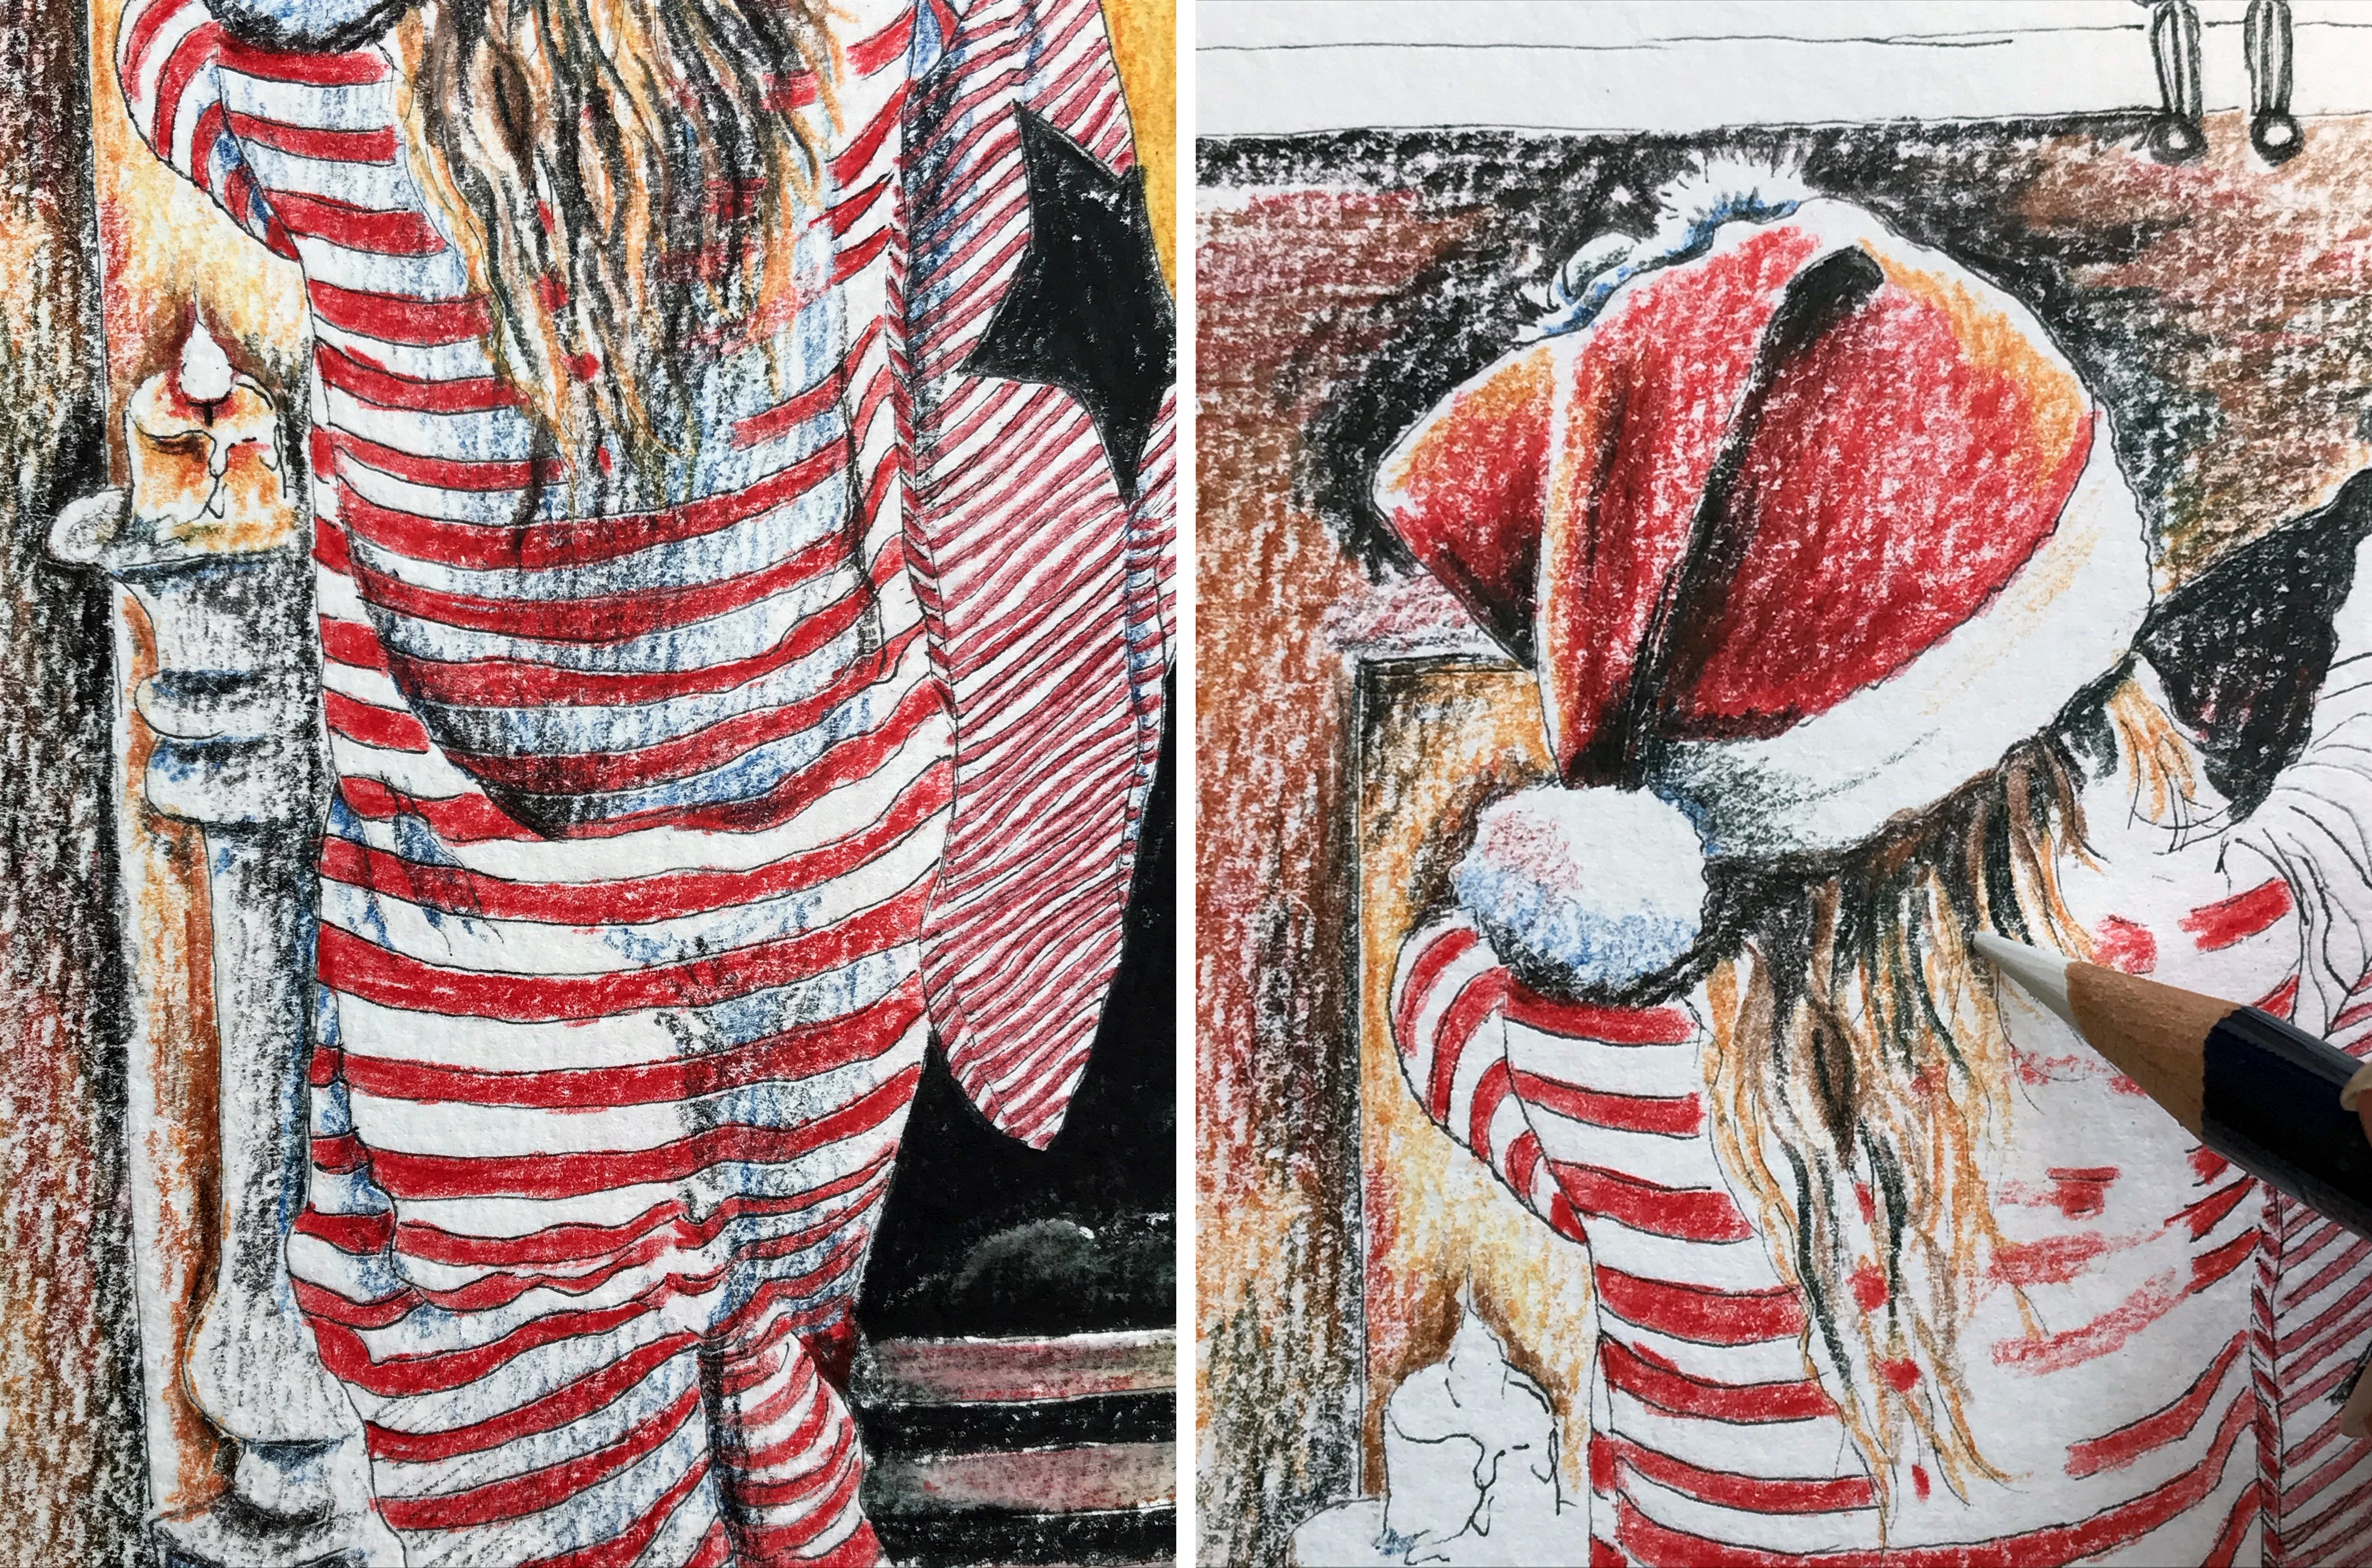 Press on harder to get more pigment for stronger colour and more gently for lighter colour. Please note that the pigments are very strong so a little goes a long way.
I drew individual strands for the hair and used several colours and different tones.
Used white to make colours more milky looking. Use strong contrasting tones as you would with paint or a pencil drawing.
I added shadows by overlaying and shading over the top using bright blue and charcoal grey.
 Once it was all coloured in, I added water to activate the colour. I used a range of brushes including the SAA new silver detailers. These now come in several different sizes and are brilliant. I used a worker brush for the larger areas and each of the detailer brushes for the more detailed parts.
If you can still see the drawing marks use more pressure with the brush and gently move the colour. You will find this works more easily on smoother surface eg NOT or Hot pressed paper.
 If you like the texture of the drawing marks…don’t go over it too many times. Rough paper produces the best results for this method.
If you need to add more colour, wait until it is dry and then add more and re wet the surface as before.
I hope you enjoyed my blog.
If you’re interested in signing up for video lessons in either Watercolours or Acrylics, or one off workshops just email Ali Hargreaves: ali@alisart.co.uk