The more I paint the more I enjoy experimenting and discovering the different marks that can be made with my brushes. I am also trying to get away from being too representational and find that starting a painting with a big brush prevents me from being too rigid or fussy. Even if I go on to use smaller brushes for adding detail later, the big brush enables me to cover my canvas rapidly, allowing me to get on to the fun bit very quickly!
Although the canvas comes ready primed, I nearly always add a layer of primer with a medium tone before I start. I used a light grey, and included a texture to my primer. Here I used ash which adds colour and gives an unpredictable texture that I love.
 Starting with the 3” Paddle brush, I mixed Ultramarine Blue with Burnt Sienna and some White to give a warm grey. I added a little water to the mix – I don’t want it to run, but just to cover quickly. This was used to indicate the bushes at the base of the trees. I then added some more Ultramarine and White to suggest the beginnings of the shadows coming forwards.
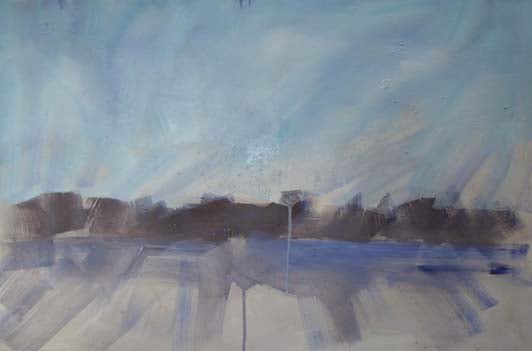 The sky was started with a mix of Ultramarine, Phthalo Turquoise and White. I added a rough layer of this mix, concentrating on the top third of the sky area as the rest will be painted over next using a mix of the paint with barely any water. With the paint left in the brush and a little water, I painted down to the bushes, but very quickly as most of this area will be painted over in the next layer. I allowed this to dry to avoid making green when I add yellow later.
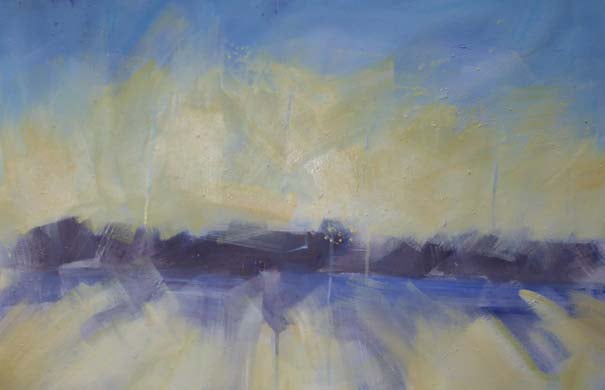 I mixed a light gold from Yellow Ochre, Lemon Yellow and White and painted this on the bottom two thirds of the sky area, and into the foreground where the light reflects on the ground. It is important when you are cleaning your brush to remove most of the water or the paint will be too thin.
 Next, to indicate the sunshine glowing through the trees, I used Titanium White to create an area of shine. This was achieved with a few broad strokes with a thicker coat at the centre, and was faintly mirrored in the foreground. I then added an area of warm coral above the shrub line, created by mixing Lemon Yellow, Brick Red and White. I also toned the shrub line down with a lilac grey with a mix of Ultramarine with a touch of Red and White. I have still only used the 3” Paddle brush.
 Now for the trees! I did quite a lot of this with the painting upside down and a little extra water, allowing any runs of paint to add to the branches rather than flowing all over the painting, and used the edge of my Paddle brush. I started
with the same lilac grey used in stage 4 to paint thin lines for the distant trees, then used several versions of this colour to give the impression of trees at different distances, making the colour darker and stronger as the trees get closer.
 Using the same warm lilac greys I started adding the tops of the trees, now keeping the paint very dry and my strokes light. This allows some of the blue sky to show through and gives a light canopy. I also splashed some paint on too, after picking up some extra water on the brush.
 So far the whole painting has been created with the one large Paddle brush. It is now time to add a few finishing touches. I used the SAA 11/2” Big Flat and 1/2” Flatmate to create some finer details of grasses and twigs. I then added a warm mix of Rouge and Brick Red at the base of the trees, also adding some of this warm colour, toned down with White, into the shrubbery and on the tree trunks. I also reflected this onto the ground bringing some of the warmth forward. The finishing touches included putting a white highlight on the tips of the shrubbery in front of the sunburst and adding some texture in the foreground.
Although the reference photo is a winter scene, the finished painting could be any time of year with the low sunlight and long shadows. If you wanted to make the scene more summery you could add a few more greens and lemons in the front of the trees. I have used warm greys to represent the thin branches but it would be easy to use soft greens to change the season.