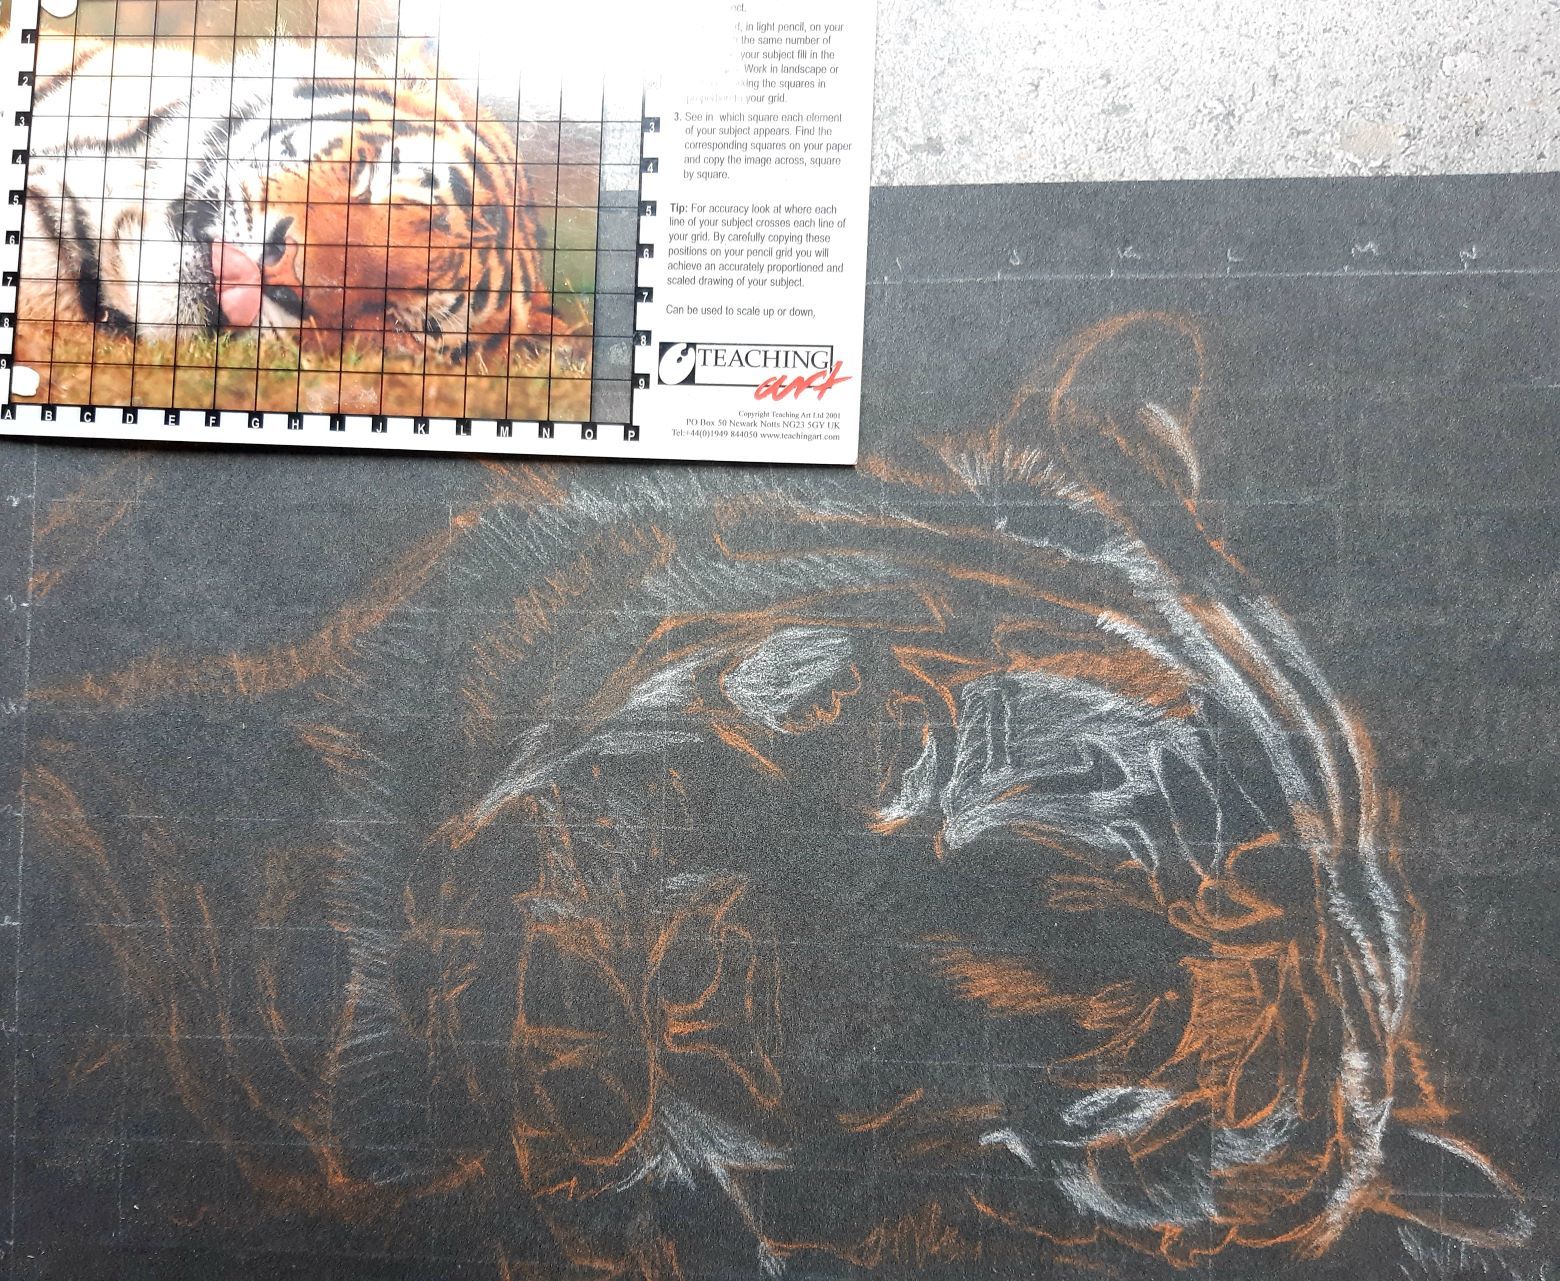
 Using a white pastel pencil I lightly sketched a grid on Pastelmat paper. Pastelmat is one of my favourite surfaces. It has a good tooth but is not abrasive to touch so doesn’t eat your pencils or your fingertips like some other papers. I prefer to work on coloured surfaces and here I have chosen ‘Anthracite’ colour Pastelmat. I used a scalefinder to cover my tiger photograph and now follow my gridded photo in order to scale up (1cm to 1inch to keep the maths simple). I found it easier to use 2 colours (White and Orange) here to help me see the tiger’s stripes.
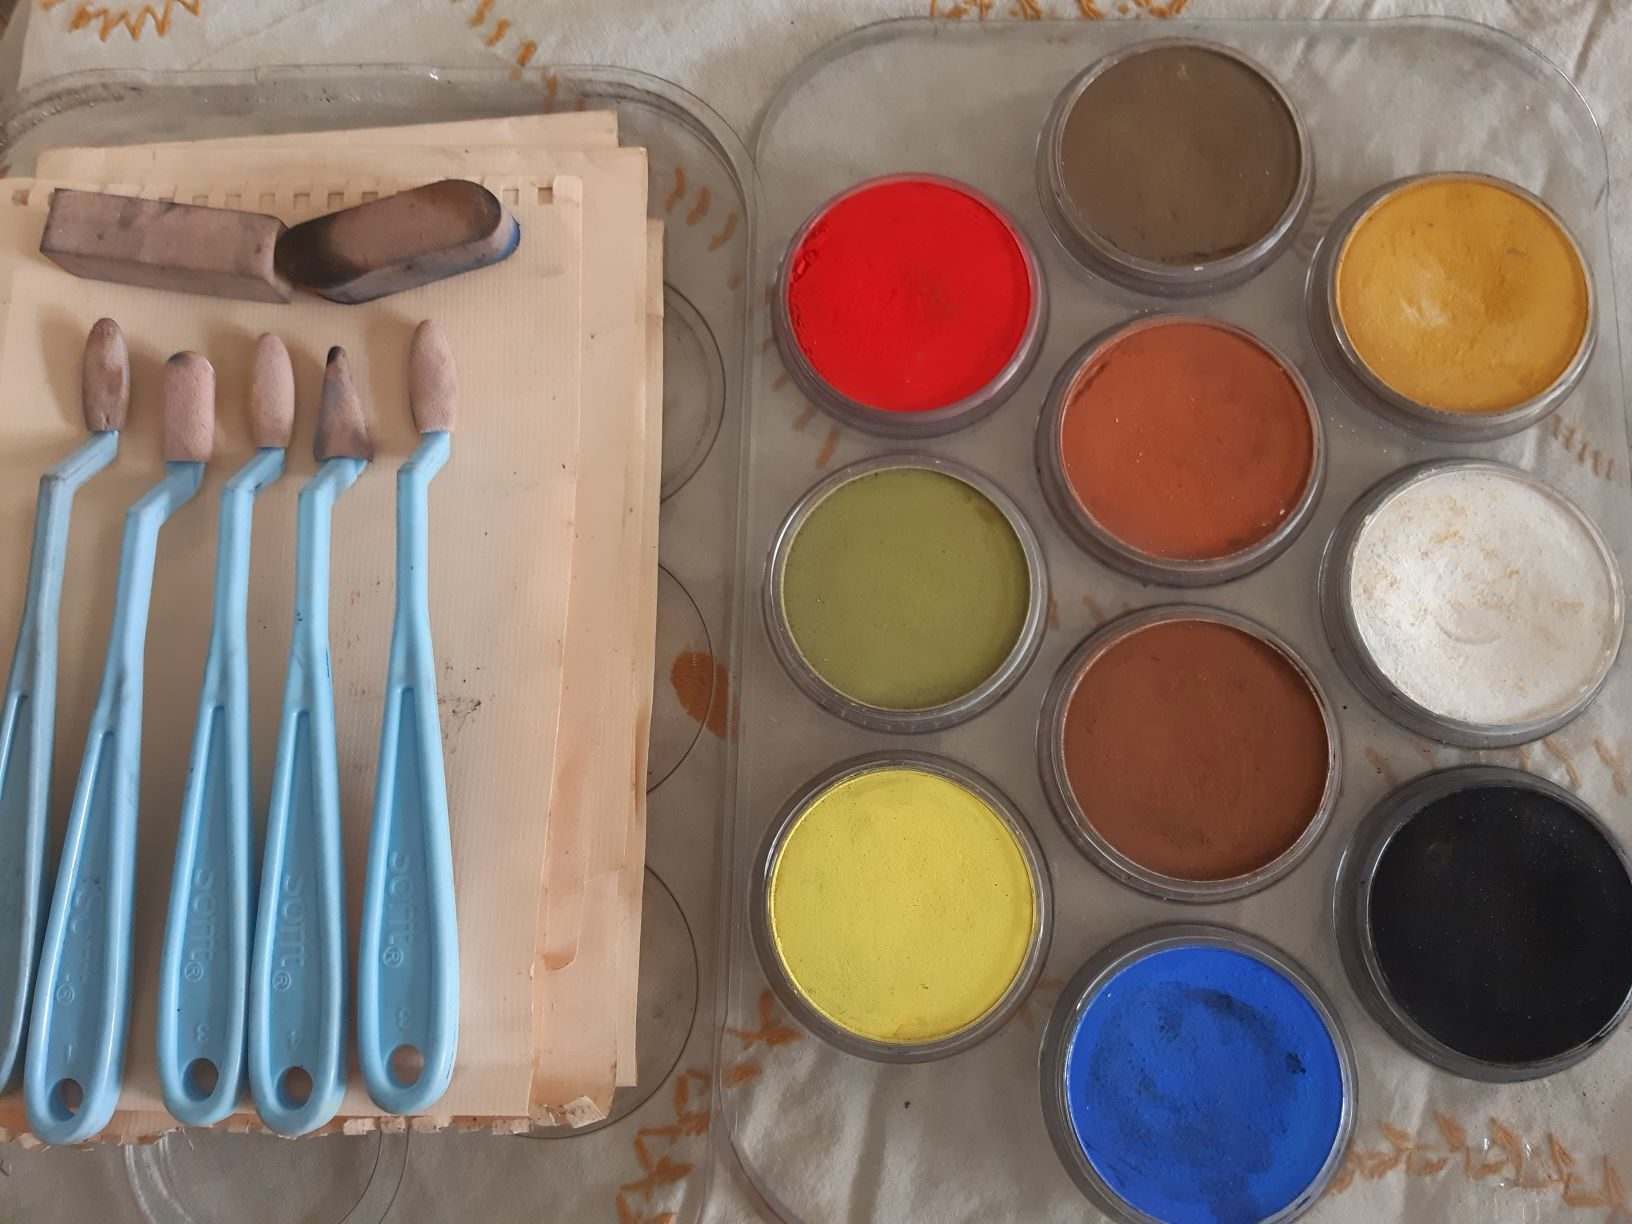 Pan pastels were used for the base, applied with sofft sponges and sofft knives. I’m very fond of these pan pastels especially for backgrounds and under painting. The large sponge bars replicate fingers and are great for applying pan pastel to larger areas. The Knives are good for smaller areas and allow more painterly work. The socks on the end of each knife can be changed. Obviously, you’ll want a number of these knives handy otherwise you’ll constantly be changing socks to paint different colours.
 I started painting with my lightest tones so that my tiger takes on shape and form. (If I was on light colour paper, I would’ve painted the dark areas first). Working with these pan pastels is a little different to working with regular pastels. They are loaded with colour. Thin layers show up quickly and don’t overfill the tooth of the paper. This allows pastel pencil work on top of pan pastels which is what I enjoy doing. Using the sponge bars I have very quickly blocked in my light tones. (White, Burnt Sienna).
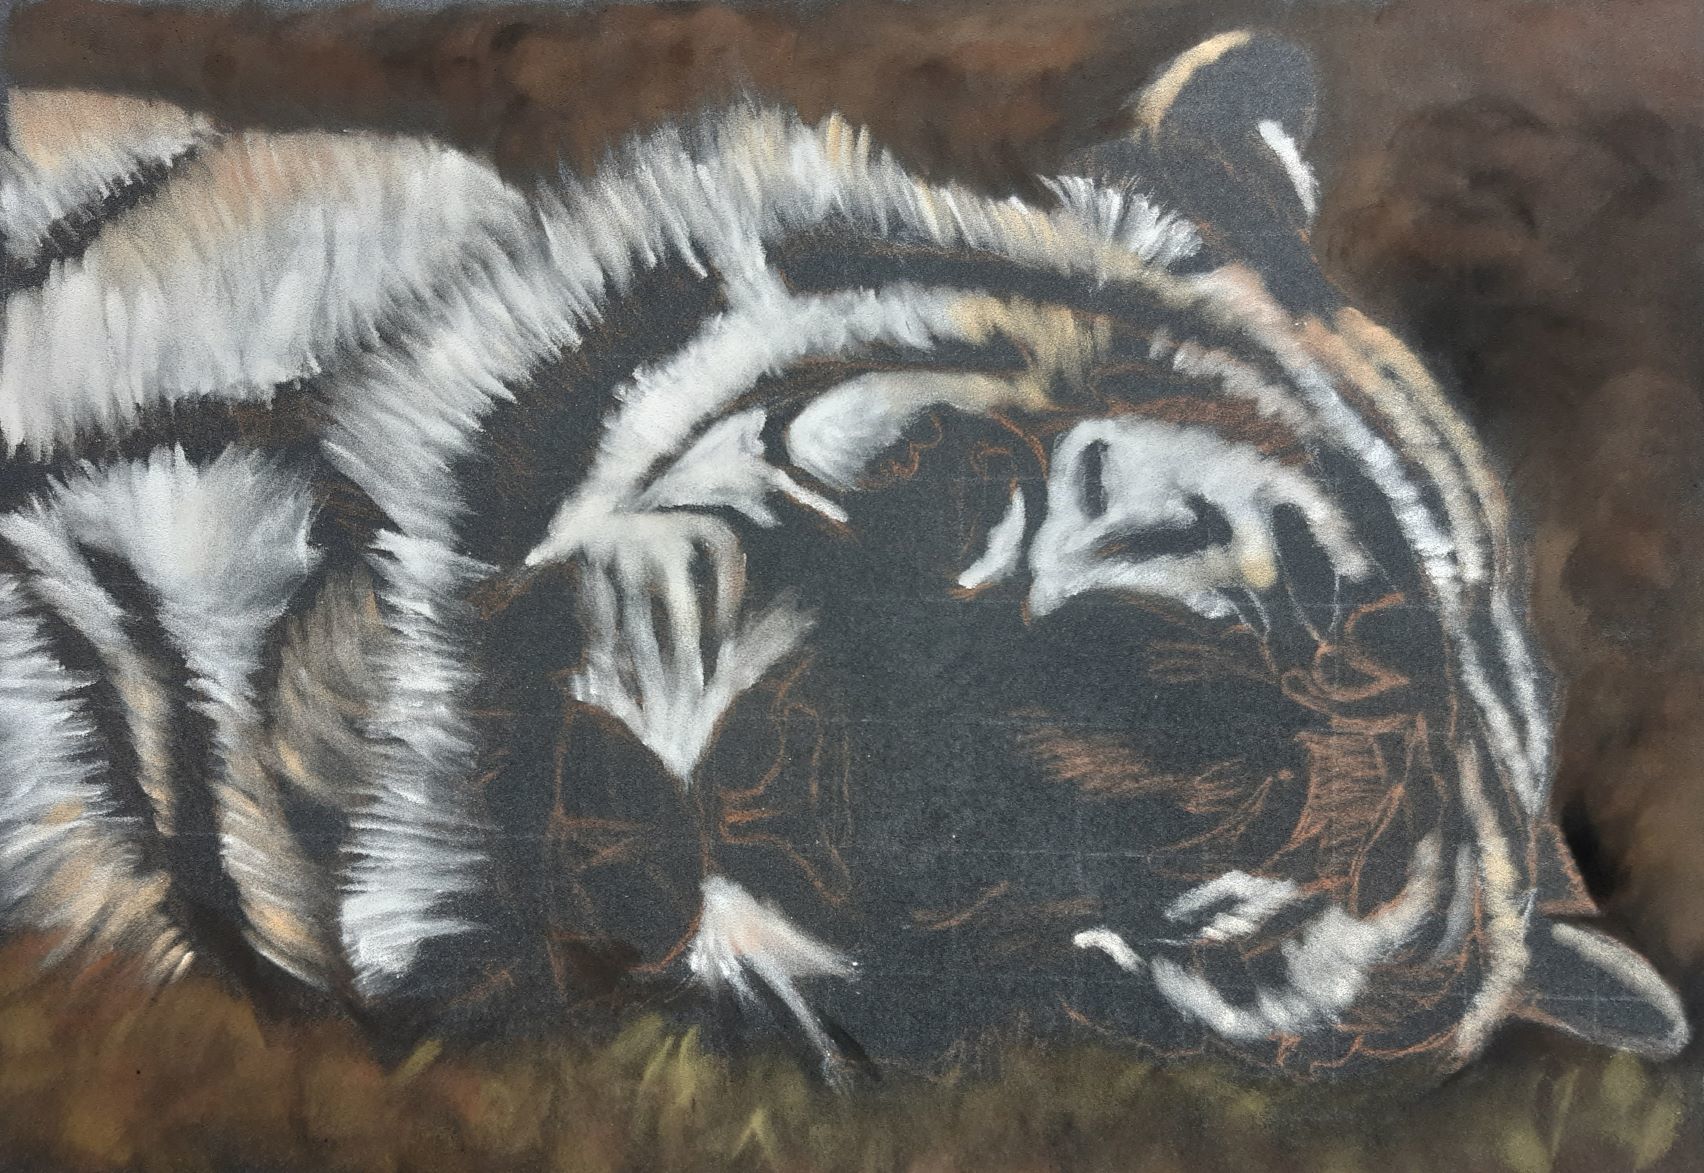 I painted a little background (Burnt Sienna Shade, Raw Umber, Bright Yellow Green) using the large sponges. It’s better to do this now so that the fur can be painted over the top of background and not as an after-thought. You can mix colours on your painting or on the pan itself. I like to do something a little different. I mix on a separate piece of cheap paper which acts as a mixing palette.
 I have used my pan pastels to roughly block in the tiger, mixing colours on my scrap piece of paper where mid-tones are required (Burnt Sienna, Yellow Ochre, Black, White). Using this paper as a palette, I pull colour when needed. I’ve taken care to use different knives for various colours to prevent muddiness.
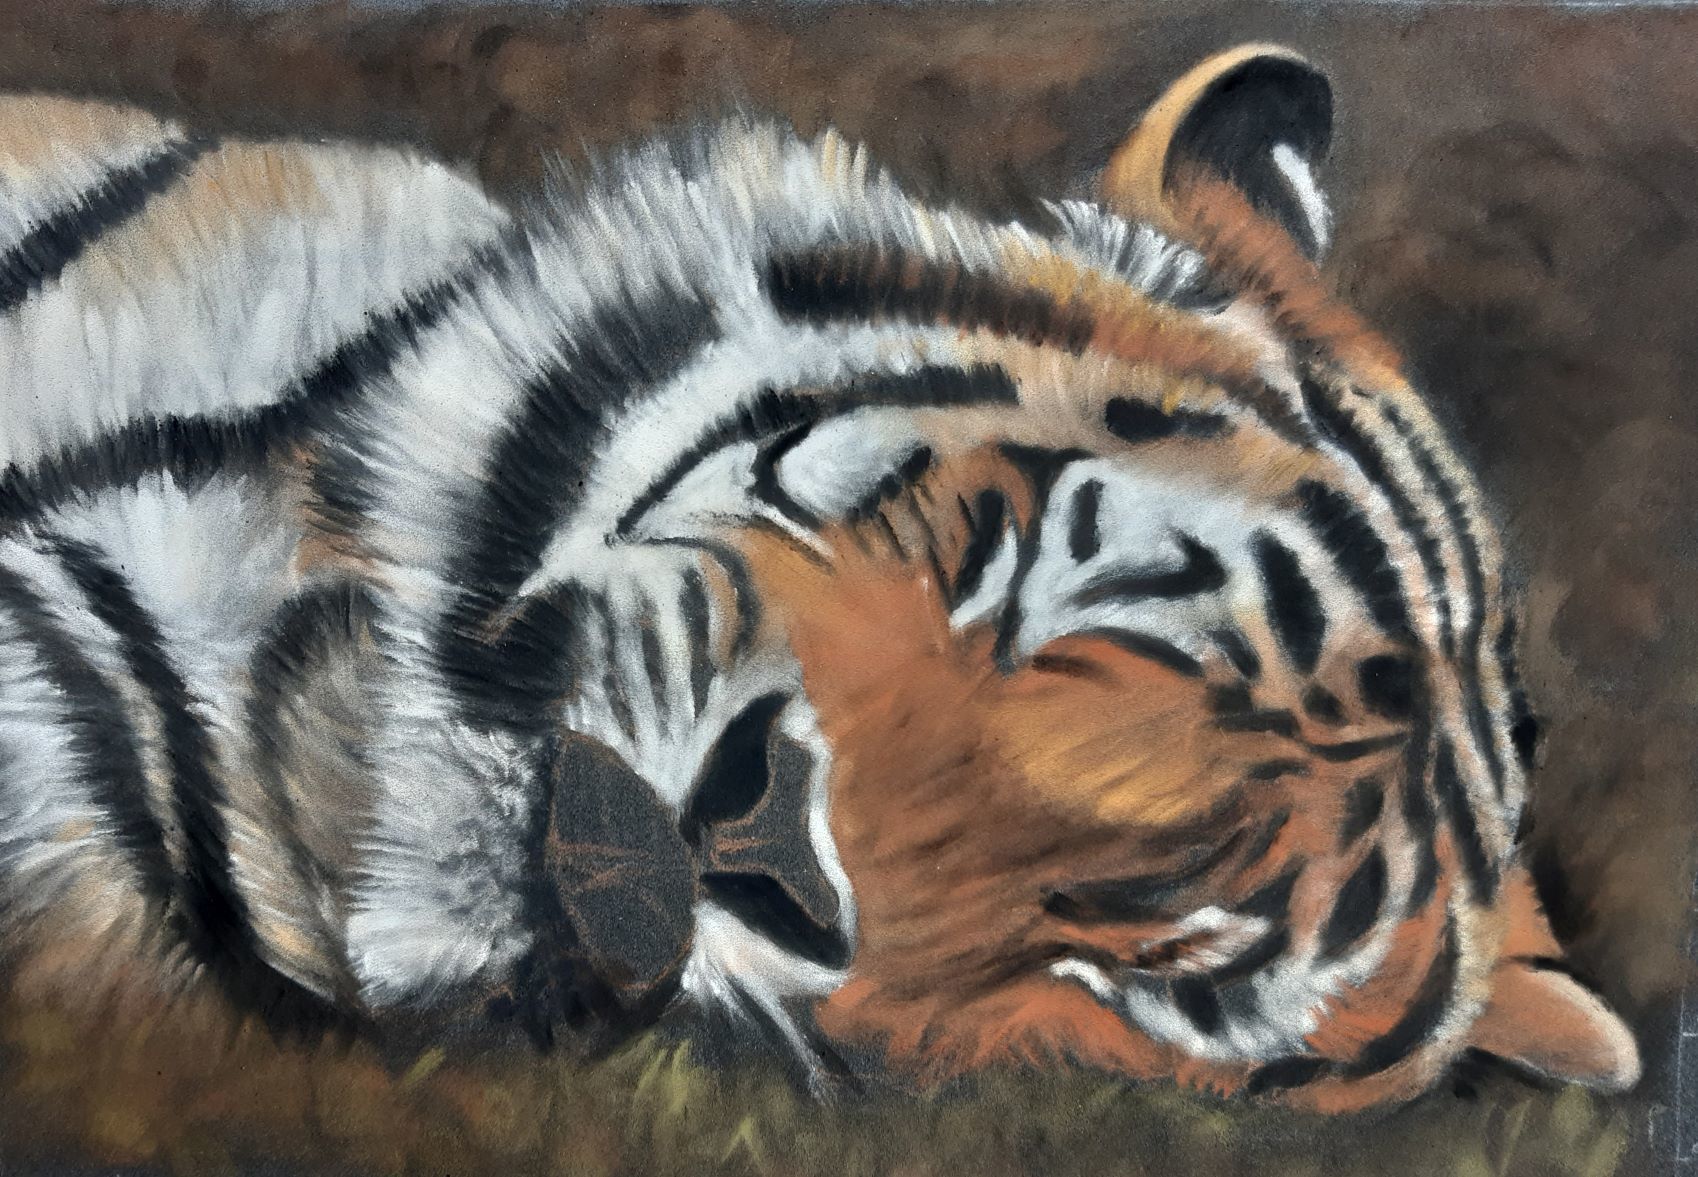
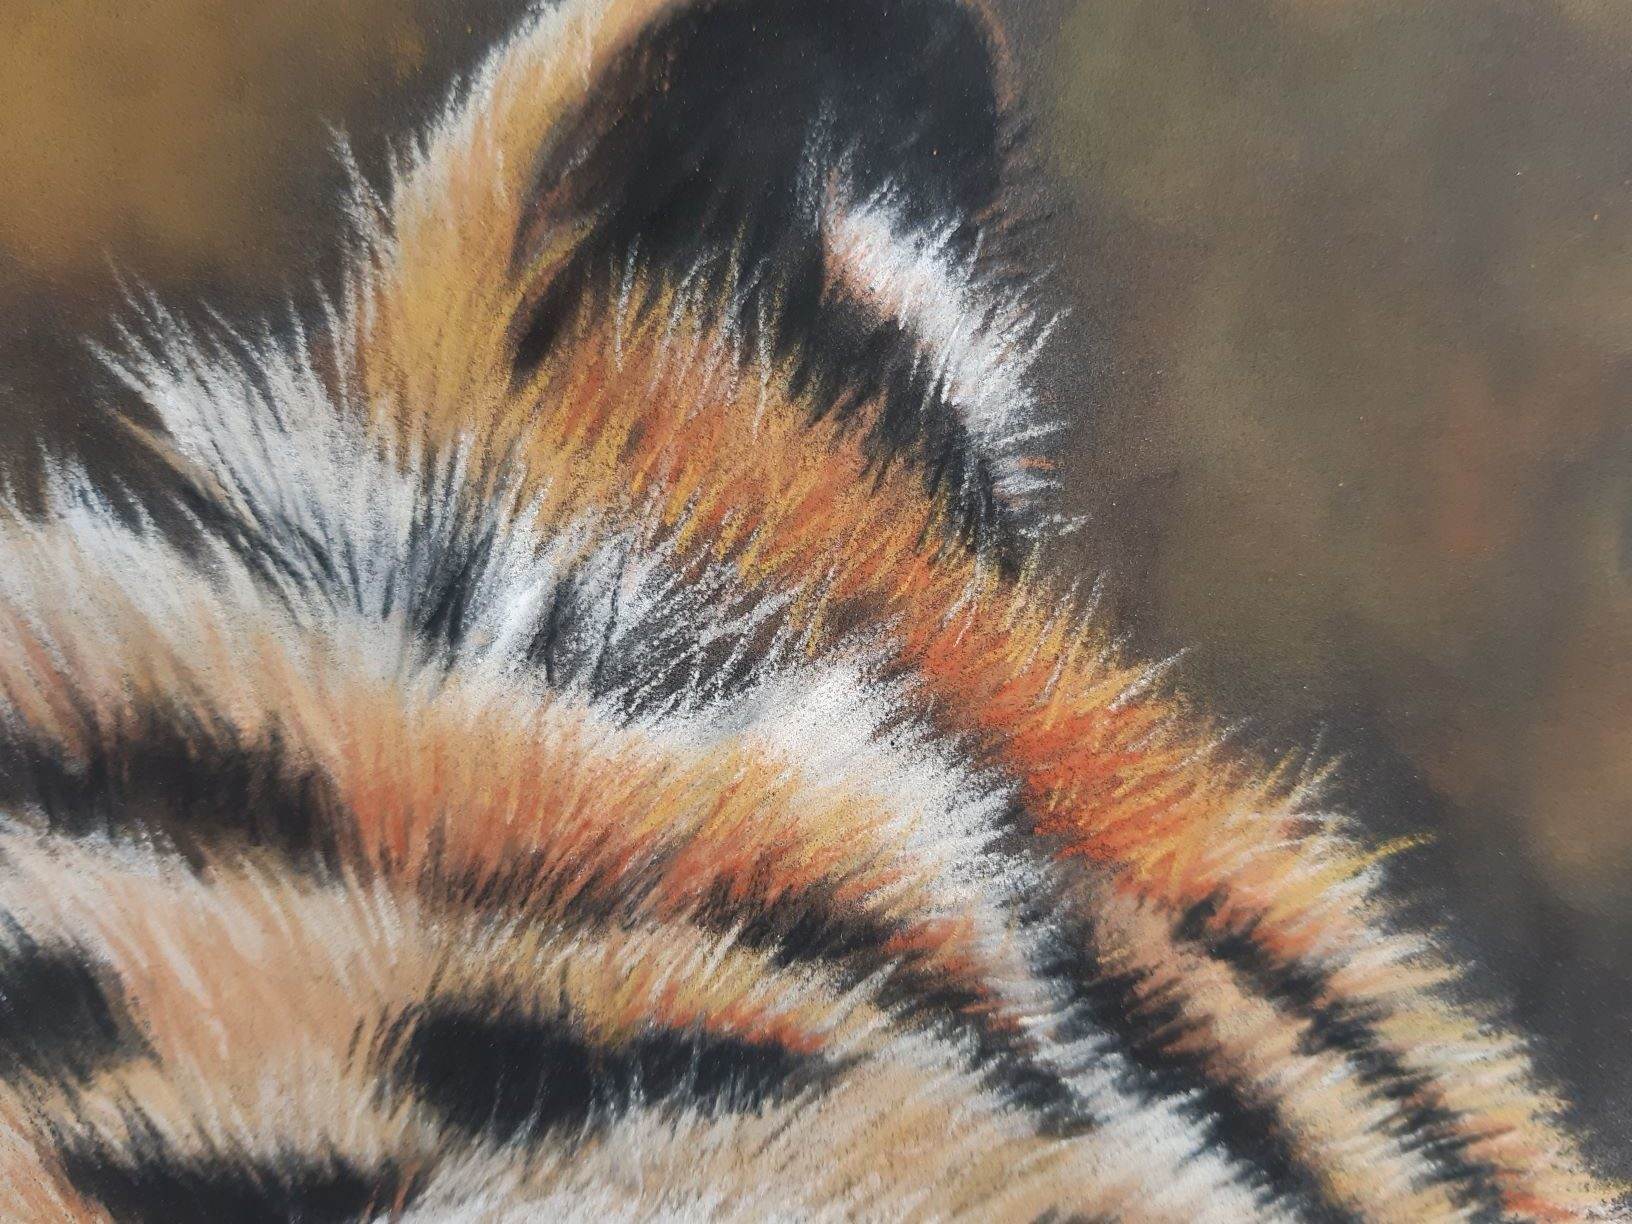 I Now it’s time to bring this tiger to life. I use my sharpened pastel pencils to enhance the fur and add realism. (White, Orange, Yellow, Black).
 I have reserved a few SAA pastels from my box for the tongue and nose. I have used pastel sticks as I want more intensity of colour than my pencils offer.
The finishing touches. Added highlights, whiskers, tidied up the background and sharpened marks.
Finally, I signed the painting with a sharp pastel pencil.