Sue Williams suggests that painting indoors in the winter (or during lockdown!) gives us the opportunity to keep on improving our paintings, ready for better times.
 There are so many subjects to paint: the view from the window, indoor plants and still life. I enjoy painting vegetables and fruit, just as studies, but they also make great paintings to hang in the kitchen! Just painting simple vegetables gives us the opportunity to think about how we design our painting and to explore painting light and shadow. Painting texture could be practiced by painting something matt, like a turnip, contrasted with a shiny object like a red onion. Brussels sprouts or cabbages are good for experimenting with mixes of green, which will help with summer landscape painting
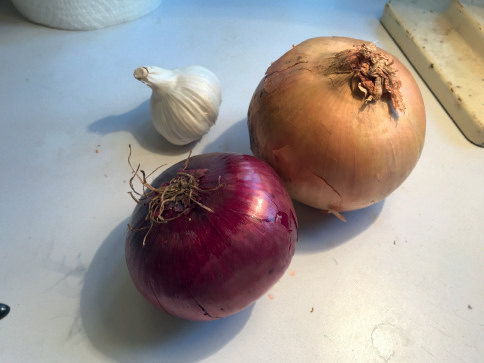
 I experimented with different set-ups for my still life and used a desk lamp with a daylight bulb to throw interesting shadows.
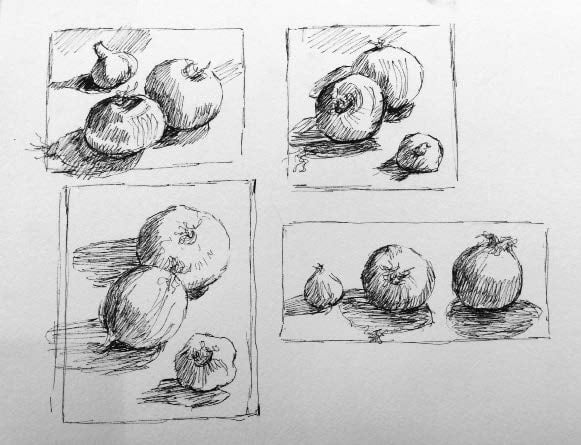
Starting with a few quick studies can help you decide on a design – rectangular, square, vertical or long horizontal, for example – and will familiarise you with the shapes and patterns of light and shade.
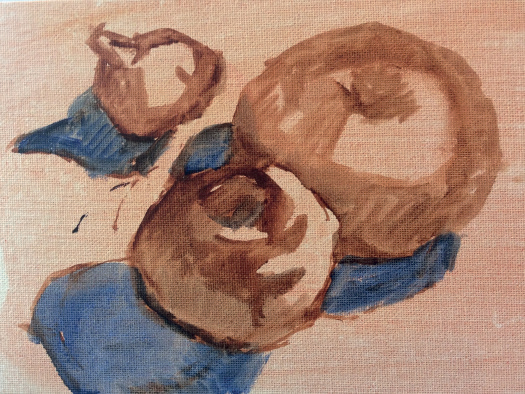 Using both straight and curved lines, I drew the vegetables with a Size 4 Flat in Burnt Sienna, diluted with a little medium. For a darker colour, add a little Ultramarine to the Burnt Sienna. I then added the shadows using the Size 10 Flat, with Ultramarine or Ultramarine with a little Burnt Sienna – both are useful as a shadow colour at this early stage. Use the oils like transparent watercolour and don’t add any White yet. Once White is added to a painting it is difficult to paint dark colours on top.
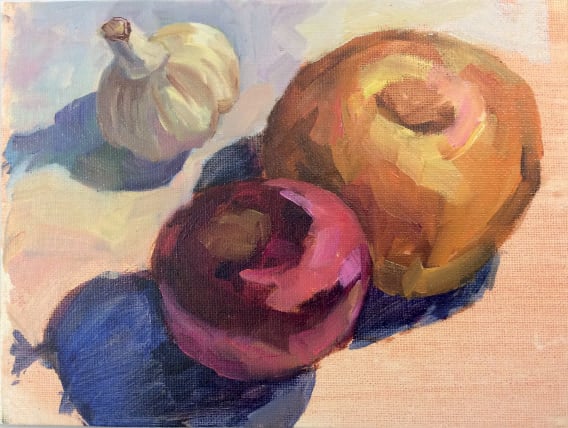
 With the shadows established – and using the paint neat, without any medium – I started to build up the colours using the smallest amount of White in the mixes to make the paint more opaque. The red onion was painted with Quinacridone Magenta, Burnt Sienna, Ultramarine and Cadmium Red and a touch of White. Violet is useful for shadow areas on the red onion but only use a little as it is a strong colour. The yellow onion was painted with Clementine, Yellow Ochre and Burnt Sienna, and Violet mixed into Burnt Sienna for the shadows. I applied the brushstrokes around the onions as well as downwards.
 With the shapes now described with colour, I started to add detail using my two Size 4 Flats. I kept one for darker areas and the other for lighter areas, wiping them clean when changing colour to keep the mixes fresh. I looked for the ‘shines’ and added reflected light from the table onto the underside of the red onion, using Quinacridone Magenta and White. For the yellow onion I used Yellow Ochre with White for the reflected light. Be aware that reflected colour will never be as bright as the highlight on top of the onion. The red onion reflects colour up into the yellow onion, as well as down onto the table and across to the garlic.
 The garlic was painted with quite a mix of colours; Clementine, and Yellow Ochre with White for the lights and Burnt Sienna with Ultramarine and Magenta for the shadows. The garlic looks white, but needs colour in it to look believable. The direction of the brushstrokes describes the shape. I used Sea Blue Deep with White and a little Magenta to start to build up colour in the background, keeping it bluer behind the garlic to show off its yellow-white colour.
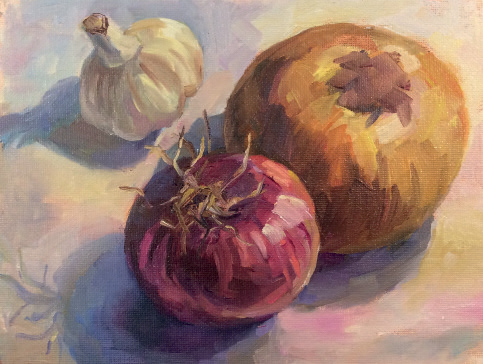 Continuing to work on the background, I kept the colour warmer towards the light and at the front of the painting, by mixing pale pink and yellow colours from White with Clementine, Red, and Magenta to indicate where the onions are reflecting colour onto the table. The highlights are the lightest part of the onion and go around the top and downwards. White with a little Magenta is useful for the red onion, as well as White with a little Cadmium Yellow in places. White with Lemon and White with Cadmium Yellow were used to make the shiny highlights on the yellow onion. 6
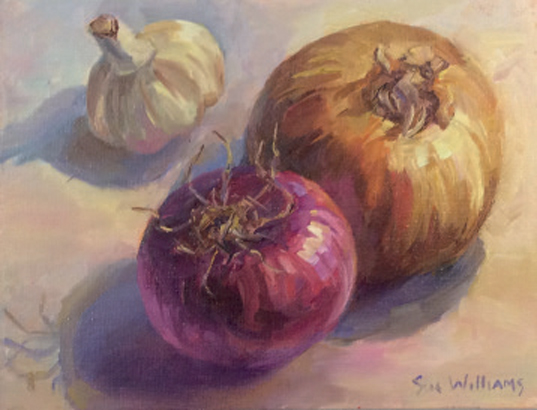 The shadows were softened and lightened by adding White to the mixes, and made more subtle by gently blending their edges. I used Sea Blue Deep, Magenta, Burnt Sienna and a tiny bit of Clementine. The shadows have colours reflected from the onions and garlic. Finally I added the fine roots using the Rigger and a couple of different colours that had been used to create each onion.