
Whilst staying in Bali and surrounded by exquisite scenery, Michele took the opportunity to paint en plein air as much as possible. Here she shares her process so you too can capture a moment in time while out of doors, or just to have a go at Michele’s painting yourself.
If you’d like to see more of Michele’s work you can visit her website: www.micheleilling.co.uk
I was very fortunate to be staying in Bali earlier in the year. Whilst there I took the opportunity to paint en plein air as much as possible. There were temples everywhere: very beautiful local ones and also some famous touristy ones and, one evening at sunset, I managed to do a little line and wash sketch of Tanah Lot Temple – an ancient Hindu shrine perched on top of a rocky outcrop surrounded by the sea.
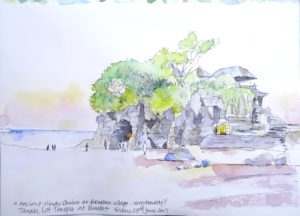
My sketch was the inspiration for the finished painting, done on location in about 20 minutes. Just a quick colour sketch of the scene as I saw it, without much detail. There were too many tourists to put them all in and besides they weren’t the main feature! I also took snapshots of the scene, knowing they would be a great help when I came to do my finished painting. Photos make excellent colour references as you probably won’t have taken the exact colour with you in your limited pack, and they will all help to remind you of the scene, the weather, light effects etc. The idea when working up a sketch is to make your painting interesting, well-structured with thought to composition and colour. In short make your painting work. You must feel free to leave things out or add things to make it better.
1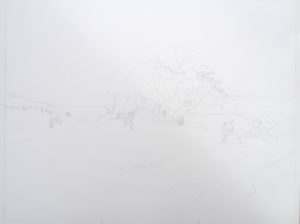 I worked on RWS 200lbs Hot Pressed watercolour paper taped to a board. I wanted to keep the drawing simple, however there are some tricky areas that I needed to get right. I was combining several elements from different sources: photos, colour sketches and drawings, so I did a few simple thumbnail sketches to work out what I wanted to include in my painting. First I needed to consider where to put the horizon line. The horizon line is critical in landscape painting as it determines how much sky you are going to show, versus how much land. I really wanted a dominant foreground to this so, basing my composition around the rule of thirds, I drew my horizon line above the centre, and the temple itself about two thirds in from the righthand side. However, I kept quite a bit of sky at this stage as I wanted to decide where to crop it when the painting was finished.
The beach is relatively flat and the drawing is being done from the perspective of a person on the beach in a slightly elevated position. There were a lot of people milling around, far too many to paint, but I needed to include some of them to add interest to the painting. Figures need to follow perspective and obviously those in the foreground are going to be larger than those in the distance. When drawing figures as small as this, it’s important not to try and put in too much detail. In fact you can get away with drawing very simple shapes, just don’t make their heads too big or try and put in features!
2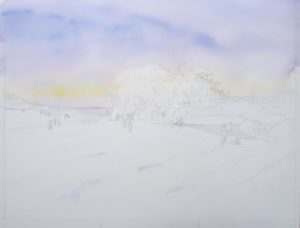 After doing the drawing the first step was to paint in the sky. Using a large mop brush, I wet the sky area down to the horizon with clean water, then dropped Cadmium Yellow near the horizon, a little Quinacridone Magenta around that up to the top of the sky, then quickly dropped in some Indanthrene Blue from about two thirds up. I then lay in a little Indanthrene and Magenta to the foreground pools.
3 When this initial wash was dry, I went back in to strengthen the sky a little and added the distant land mass.
4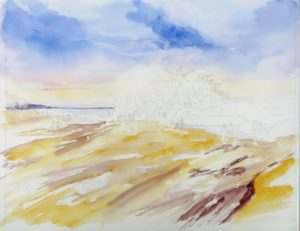 Without wetting the paper, I started to build up the foreground whilst the sky was drying, using Titanium Gold Ochre and Caput Mortem, letting the colours mix on the paper using strong directional strokes with a large Chinese brush, leaving a few untouched areas of white paper. Then I let this dry so I wouldn’t lean and smudge it.
5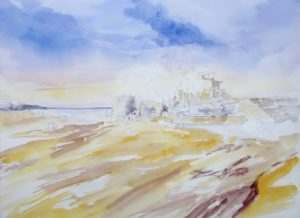 Next I started to build up soft washes for the temple using Titanium Gold Ochre, Caput Mortem and a purple shadow mix of Indanthrene and Quinacridone Magenta, again letting the colours mix on the paper. Remembering to go carefully around the figures and the lighter rock shapes and leaving the odd highlight unpainted.
6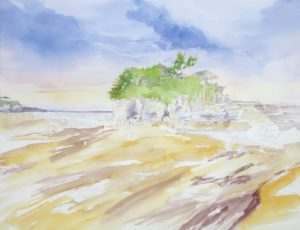 Next I put in some washes of Sap Green and a little Winsor Green for the trees and foliage on the temple and distant land mass.
7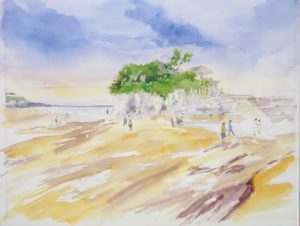 Now that the main colour areas and initial washes were in, it was time to build up with stronger colour and tone. I started to build up some darker areas to the trees, adding a little Indanthrene to Sap Green. I then went on to paint a few of the figures. A couple of quick irregular brushstrokes starting from the figures’ face, arms and legs is all it needed, with Titanium Gold Ochre and a little Caput Mortem, finishing with a touch of colour here and there to indicate clothes.
8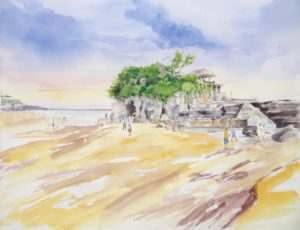 Using the same mix of watercolours that I used for the temple in the initial stages, but making the consistency stronger and adding a little Neutral Tint, I started to build up shadow areas and areas of darker rock. Again I made sure I went around the figures and kept some highlights. In some areas, I used a slightly dry brush to indicate the roughness of the rock.
9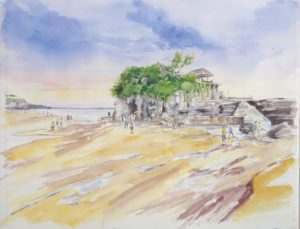 I felt the painting was almost there – it just needed a few tweaks! I lay some soft shadows on the beach and added some more colour to the pools in the foreground and painted the remaining figures, being careful not to overwork.
10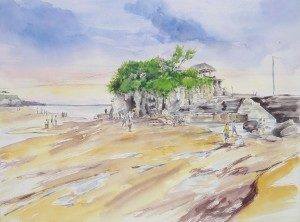 For the finishing touches I just needed to dash in a few more semi-dry brushstrokes of Caput Mortem to the foreground and put in one or two remaining details to the temple. I put in the line coming in from the left edge of the paper to lead the eye into the painting and decided to leave it there. The painting was done!