
I hope you are tempted to try your hand at painting this scene and look forward to seeing the results.
1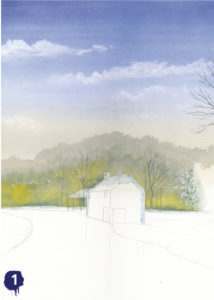 Do a simple outline sketch and add masking fluid to the building, the edge of the large tree and across the horizon line.
While the masking fluid is drying mix up the following washes:
– Natural Blue for a realistic sky
– a pale, watery Natural Yellow, for the base of the sky
– a pale watery Natural Grey, for the top of the distant trees
– a dark green, mixed from 20% Lemon Yellow and 80% Natural Blue, use plenty of water
– a bright green, mixed from 50% Lemon Yellow and 50% Natural Blue
– Natural Grey for the misty tree trunks and branches
To start painting, wet the top part of the paper, down to the masking fluid, using the size 14 brush and painting in horizontal strokes, then apply the pale Natural Yellow first in the lower half of the sky, followed by the Natural Blue from the top, working down to meet the Pale Yellow. The trick is to make these colours blend together, creating a gradient sky. At this stage, while it is still wet you could use a piece of kitchen roll to roll out a few clouds. When dry, use the medium Tree and Texture brush for the distant trees. Note how the trees are grey in the distance, so start with the pale watery grey mixture. Then move into the dark green and finish at the bottom with the bright green. While the tree area is slightly damp, use your rigger brush to paint a few misty trees in Natural Grey.
2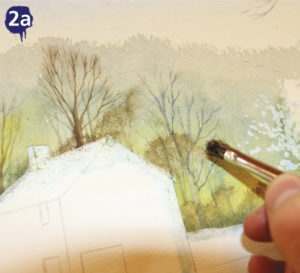
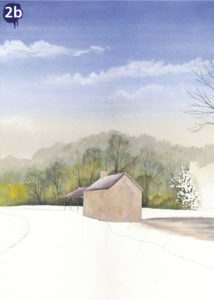 Once all the background is dry, using a darker shade of brown and grey, paint in the mid ground trees (a mixture of Natural Grey and Burnt Sienna). Take your time to create layers and layers of different height trees. Next remove the masking fluid, just by rubbing it with your finger or use SAA Maskaway, then use a pale Natural Yellow and your size 6 brush to paint the walls and chimney and Natural Grey for the roof.
3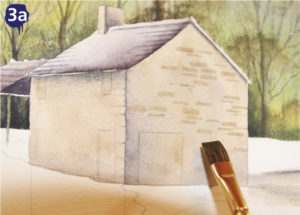
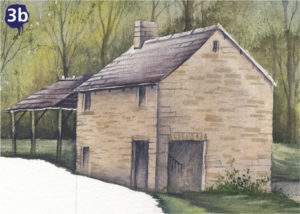 To add detail to the building start with a pale Natural Grey and your size 6 brush to paint the shadow/darker side of the building. Natural Grey is my own pre-mixed shadow colour, Paynes Grey will not have the same effect here. Take your time adding lots of detail to the building. A flat brush is great for painting in the random brick-work, use a pale Natural Yellow for this.
4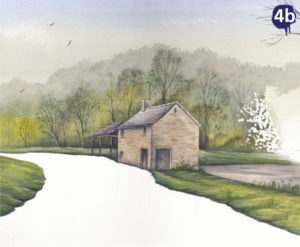
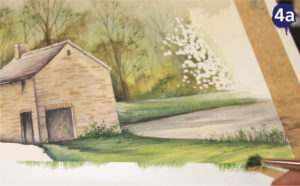 Paint the grassy banking with two strong mixes and a size 6 brush:
– a dark green, mixed from 20% Lemon Yellow and 80% Natural Blue
– a bright green, mixed from 50% Lemon Yellow and 50% Natural Blue
5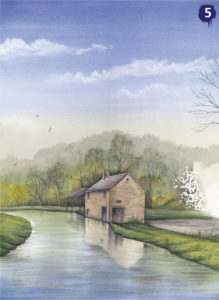 To paint the water, you are actually painting the reflections because water is transparent.
You should have the colours already in your palette:
– Natural Blue
– a dark green
– the stone colour from the building
– Natural Grey
Begin by wetting the water area, after all water should be wet! Paint the sky reflection first, using the size 14 brush and begin from the bottom of the paper, working upwards in horizontal strokes. Try to get this to fade to nothing. While the paper is still wet, paint in some green, again using horizontal brush strokes at the furthest point of the water and at the front right. Again, while the paper is still wet, use a smaller brush to paint the building reflection in the Natural Yellow. Loosely try to mirror the building, painting it in the same way you did the building itself, then change to Natural Grey for the shadow side and the doors. Complete this stage by adding random horizontal ripples with Natural Grey to add some movement to your water then leave to dry.
6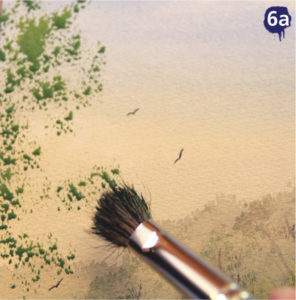
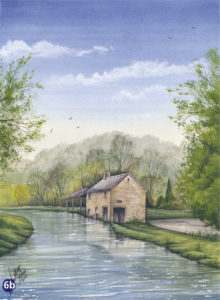 The final stage is my favourite – I love painting trees and adding all the detail, this is when the painting comes alive.
The green for the two large trees is:
– bright green: 70% Lemon Yellow and 30% Natural Blue
– shadow green: 40% Lemon Yellow, 50% Natural Blue and 10% Burnt Sienna to add just a touch of darkness to the green
Use the large Tree and Texture brush to mix up a lot of this strong mixture, tap off the excess paint from the brush and gently tap or stipple the flat part of the brush onto the painting. As always, take your time. Keep looking back at the shape of the tree as its composition is everything. Try to blend this into the area where the masking fluid was. I used a damp size 6 brush to do this, just gently blending the paint with a touch of water. Once this first coat is dry, use the small Tree and Texture brush to add shadows to the tree – note the depth this creates. Use the shadow colour and lightly tap a random wiggly line, then clean the brush in water, and just using it damp very gently tap the shadow green away, moving the brush upwards as you go.
Finally a few finishing touches:
– stipple some neat Lemon Yellow over the large trees for extra detail
– add dark branches to the tree with a Burnt Sienna and Natural Grey mix
– use the Opaque White with a rigger brush to give light to the water, a few ripples and sparkle
– oh and don’t forget the birds