
 When the world’s a little grey, the perfect thing to do is add your own colour and brighten it up! I’ve grabbed my new Inktense Paint Pan Studio Set and thought I’d draw a Macaw. Versatile and bold, the new Inktense Paint Pan Studio Set boasts 24 colours that are permanent once dry but allow you the opportunity to add fine detail and texture with ease.
Like all my pieces, the best place to start is with an outline sketch of my chosen animal. After I have lightly sketched the parrot’s basic shape and outline, I began to add colour. It’s best to remember here is that animals, like all things, aren’t a single flat colour. They are full of depth, minor tonal changes and shape. This is one of the best things about the Inktense range, when one bottom layer dries, you can add colour on top – which gives you an opportunity to create unique colours.
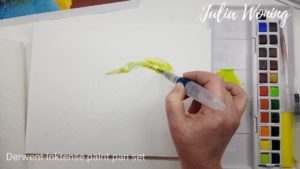 I build the parrot layer by layer, starting with a light layer and working darker and darker. Firstly, you’ll see that I began with a base layer of yellow before mixing in some green shades in the wet layer. Then – just wait until that layer is dry. Ideally, this will give you an opportunity to plan your next steps! If you don’t want to wait, you can layer wet on wet, but this will give you a more washy effect than working wet onto dry. Luckily, the Inktense Paint Pan Studio Set holds its vibrancy either way. Time to work in the blue feathers, using two blue shades and a deep green. In the video you can clearly see how I run the colours using a wet-on-wet technique in the wet layer.
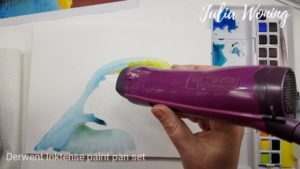 The flow of pigments is different than working with wet shades on dry paper. I’d recommend having a piece of scrap paper at your side to see for yourself the difference in working in varying styles – you might just stumble across a new way of working! For me, I wait until the piece is dry and enhance that by using a hairdryer.
The addition of this third Inktense Paint Pan Set to the Derwent Inktense Paint range, really gives me a wider variety of colours in all one place. The Inktense Paint Pan Studio Set includes the 12 colours in Inktense Paint Pan Set #01 and the updated 12 colours in the Inktense Paint Pan Set #02. Safe to say, I’m happy with the new 24 colour Inktense Paint Pan Set.
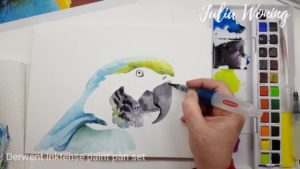 Once the main areas of my colours are complete, I began on the beak which has a slight shine to it. I start by mixing a dark blue and dark brown – nothing is just deep black. I haven’t used any black paint as my mixing technique gives the beak much more depth!
The dark feathers around the collar are also made up of many, many layers. This is time-consuming but worth it – giving a really soft texture to your feathers whilst adding a depth of shade. At least waiting between layers, you have time to make a cup of tea (or work on other pieces of artwork!)
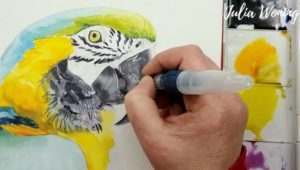 Then I put the yellow in the picture. What a difference that makes – contrasting really nicely with the blue shades already in the piece. It makes the blue ‘pop’ too!
For the last details, I apply the thin lines with white Inktense on the black beak – this is important as it also shows where the light source is in your piece.
And here is the final result!
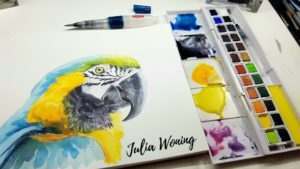 Good luck with practising with the Derwent Inktense Paint Pan Studio Set and enjoy creating – there’s always time to add a bit of colour to your life!
Thanks to Julia Woning for creating this fantastic piece and video for us! You can discover her work on her website, Facebook, Instagram or YouTube.