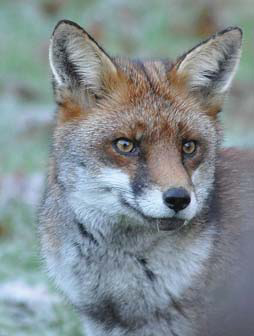
Photo courtesy of Malcom Rayner
For Alison Board, being a mixed media artist doesn’t just mean using a collection of different media and finding ways of making them work together, sometimes it means using just one or two and mixing up how she uses them.When I approached this project, I found I had two products in front of me; Inktense and Graphik, both made by Derwent and both aimed at producing strong colour and line. I decided to put them to the test and see if they would work well together, but using them in a way that was slightly different.
 Inspired by doing things out of order, I decided to start with my background. I used the Inktense sticks grated onto a palette and mixed them with water in three colours, Red Oxide, Payne’s Grey and Mallard Green. I then applied these puddles of colour straight onto the watercolour paper, vaguely in the areas where I thought there would be either background or fox, and while this was damp, grated a little dry colour onto the wash so that it diffused slightly to give a textured area. When this was completely dry, I drew my subject on top of the colour in an ordinary graphite pencil. Next I turned to Derwent’s Line Makers to start on the features and areas of importance such as the ears, eyes and fur. For many years I have been looking for a grey sketching pen and Derwent have obliged. Why grey? I have often wanted to put down a line but black was too harsh a colour and brown or sepia just didn’t fit the subject. As you can see here, the Graphite Grey is perfect for plotting where less prominent marks need to be placed but as the pen is waterproof, you have no concerns about it wandering off when you wet it.
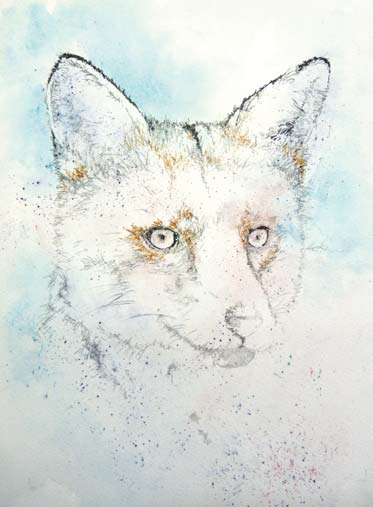 I didn’t want this painting to be all about the ‘colouring in’ – I still wanted to keep the spontaneity of my usual techniques but be able to exploit everything that Inktense can do. Therefore, I continued with grating the stick onto the fox head, spraying as I went to intensify the colour, and expanding my colour palette to include Willow and Antique White. It was at this point that the combination of pencils and sticks really came into their own. The pencils were great for any detail that was required for making a mark to simulate hair, and the sticks were able to give me a smoother finish on areas such as the eyes or nose. One of the best features of this product is that you can get the same colours in both the sticks and pencils so you can use your chosen colour to make a whole range of marks.
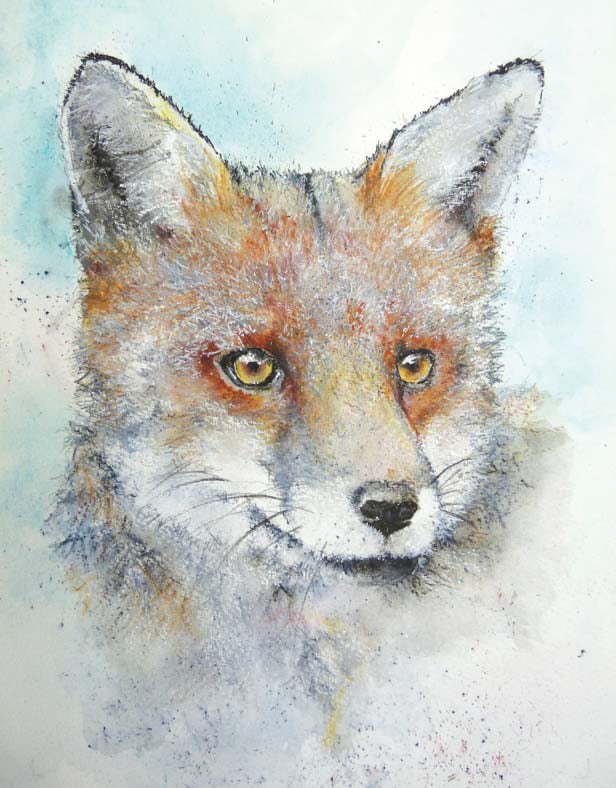
 When I’ve used water-soluble pencils previously, I’ve struggled to retain highlights and my piece has quickly got muddy, not only because of the number of colours I was using, but due to how much one needs to touch the paper to lay down the colour. This time, a solution was to be found with the Line Painters. These pens are incredibly versatile, delivering strong opaque pigment and, for this project, the Snow, Jungle and Graphite were going to be the perfect colours for my highlights and shadows. Again, I was mindful of just relying on lines to build up the texture so exploited the pump action in the pen nib to flood colour. I used this in two ways, the first being to deposit a puddle of colour onto a separate piece of paper then using a wet brush to transfer it and blend it out like a wash. The second method needs a little practice and a bit of nerve! In previous projects I have used a Rubber Dust Blower, originally designed for removing dust particles in picture framing, to blow the ink off the nib of a pen and here you can do the same. Flood the nib with ink by pumping it onto a scrap of paper and when the ink floods towards the tip, spray it on to your piece with the blower in your other hand. The effect is wonderful, random, fine lined highlights and was perfect for areas of my fox such as the ears and chest.
 I continued to use the pens, adding Magic and Bricklane to my portrait, using a variety of squiggles, dots and dashes for all the fine hairs and highlights but close to the end I felt the fox was lacking something. Usually I leave a painting on an easel in my studio for a few days if I’m undecided on the final touches, but I was keen to complete him so my husband and I sat with a coffee discussing what was needed. A second opinion helps when you have worked on something for so long that you can’t see what’s required. Richard suggested that he was too grey, even though he was obviously an older fox, and that his muzzle didn’t seem bright enough. I agreed but was concerned about over-working it. I needn’t have worried as, returning to my Inktense sticks, I used them dry, almost like a pastel, to lightly drag across the surface for those last few colour additions.
 Making a conscious effort to think about your tools differently can not only breathe life into products that you haven’t used for a while, but can also open up huge possibilities with your style and approach to a piece.
Have fun everyone!