
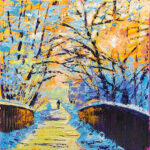
 Acrylic paints are a versatile medium; they can be used thickly like oil paints or thinned with water to behave like watercolours. They are wonderful for beginners as mistakes are easily corrected by painting directly over the top of previous layers, and they can be painted using brushes or palette knives, or both. You can paint on paper, card, wood, canvas boards or stretched canvas. For these paintings, you will use palette knives to create vibrant, atmospheric skies in acrylic. You can work with the canvas lying flat, at a slight angle or placed on an easel.

If this is your first time using a palette knife, or you just prefer video tuition, you can watch this member-exclusive series of acrylic sky paintings on our Video On Demand service here. In the video tutorial, Jamie demonstrates how to hold your palette knife as well as going into more depth at each step.
Watch the video
Squeeze out a generous amount of Medium Magenta and using a 50mm flat brush cover the entire canvas with a thin layer. Add a little water with a water spritzer to increase the flow of the paint. We need to see the grain of the canvas, so don’t paint this layer thickly. Allow this to dry.
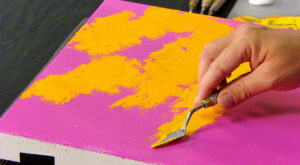
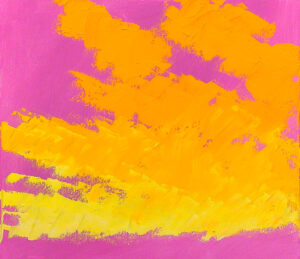
Load the No.5 palette knife with Cadmium-Free Orange, and with the knife positioned at an angle, drag the paint down from the top. Work quickly. As you move towards the horizon, add a small amount of Cadmium Yellow Light to the Orange on your palette and drag this across the canvas. Add in some Titanium White to create the lightest clouds across the horizon, blending the colour on the canvas.
 |
 |
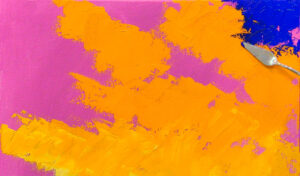 We can start to use a variety of blues to create negative shapes around the orange/yellow clouds. Using Ultramarine Blue loaded onto the No.5 palette knife, and starting from the top right corner, quickly and loosely fill in the gaps between the clouds, dragging the paint over the dried paint to create broken edges. Towards the left-hand side, introduce Light Blue Violet into the sky, dragging it down towards the horizon before finally adding Light Blue Permanent. Blend the colours on the canvas while they are still wet, allowing the tackiness of the paint to drag the paint off the palette knife.
Want to keep reading? This article is exclusive to SAA members, where you’ll also enjoy a wide range of benefits, including:
Unlock these perks and more by joining today! Become a member.
Mix Titanium White and Light Blue Violet on your palette and then scrape this mix onto the canvas using the No.5 knife to add lighter tones. Clean the palette knife with a piece of kitchen towel or cloth and mix up different light yellows and oranges using
This article is for members only. Please login or sign up to continue reading.
Notifications