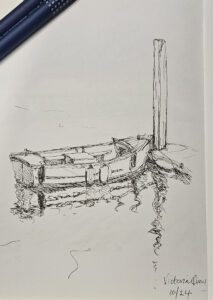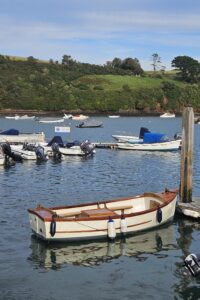
Reflections on water can be a tricky subject matter, but sometimes finding the right weather conditions and the right light can make for an interesting painting. I honed in on a single boat moored to a post that sang out to me because of the smooth ripples of water in the boat’s reflections in the foreground. An initial quick pen sketch en plein air paved the way for transitioning the composition into a painting back in my studio. I like to approach a painting in reverse to how one might be traditionally taught, blocking the lightest parts in early and focusing on the negative spaces. The original subject matter, whilst rather complex, was simplified so I could focus on creating an impression of the scene before me. I think this is one of my biggest challenges when searching for inspiration, but I am gradually learning to hone in on what it is that’s important in evoking an emotion or intrigue.
 Initial quick pen en plein air sketch |
 Reference photo |
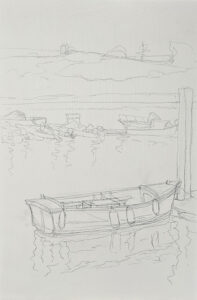
 Prime the panel with several coats of Gesso primer, then create your under-drawing, mapping out key areas of the composition and proportions in pencil. Be choosy about what you do and don’t want to include in your painting. Remember that you’re creating an impression of a scene, rather than a photographic representation. Keep pencil marks limited, just focusing on the details that you want to highlight. While it’s easy to get carried away with the details, at this point you only want to focus on what’s important to you. For me, it is the starboard side of the boat and reflections in the foreground.
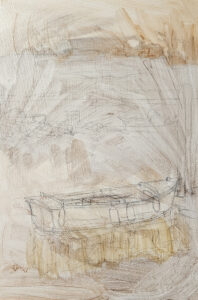
 Using a size 8 round or long flat brush, apply a heavily diluted undercoat of paint. In areas that will appear lighter or in sunlight, use Yellow Oxide, and in areas of shade or where it is darkest, use a mix of Phthalocyanine Blue and Van Dyke Red. Use plenty of gloss medium and get the whole panel covered so no white is showing through. Mix the paints loosely, rather than too perfectly. It’s also good to move your brush quickly around the panel, moving the brush in different directions. This should only take a minute or less to cover the panel. Notice how you can still clearly see the pencil lines beneath.
Want to keep reading? This article is exclusive to SAA members, where you’ll also enjoy a wide range of benefits, including:
Unlock these perks and more by joining today! Become a member.
For the sea, mix at least two to three shades of a bluey/green using Cerulean Blue and Phthalocyanine Blue and adding a tiny
This article is for members only. Please login or sign up to continue reading.