
1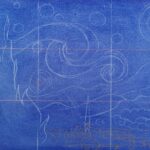 Firstly, get rid of the white of your surface. I have chosen to colour this painting blue, which will help to hide any gaps between the brush marks. Divide the board into thirds and sketch out the main elements of the painting. I have used a white pastel pencil. This will all disappear underneath your painting, but will help you relax into mark making rather than worrying about where everything goes.
2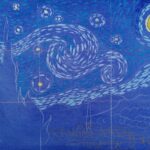 Beginning with the moon, load your brush with plenty of paint and paint the moon shape by rolling the paint off your brush in short straight lines so they follow the shape you’ve drawn. Make the centre paler by adding some white to your yellow mix. Dot in the stars, so you don’t lose where they are!
3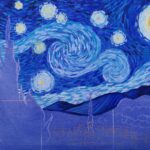 Now wipe your brush clean with a cloth and load it with pale blue. Begin with little dashing lines to follow the contours of the hills. You will be weaving the colours in this picture and laying them next to each other. Roll the paint off the brush and remember to keep reloading your brush. This painting is an exercise in patience and perseverance. Dash the little lines through the sky in the big swirl that is the Milky Way or the mistral winds. Notice how the lines flow in the direction of the swirl, taking your eyes around the painting. Add darker blues to the sky and lighter blues around the moon and the stars. Build up the colours until the sky is richly patterned with the various blues and sparkling stars. The blues are darker towards the top of the painting. The paint should be thickly applied. This ‘impasto’ style of painting is very noticeable in van Gogh’s paintings. Place the paint on – don’t scrub!
4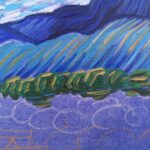 Begin to paint the hills and mountains. Paint the horizon line then follow the contour of the hills with lines of paint, varying the blue as you go, describing the shape of the hills. Keep going until you get down to the olive groves. Mix a few greens and begin to paint the trees with curving C shapes, then go back and fill them in with a different shade of green with slightly smaller C shapes. Do the rest of the olive grove with blues, in the same way, filling the gaps with horizontal lines.
5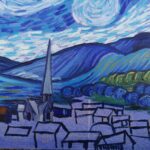 Now paint the village beneath the night sky. Don’t panic, its just some shapes! Start by blocking in some of them with a dark blue mix. Using some Burnt Sienna and Ultramarine and White to make a soft grey, do some of the roofs. Don’t worry about the lighted windows yet, we can light the lamps later.
6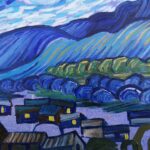 Fill in the shapes and remember your brushstrokes must follow the direction of the walls or roofs. Persevere and when you have all the buildings looking solid, take a clean brush and, with one brushstroke, lay in some yellow and light up the windows. Try to do it with one stroke otherwise you run the risk of muddying up the yellow.
7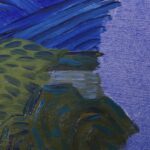 Paint the area between the buildings with horizontal strokes of green, brown and blue. Don’t worry about getting the colours the same as here, just think dark and muted. Paint the far side of the cypress tree, the shapes of the fields and house behind the bushes and then dot and dash in some other colours, following the shapes again.
8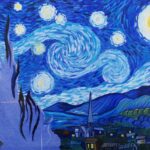 Now you can start on the glorious cypress tree, sinuous flame-like shapes reaching up into the sky. Use the Permanent Green, Ultramarine and some red to make a rich dark. Load your brush and paint up or down, whichever you’re most comfortable doing, trying to start and end with a fine point. Do this by lifting the brush off as you paint, the more pressure you put on your paintbrush, the more the line will spread.
9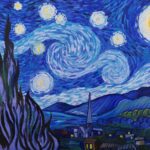 Finally, grow the tree with some greener lines and some brown lines until you have a magnificent dark flame of a cypress tree.