
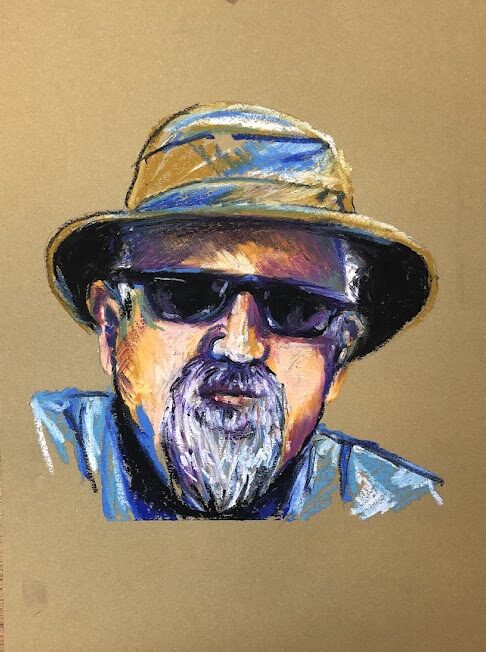
 Painting a colourful portrait can be a powerful way to express emotions, personality, and creativity, while also offering a refreshing take on traditional portraiture It allows you to explore unique styles and creativity. By stepping away from traditional, realistic colour palettes, colour can be used as a tool for self-expression, making their work stand out and pushing the boundaries of portraiture. Not every portrait has to be a faithful representation of reality. Painting with bold, expressive colours allows for a more abstract or symbolic interpretation of a person’s character. There are some mediums which just shout colour for more experimental techniques and for me oil pastels are one of these. They combine the rich, vibrant colour of traditional pastels with the smooth texture and blending ability of oil-based products. They are made from pigment, a binder (usually a non-drying oil or wax), and a stabiliser. This mixture gives oil pastels their creamy, soft consistency, allowing you to create a wide range of effects, from smooth, blended colour to bold, textured strokes. Oil pastels can be used on a number of surfaces and for this, and for this portrait, we will use toned paper to incorporate the background colour.
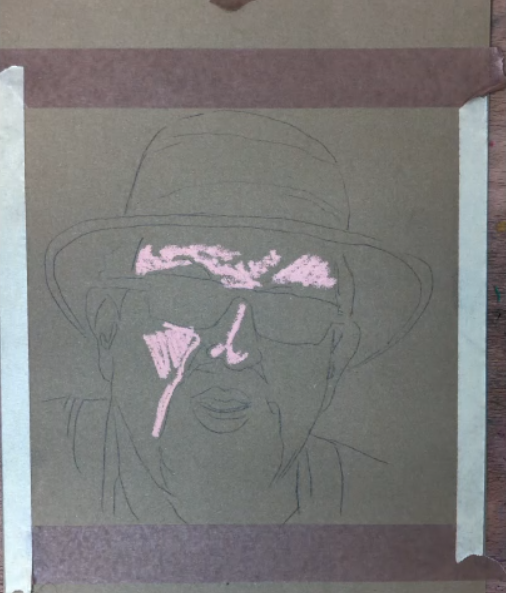
 Begin by lightly sketching the outline of the face. Focus on the structure of key facial features, like the eyes, nose, and lips. If you are not confident with freehand drawing, tracing the outline can help establish the face’s structure.
A portrait with dark glasses can be an effective way to avoid the tricky eyes. The glasses add intrigue since you cannot see the eyes, making it more challenging to figure out where the subject is looking.
Tape off the area around the subject using masking tape to create a clean edge at the end of the drawing. This helps define the boundaries of the portrait.
Now you are ready to start to apply your colour
 |
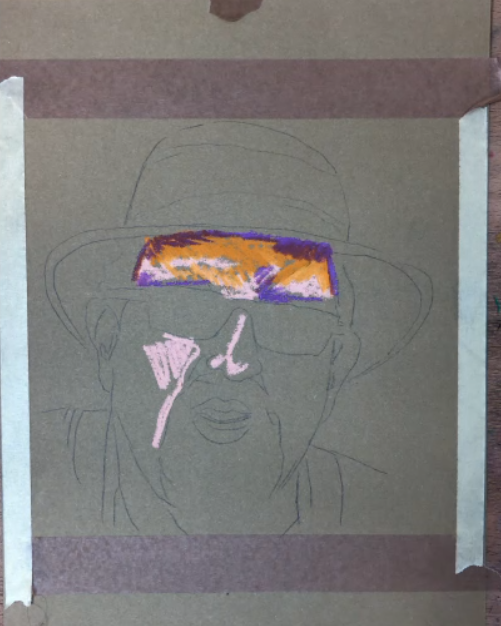 |
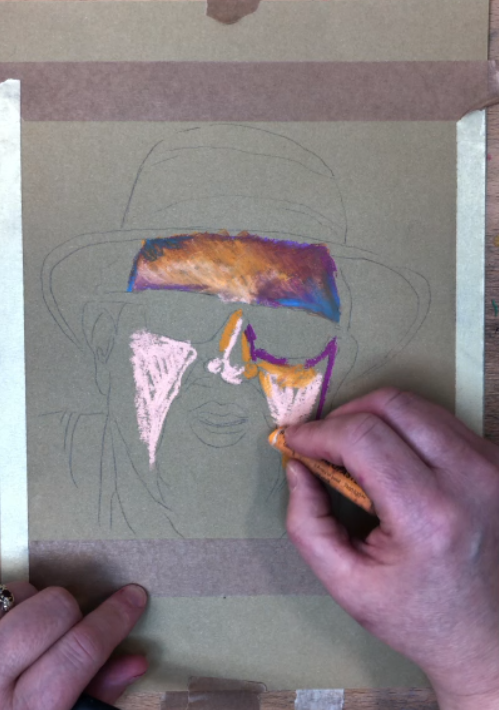
Lay down the base skin tone using a light pastel colour, like salmon. This will map out areas where light naturally hits the face, such as the forehead, nose bridge, and cheekbones.
It is easier to layer dark pastels over lighter ones. Start with the lighter shades, such as highlights, and then move toward darker shades for shadows and details.
Add a layer of orange across the forehead and mauve across the brow, on the side of the head, and in the shadow beneath the rim of the glasses. A bold application of light blue will add a pop of colour on the edge of the forehead and around the brows. These create a base layer of colour before gently blending soften the transitions.
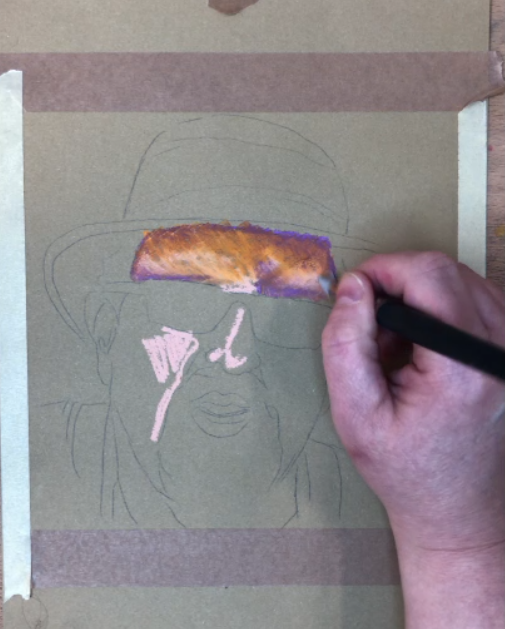 Oil pastels are excellent for layering and blending. Use a silicone colour shaper to gently blend colours into one another for smoother transitions. The shape of the tool can also be used to add texture to the layers. If you want softer transitions, you can use your fingers or a soft cloth. When overlaying different colours, try to avoid overworking the surface, which can lead to a muddy appearance. Clean your blending tools between colours to prevent cross-contamination
For softer blends, work carefully, starting with lighter colours and gradually adding darker hues to avoid a harsh, uneven transition
 |
 |
Begin to build up the shape of the nose using additional orange pastels. Use darker violet to define the shadow areas beneath the glasses and along the edge of the face. At this stage, use light pressure to gradually build colour. If you press too hard, the pastel will become harder to blend and may form a heavy buildup. Work across the face, paying attention to where the lightest areas are (like the cheeks). Add orange to the sides of the face to create contours, using darker violet for the shadows around the nose and under the glasses. Use the colour shaper to gently blend colours. Push lighter shades into darker ones to avoid the lighter colours being overpowered.
 |
 |
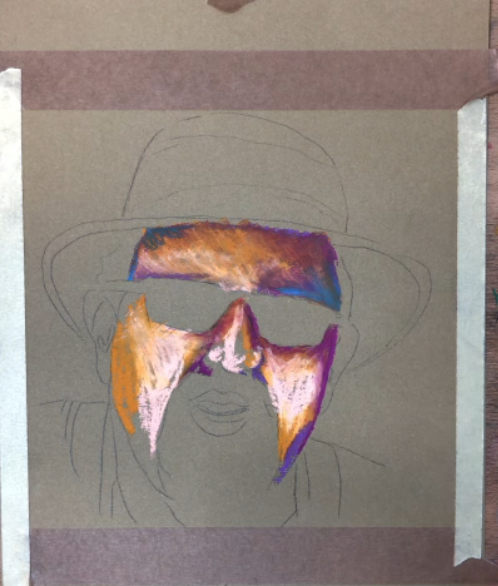
You can remove a little of the paper covering, to expose more of the oil pastel. Continue to adjust the colour adding more salmon or purples and blending the colour for soft painterly effect.
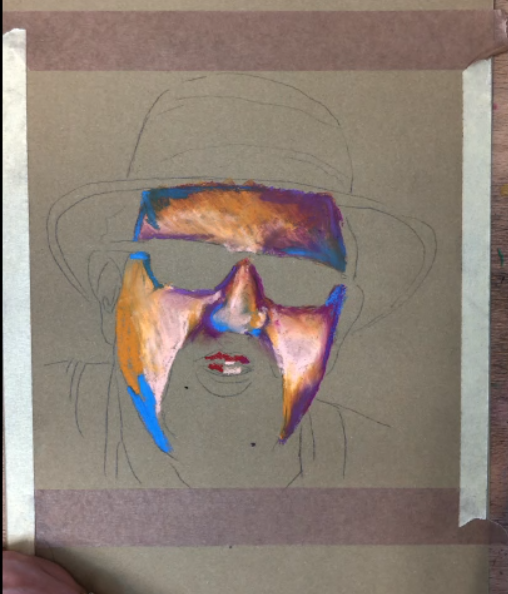
Add mauve for extra contours and highlights, and light blue around the nostrils or edges of the face for contrast. Purple, which is a pink colour, is added to warm areas of the cheeks and forehead. Use a mix of scarlet, salmon, and violet for the lips. You can use the fine edge of the colour shaper tool to define the details.
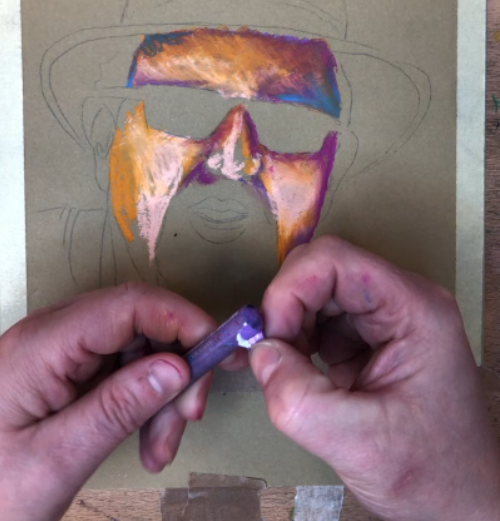
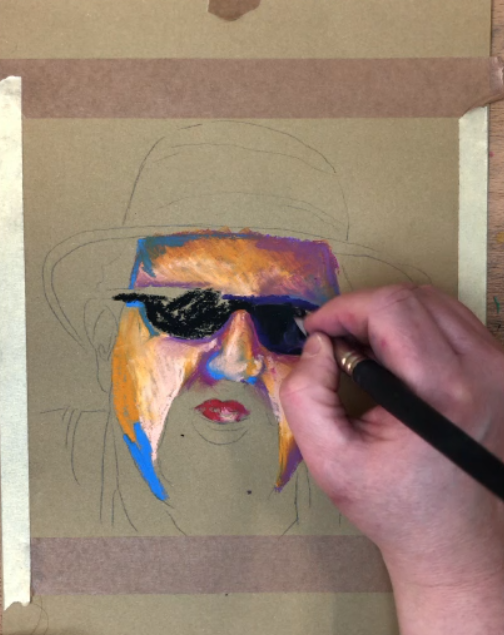 Use violet and black to add colour to the glasses. Apply these lightly, as you will blend them to achieve the reflective dark look. A touch of mauve can be added for reflection along the edges of the lenses. Blend everything smoothly with the colour shaper tool. Add light blue along the rims of the glasses for additional highlights, and use mauve to enhance reflections. Using the same techniques and colour as applied for the face add the ears.
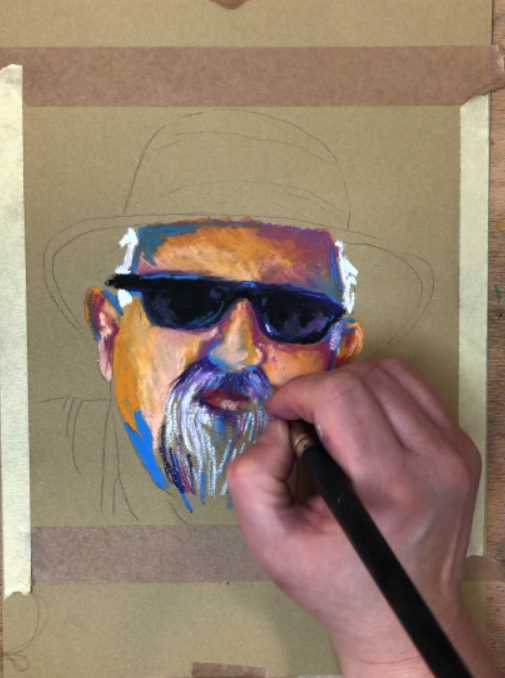 Add dabs of white to map out the hair under the had and down the side of the face. Build up the darker areas of the beard with vertical lines of violet and light blue. Add white to highlight parts of the beard, blending it using the same technique.
 Use black and blend it under the rim of the hat. Soften the white hair under the hat. Add ochre and light blue, using expressive bold lines to create texture in the hat and use white to add highlights. Apply bold lines of Light blue, Turquoise Blue and Ultramarine and white for highlight in the jacket. for the jacket.
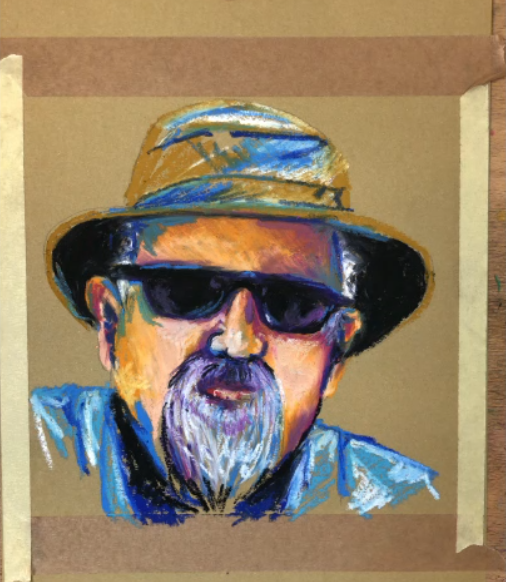
Continue adjusting the colours and adding finishing touches. Use black to bring out fine details and white for additional highlights. Once you are satisfied with the portrait, remove the masking tape. This will reveal a clean edge around the artwork, giving it a professional finish.
Oil pastels offer a rich, expressive medium that can be both fun and challenging, making them a popular choice for many artists, from beginners to professionals. I hope this has inspired you and remember to add your amazing pieces to our social media channels.
Notifications