
Ian McManus says that mastering the basic rules of shape, tone, edge control, focus and colour, can dramatically improve the quality and results of working with watercolour
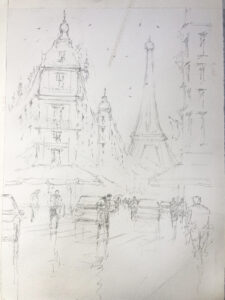
 When it comes to the initial drawing, the first thing to establish is the major shapes. Here, that’s the sky, all the buildings – including the canopies, the shop fronts, all the way down to the road level, and the third shape is the ground area. I mark those in, and when I’m happy with their placement, I
go on to detail it a little bit. Detailing includes the top line and just enough windows to make it work. Then I populate the foreground. There are fixed things there. The buildings won’t move, the ground won’t move. What will move are the figures and cars, and I organise those to suit me. I’ll also exclude things I don’t want. Usually, there are too many cars in the road in real life or a photo. The best advice I ever got on perspective was from John Yardley, who said, “It’s just got to look right, hasn’t it?” If it doesn’t look right, do something to change it, reinstate the line.
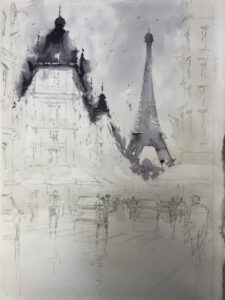
 The first thing to look for when starting to add colour is tone. Is it light, mid or dark? Start with the sky, and apply a light wash of Neutral Tint with a touch of Verditer Blue, using a large mop brush. With a slightly darker mix, and using the medium mop brush, add in the Eiffel Tower using a drybrush technique to avoid giving it hard edges. When the sky is semi-dry, work forwards, along the roofline, with a stronger mix and the medium mop brush, controlling the edges so they are soft, to prevent your eye being drawn to them. When working into an already wet area, use less water in your paint, and it’ll merge but won’t create cauliflowers.
Want to keep reading? This article is exclusive to SAA members, where you’ll also enjoy a wide range of benefits, including:
Unlock these perks and more by joining today! Become a member.
Change to the size 10 brush to add the tiny areas of detail, like the spiky verticals. You don’t want to go back to do those.
This article is for members only. Please login or sign up to continue reading.