
 Adebanji Alade uses a Zorn palette in this three-stage tutorial. The Zorn Palette is a limited colour palette consisting of just four colours: Cadmium Red, Yellow Ochre, Ivory Black and Titanium White.
This is a three-stage demonstration of a complete portrait painting process of a professional busker I have known for over 20 years. He has an amazing face and always dresses in flamboyant colours, so he is a visual treat! My system is quite structured and methodical, which helps the painting process go smoothly, from the gridding to the finishing touches. I’ll be using oils, but I start with Brushmarkers, which are normally used by illustrators. This might be a totally new method for you, but I’m sure you’ll be inspired to try it out yourself.
You can also watch this member-exclusive in depth Levelling Up tutorial on our Video On Demand service.
Watch the video
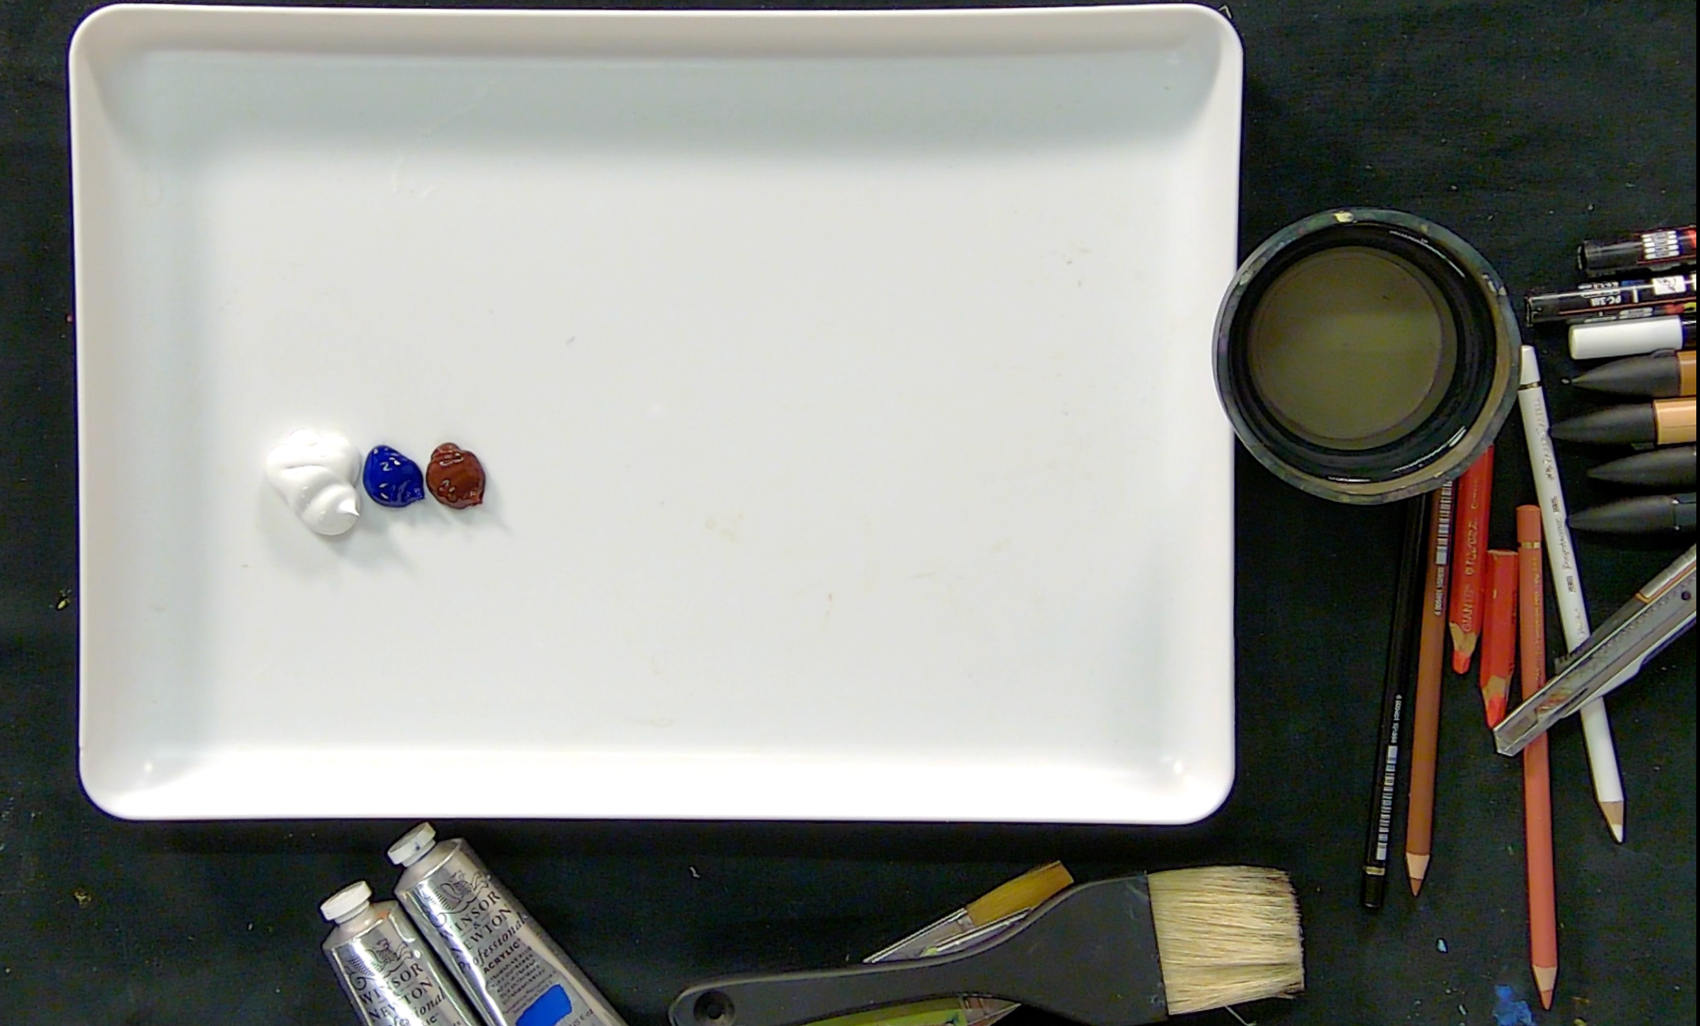 Here, I am ready to mix the colour that I love to use for the backgrounds of my portraits. Sometimes, I use a peachy colour, but recently, I have tended to use a neutral grey mix of acrylics. A mixture of Titanium White, Ultramarine Blue, and Burnt Sienna produces this neutral grey. One part White, with half of Ultramarine and Burnt Sienna will give a lovely mix.
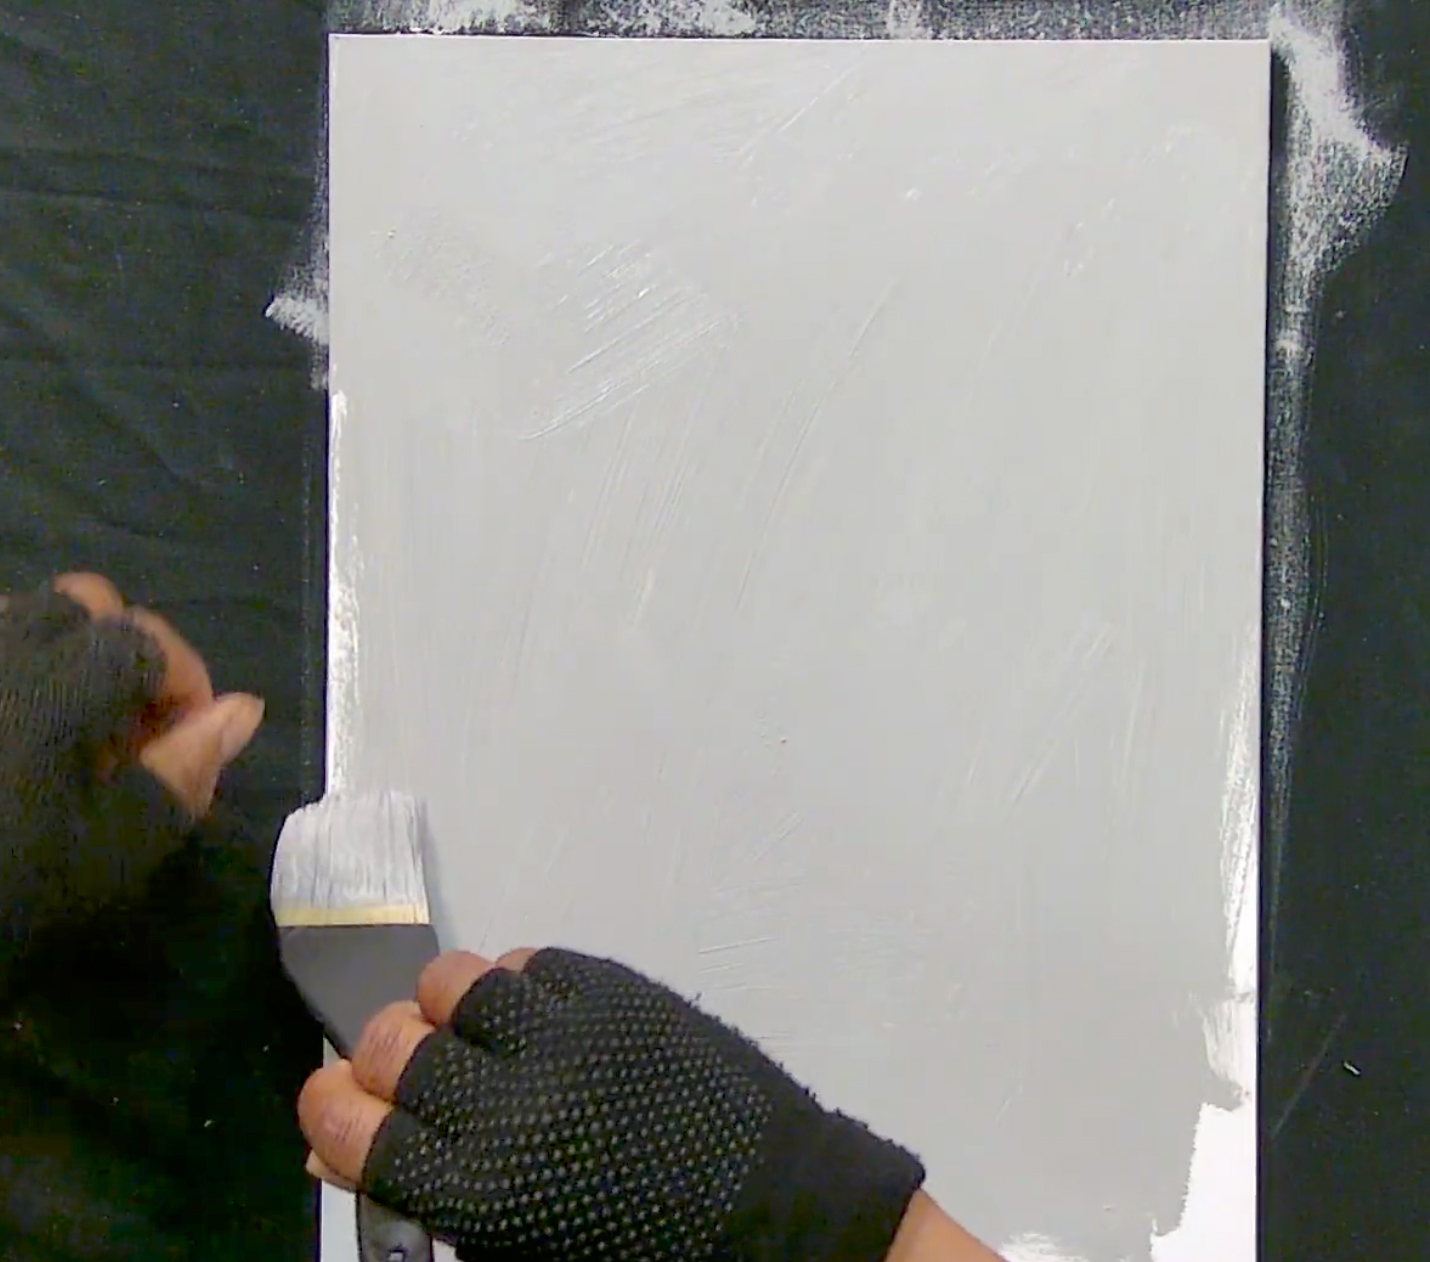 I use a 1-inch brush to prime the surface of the 16″ x 12″ Ampersand Gessobord, which I’ll be painting on. It usually comes already primed in white, but I love to give it my own colour mixture. I paint it in different directions, as this creates a lovely texture that can be useful for the painting.
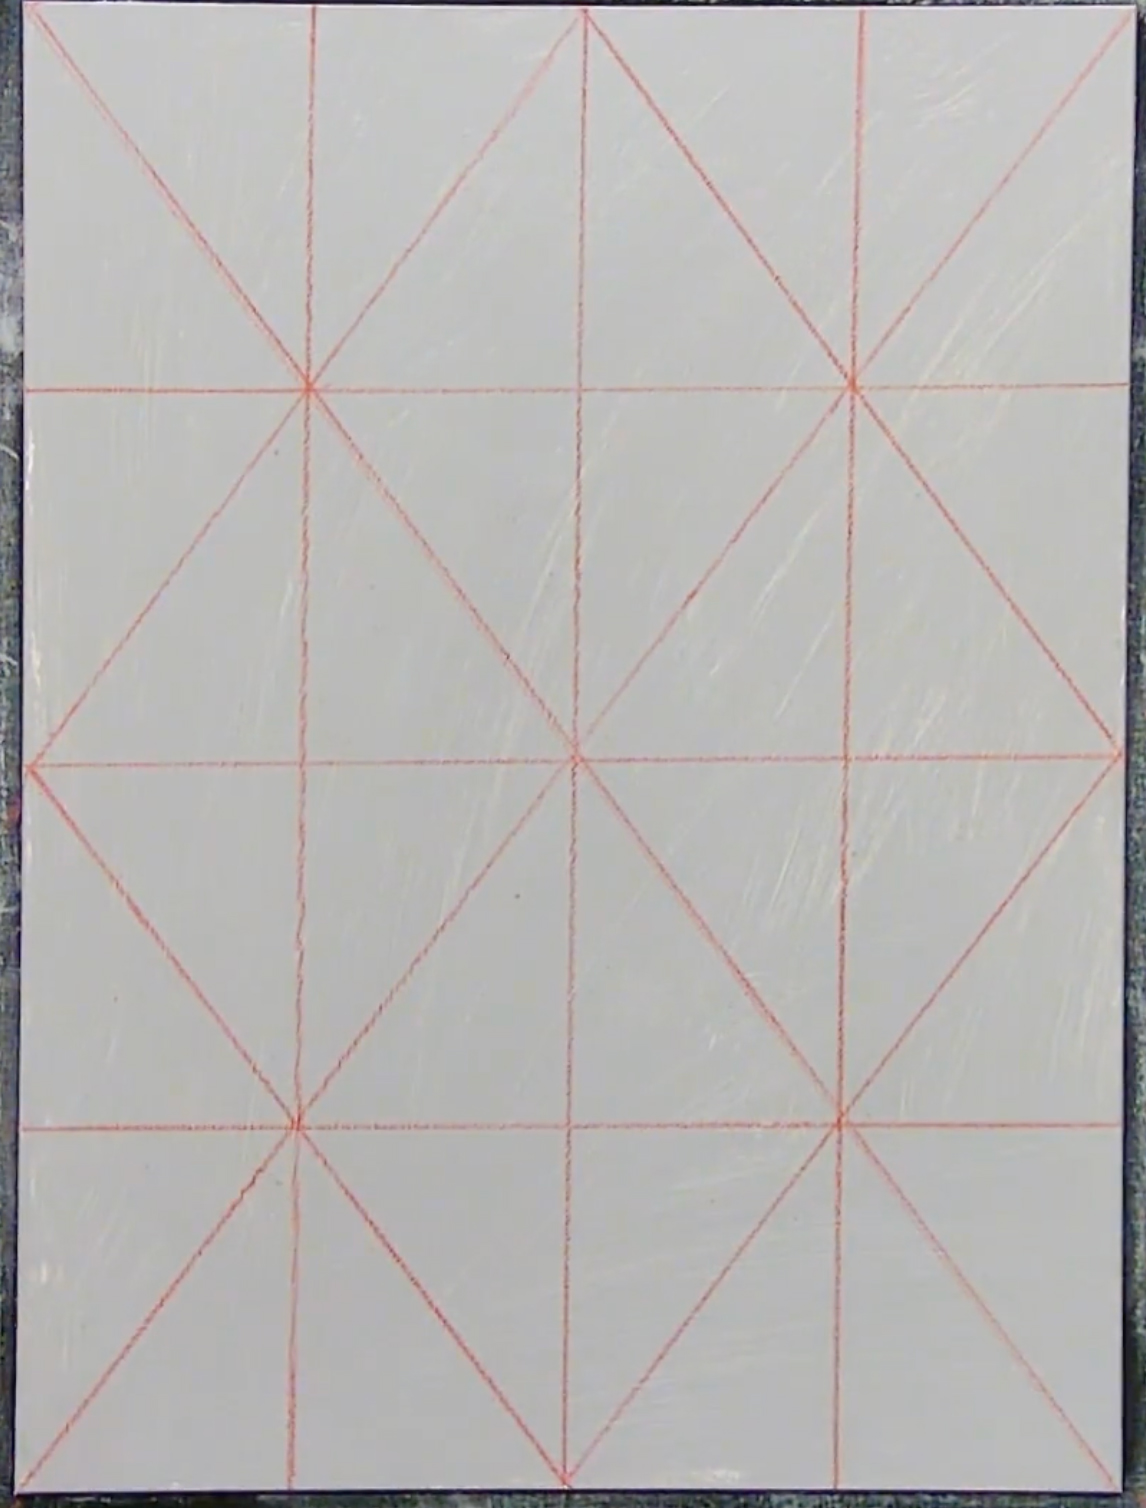 To transfer my painting, I draw a grid onto my canvas. This makes transferring an image easier. The lines are drawn from corner to corner, and then vertical and horizontal lines are drawn at the intersection of both diagonals. This process is repeated for the four rectangles.
| This stage is very important. I grid the board to get an accurate sketch from the picture reference. Below is the method I use and recommend others to use:
|
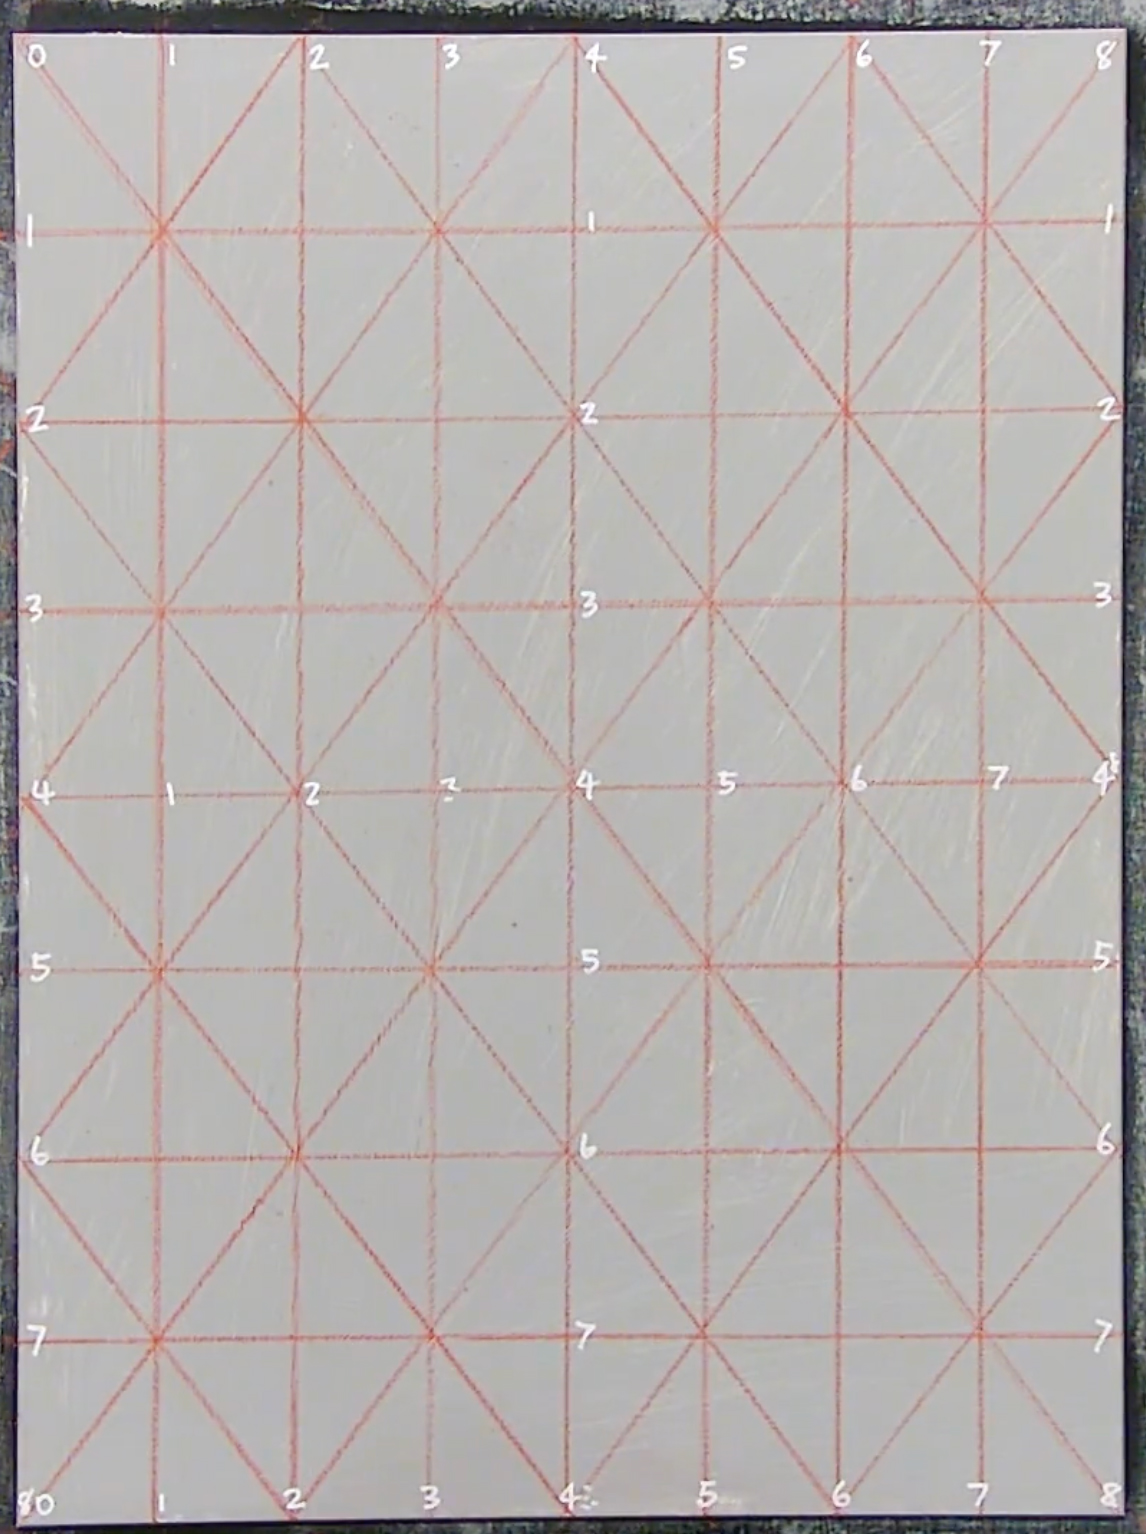 |
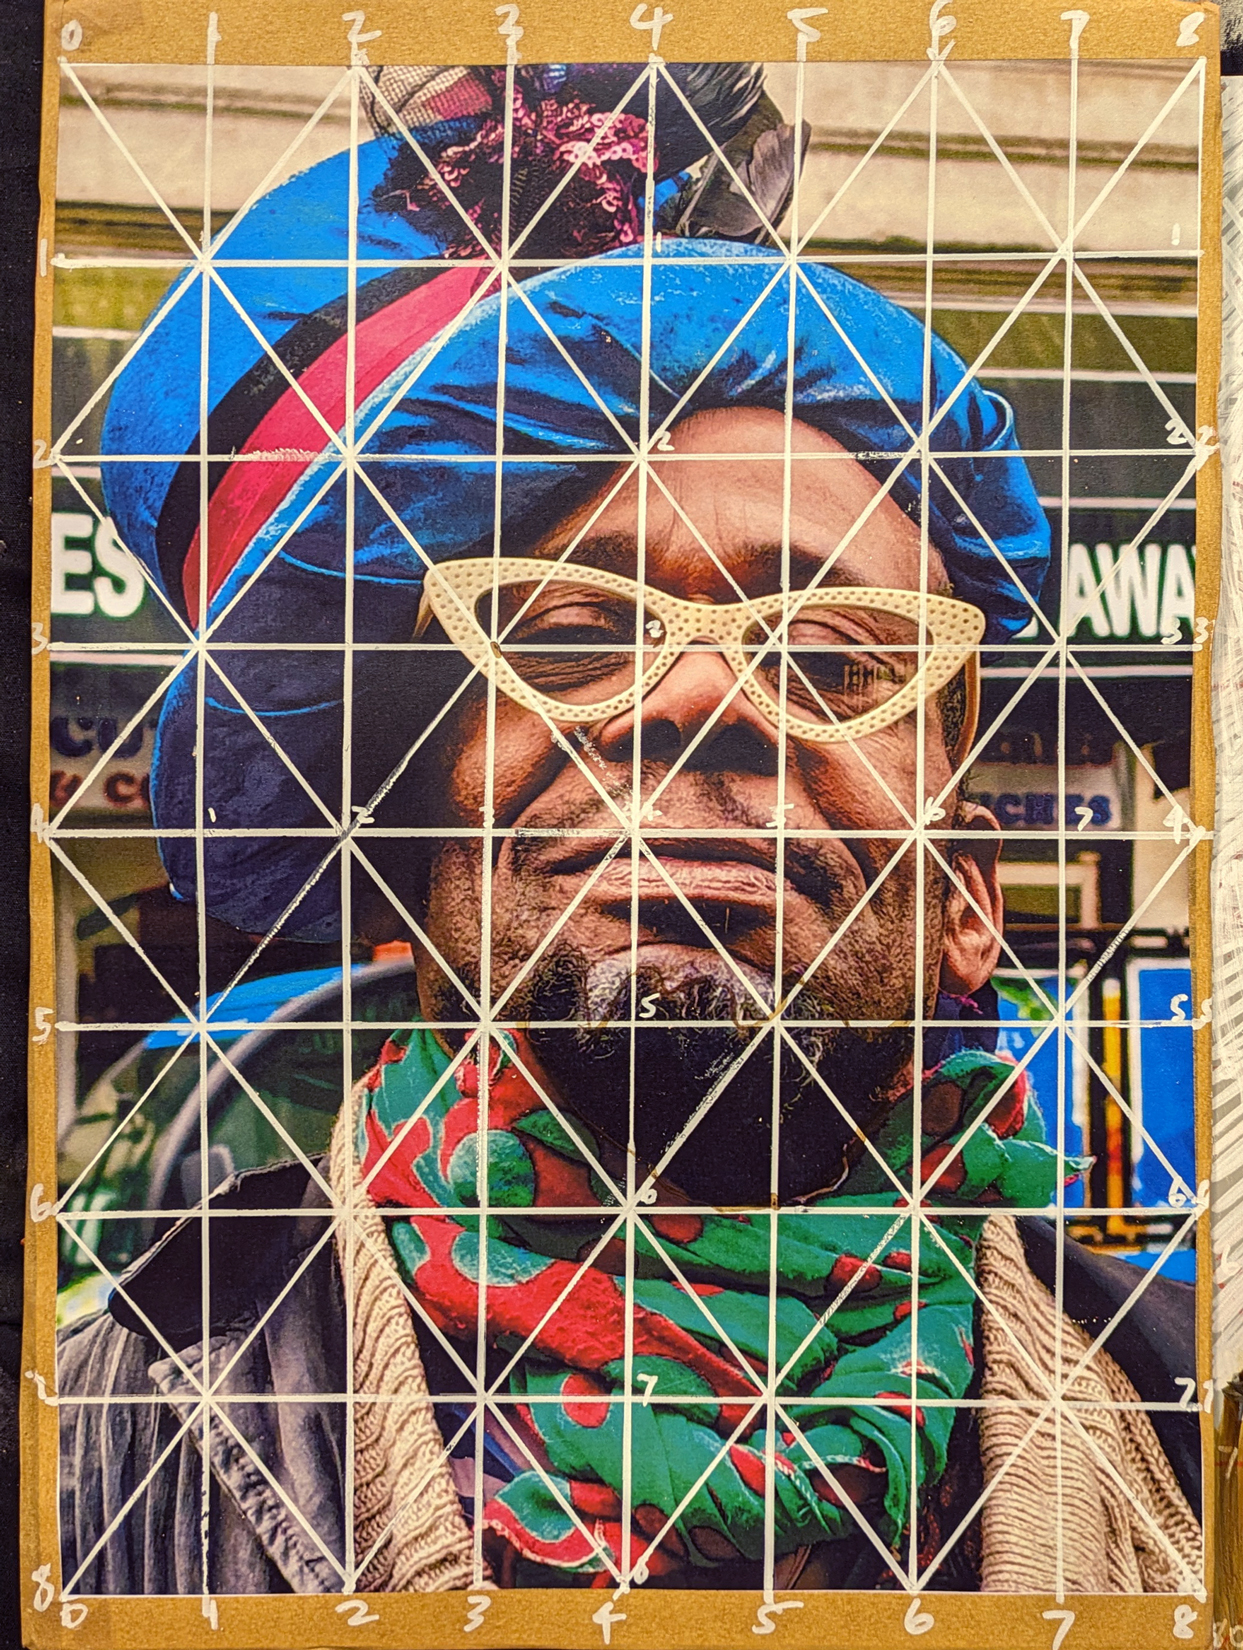 I repeat the same process on the picture I am planning to paint from. The picture is in the same proportion as the surface I am painting from. On my iPhone, the ratio is 3:4, which helps it align with the ratio of the surface I am painting on, which measures 12″ x 16″.
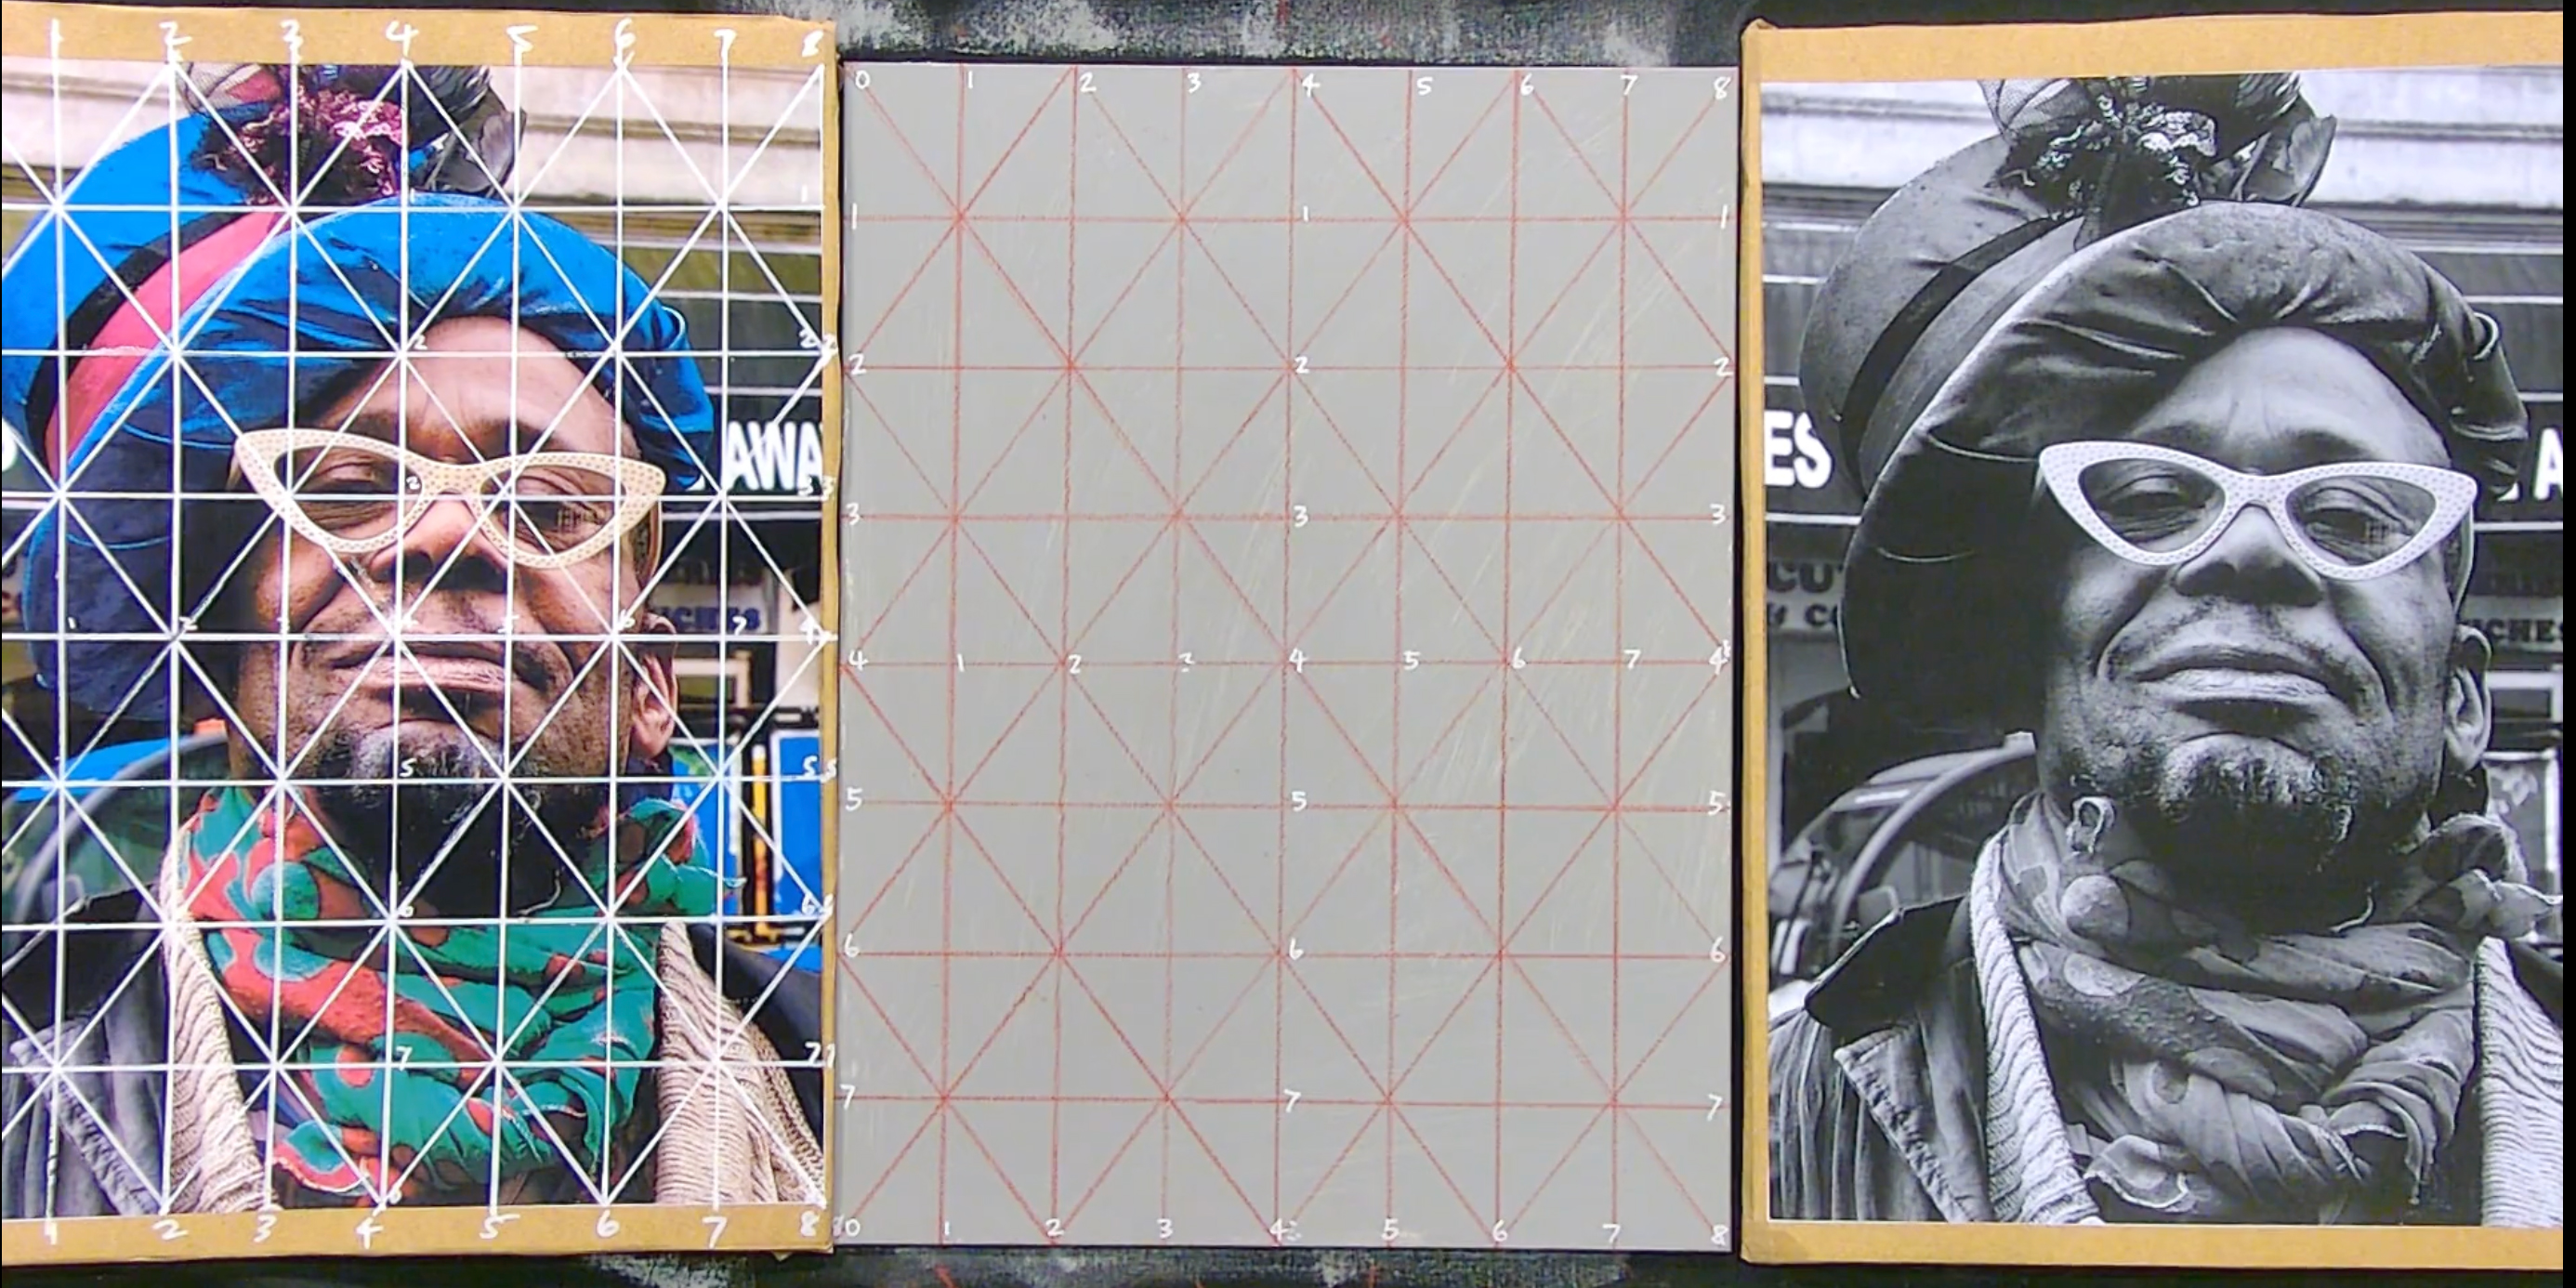 I also print out a black-and-white picture, which I don’t grid; it’s only used to help me note the value changes more clearly. The lines on the picture are drawn with a white Posca pen. With these three surfaces set, I am now ready to start sketching.
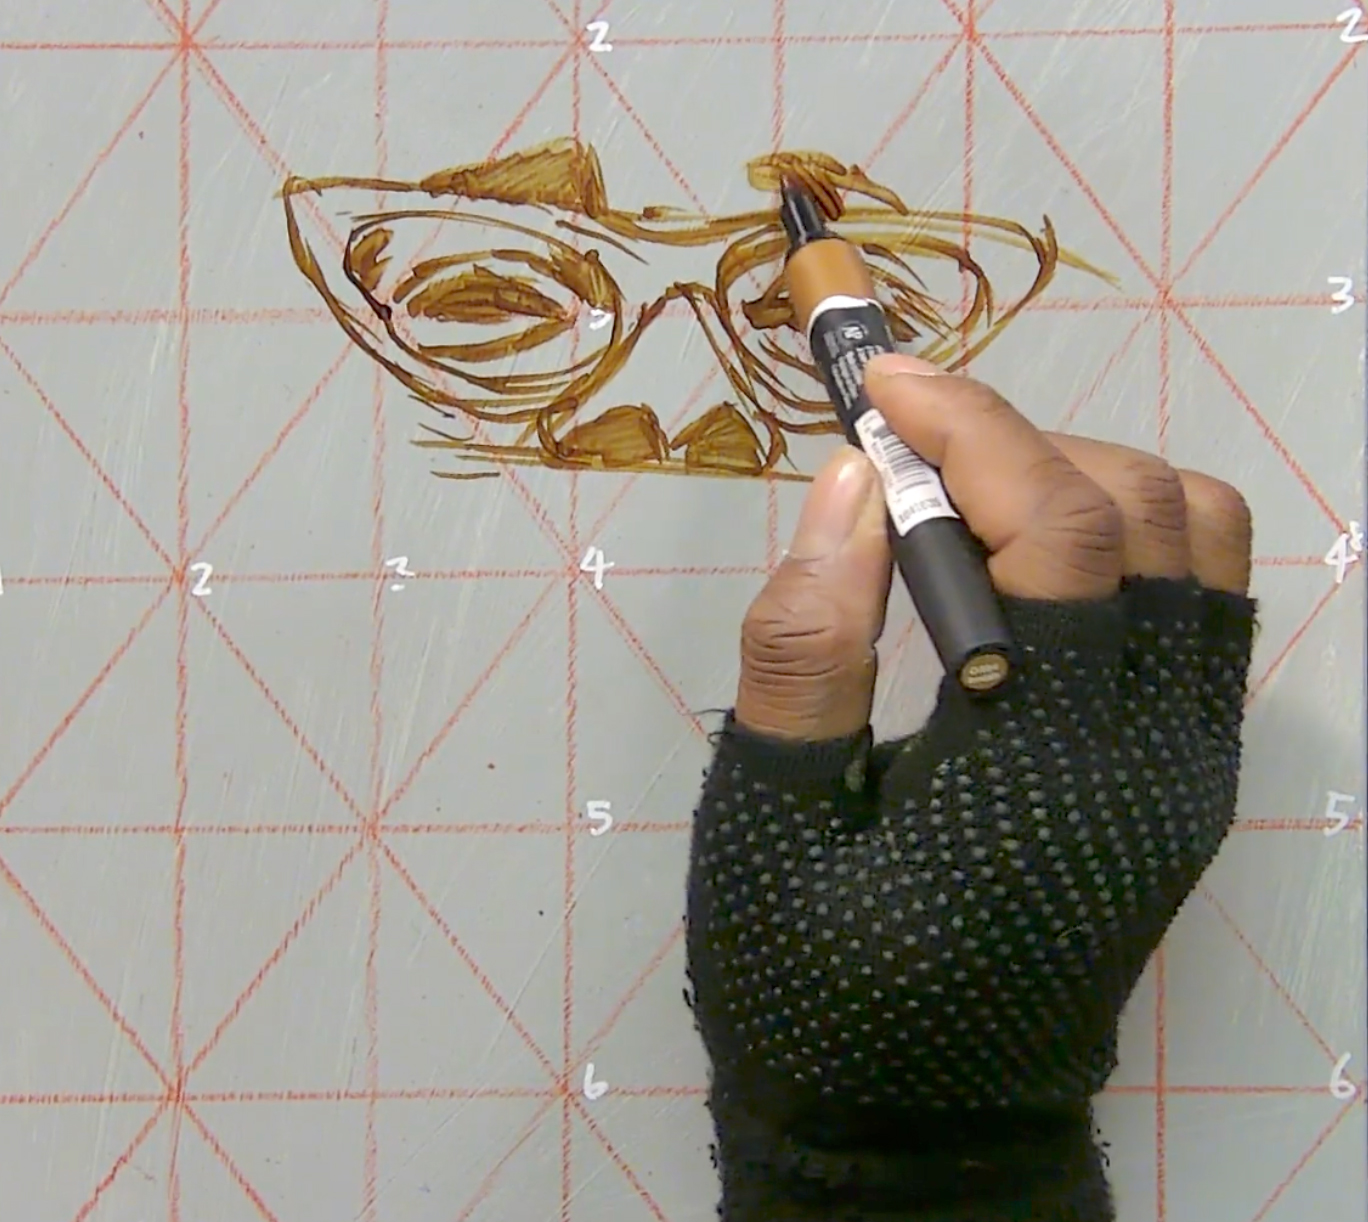 You can start from anywhere on the surface. I have decided to start from the eyes and am using a Winsor & Newton Promarker Brush in Burnt Sienna. The main thing to note at this stage of the sketch is that the gridded reference makes it easy to sketch, as I just follow the grid to get the drawing in the same way it is on the picture, following all the shapes and lines to go in alignment to how it is on the picture reference.
Want to keep reading? This article is exclusive to SAA members, where you’ll also enjoy a wide range of benefits, including:
Unlock these perks and more by joining today! Become a member.
This process of sketching with the Promarker continues until the face is done; then, to add some lighter tones to make it…
This article is for members only. Please login or sign up to continue reading.
Notifications