
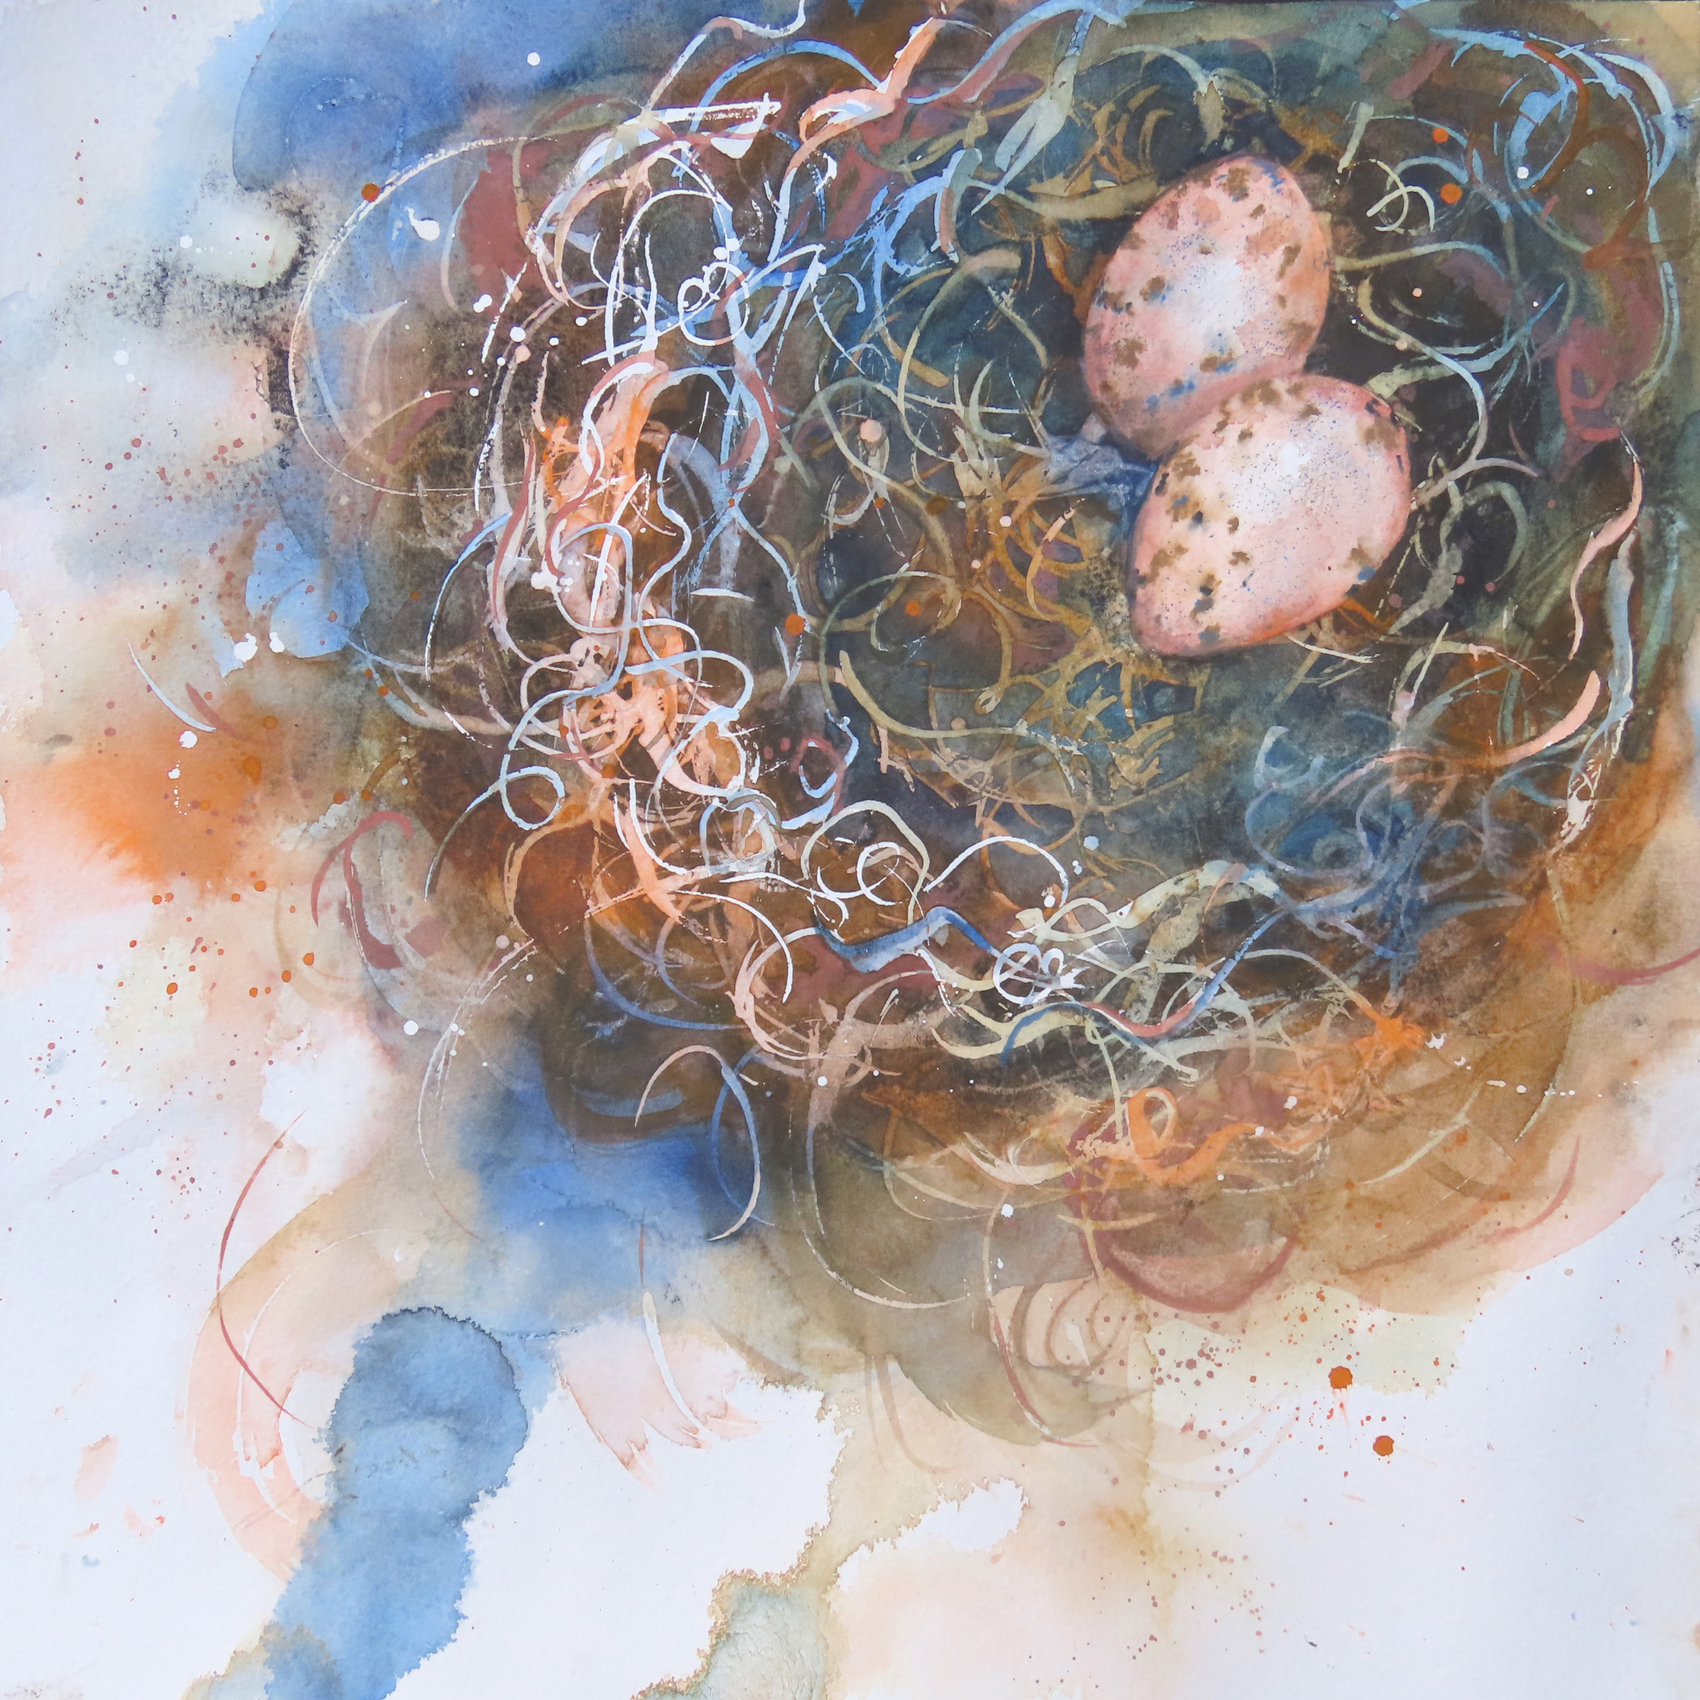
 Liz Chaderton’s loose and colourful watercolour nest with eggs
Nests come in all different shapes and sizes, from a messy stork’s nest on top of a chimney to the engineering marvels of the weaver bird. As spring finally arrives, seeing birds darting backwards and forwards with twigs and grass reminds us that new life is coming and summer is just around the corner.
You can also watch this member-exclusive extended tutorial on our Video On Demand service.
Watch the video
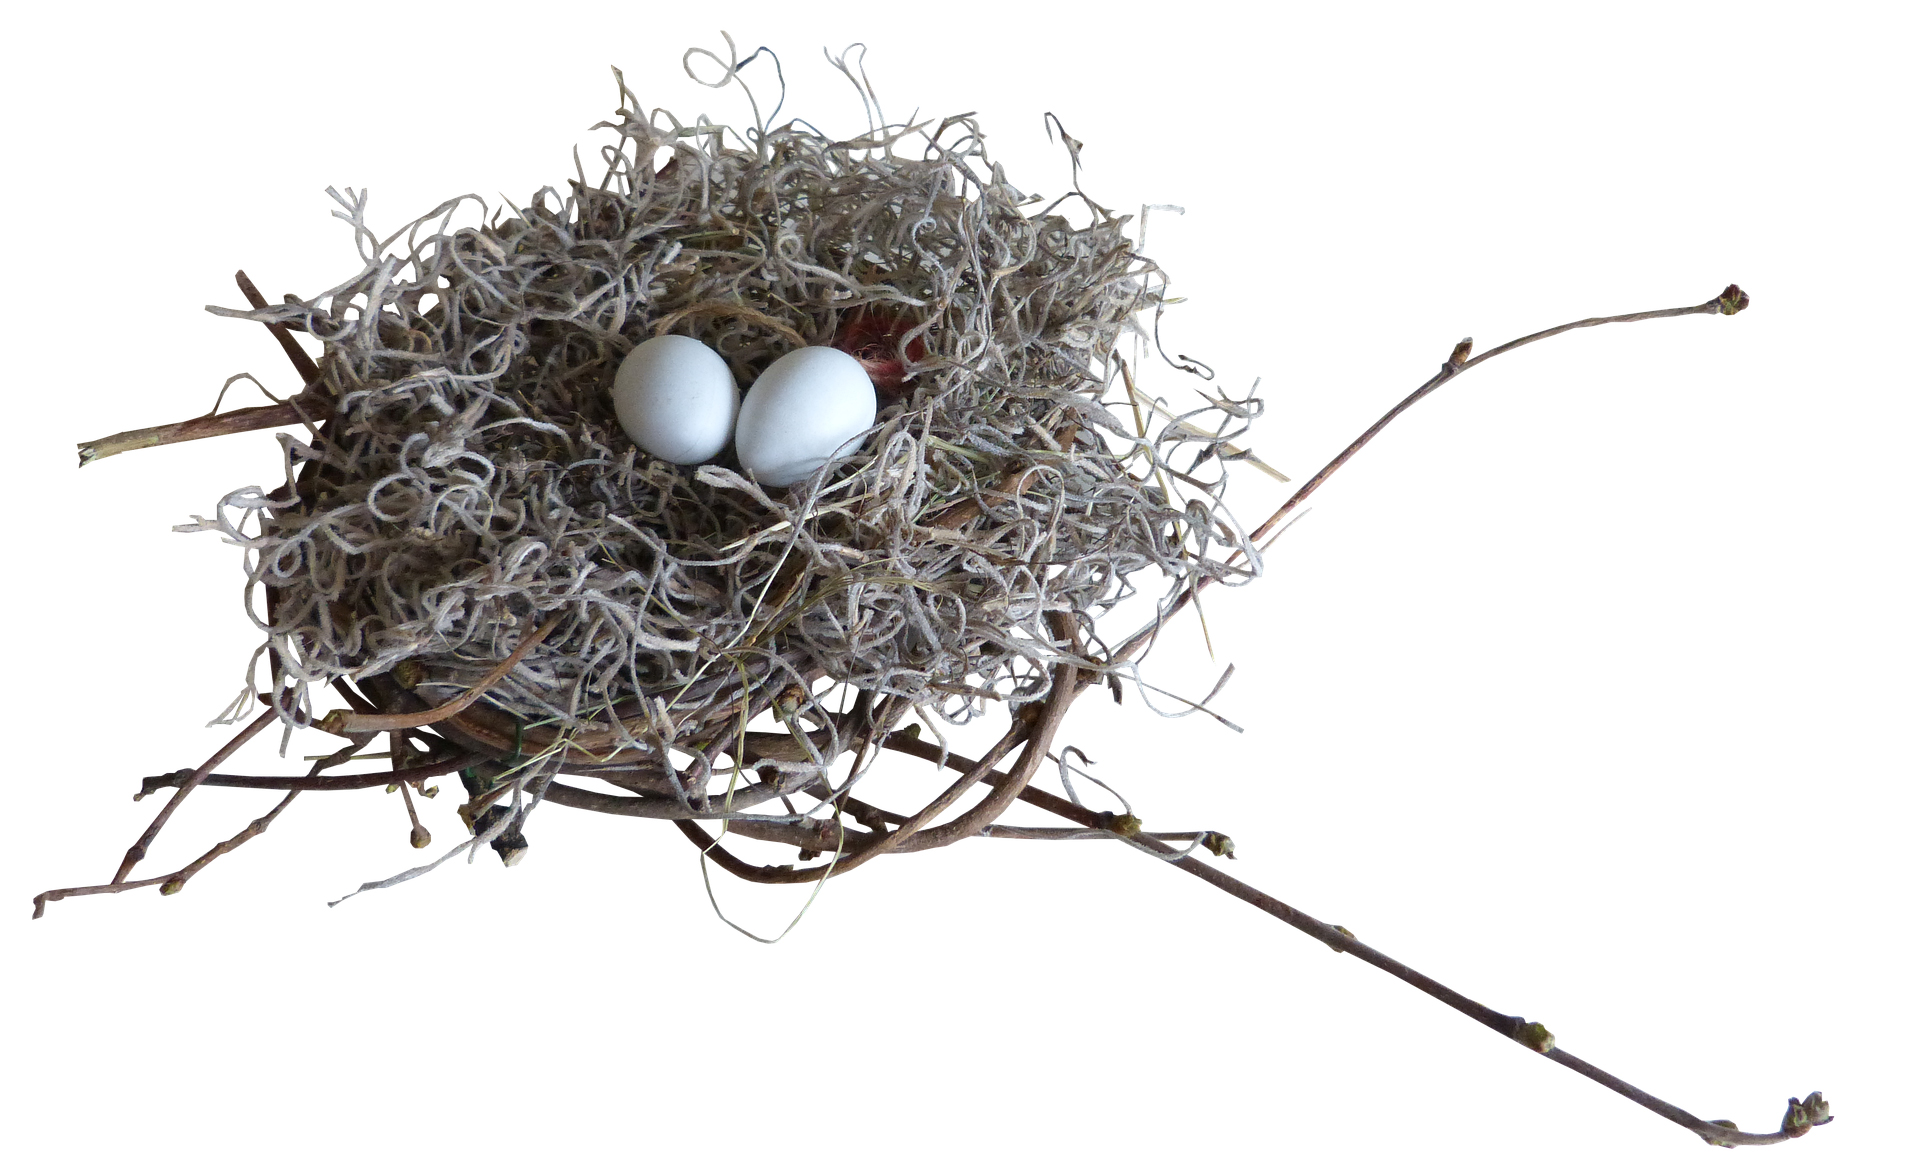 pixabay.com/illustrations/nest-bird-nest-natureeggs-spring-5268167 pixabay.com/illustrations/nest-bird-nest-natureeggs-spring-5268167 |
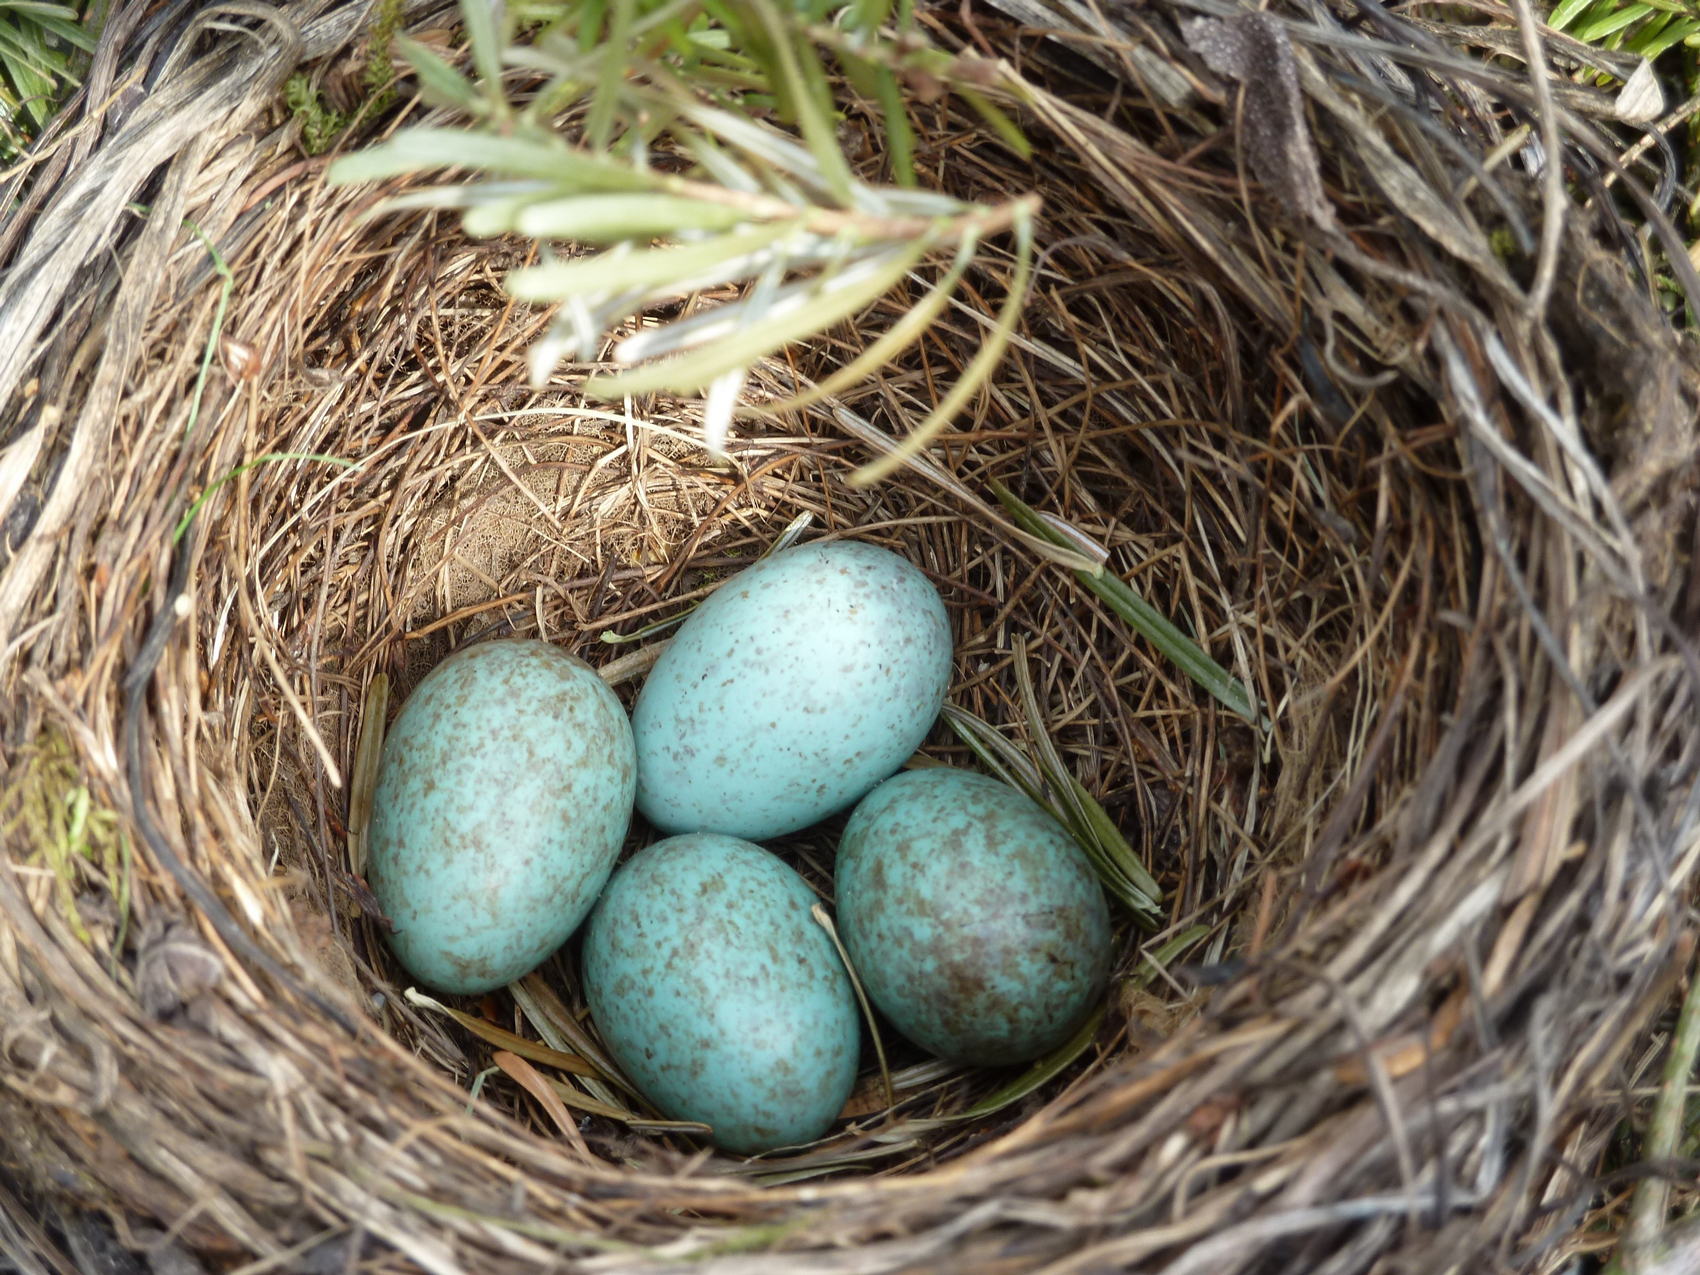 pixabay.com/photos/blackbirdest-blackbirdeggs-nest-2206124 pixabay.com/photos/blackbirdest-blackbirdeggs-nest-2206124 |
Disturbing a nest is illegal in the UK. It’s an offence under the Wildlife and Countryside Act of 1981. Luckily there are lots of photographic references available to us. My favourite site is www.pixabay.com, which has millions of high-resolution images you can freely use without infringing copyright. It is worth searching for a reference that appeals to you and then using the methods described here to make the piece your own. A reference photograph is only ever a starting point.
Put your own spin on Liz’s reference image! Join this issue’s Artist’s Photo, You Paint It challenge and show us how you would interpret the scene. Submit your artwork by 1st June for a chance to be featured!
Enter the challenge
Masking fluid is a liquid (often latex-based) used for preserving areas of your work (usually whites). Not all masking fluids are the same, with some being harsher than others. Over time, you may find that your bottle congeals. To avoid this, seal tightly and avoid shaking. If it has thickened, it can be diluted with a little water. If it has turned into a lumpy mess, it is time to buy a new bottle!
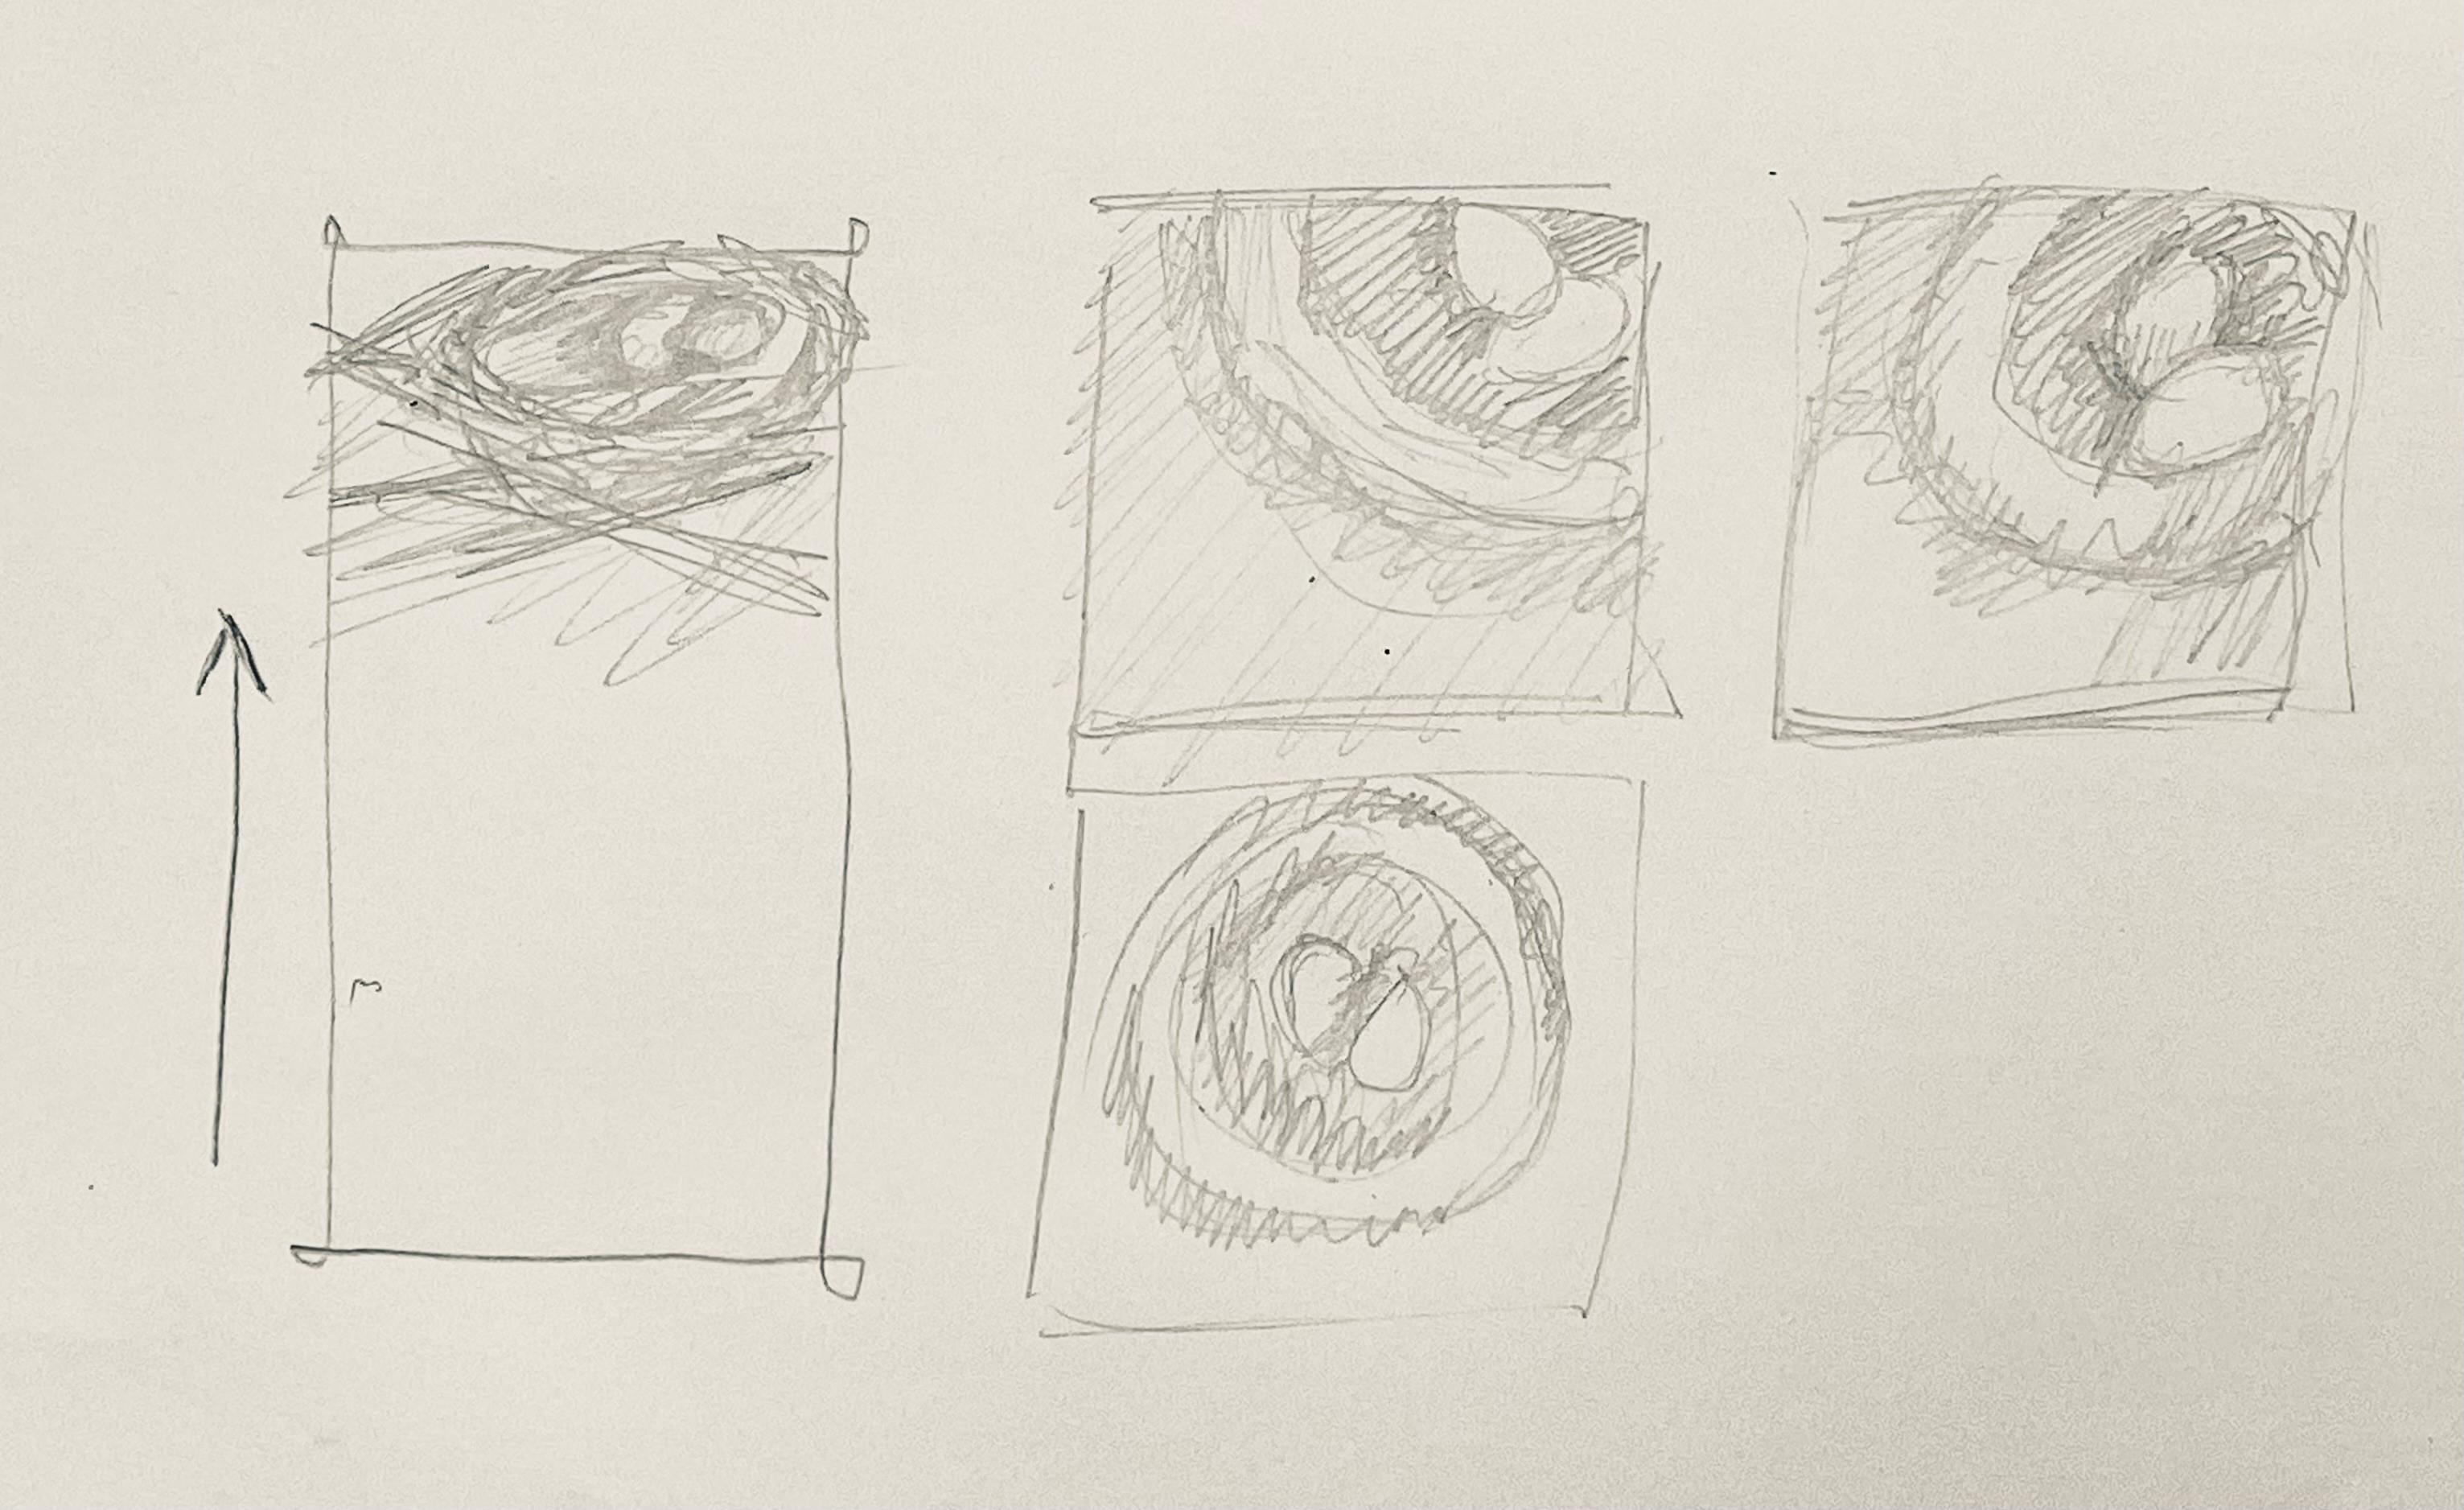 A few minutes of planning will save you time in the long run. Create rough thumbnails of possible compositions to consider which appeals to you; consider composition, format, and size. It’s easy to end up with the same size and format of painting if you always use a pad of paper; try to make it an active choice rather than a default. A tall, narrow painting might give the feel of the nest perched high in a tree. A miniature might show how delicate and precious nests are. A close-up might emphasise the complexity of the structure. In your thumbnail, consider the direction of light and where highlights and shadows will be placed. These thumbnails are for your eyes only, so they can be very rough.
Eggs in a nest will be the same size unless a cuckoo has visited! Few songbirds lay a single egg, so two or three create a pleasant balance in the composition. An egg needs to be smooth and symmetrical to be convincing. Study eggs in your kitchen to get an idea of foreshortening (see the diagram later in the tutorial). Start by drawing around a circular object of the correct size. Draw an extended centreline and put a short mark across where the pointed end of the egg will be. Turn your paper to allow a natural curved mark to be drawn between the end of the horizontal line and the edge of the circle. Use muscle memory to repeat on the other side.
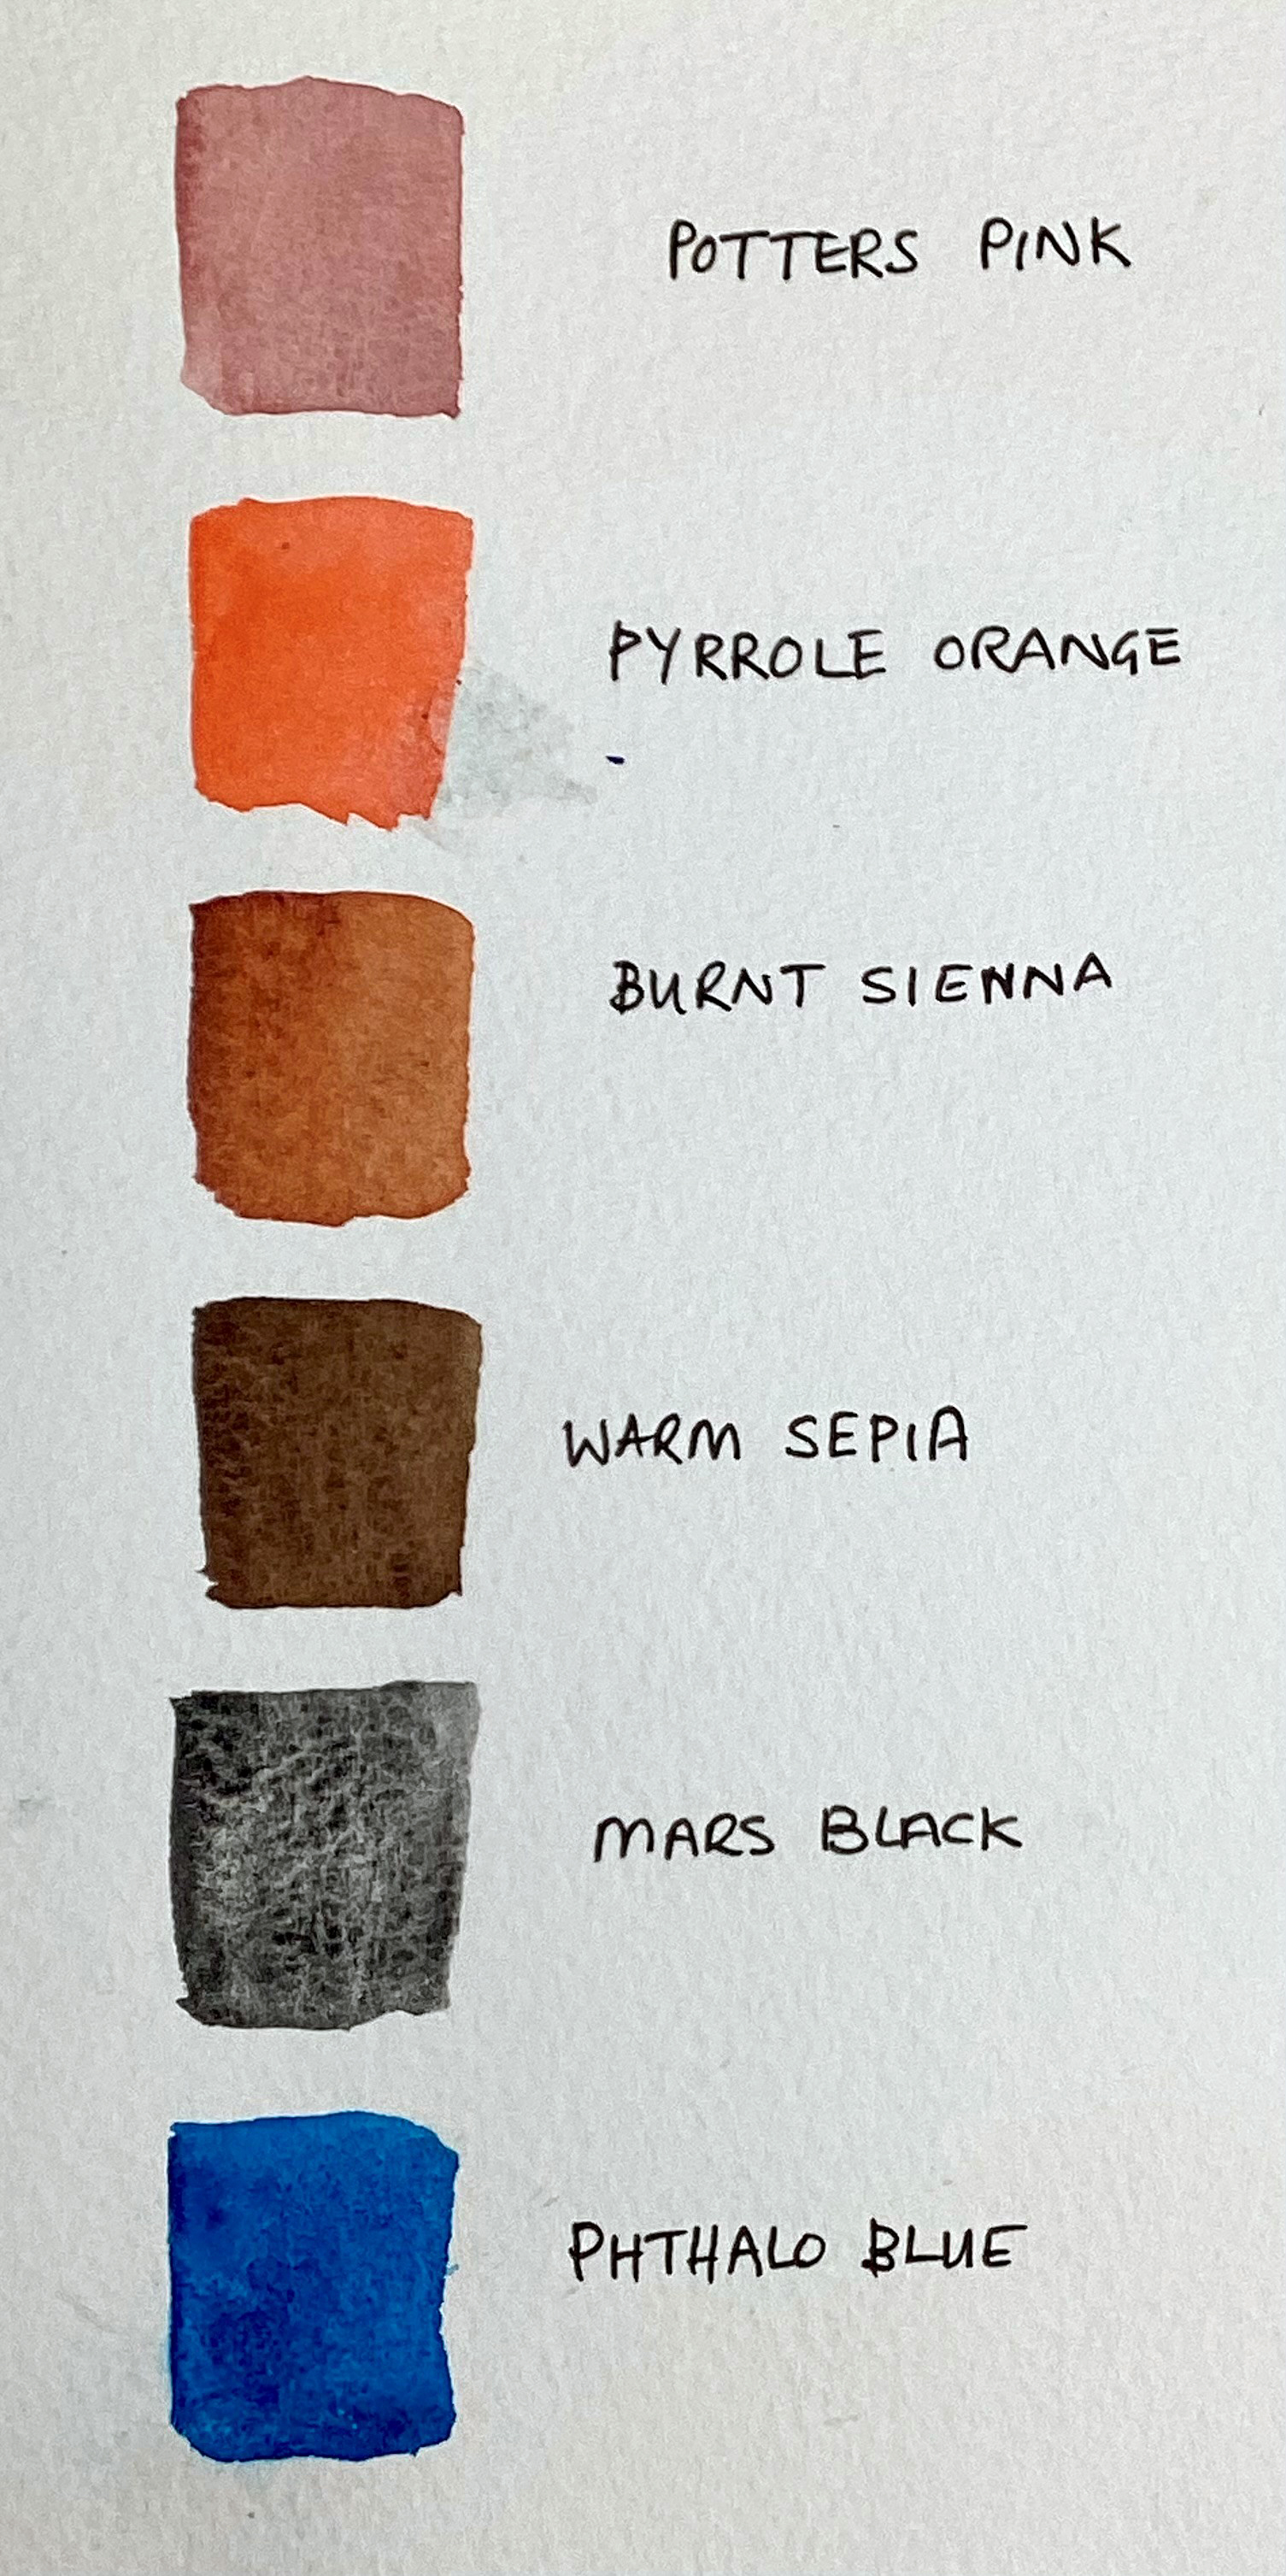 Planning and limiting your colours in advance will ensure a harmonious painting. A palette of six colours should be more than enough for most subjects. By mixing the colours, you can achieve a myriad of hues, which are all related. I like to have a surprise colour in my palette, even if the overall effect is subdued. Here, I chose Pyrrole Orange as the surprise. I added Phthalo Blue as, mixed with the browns, it will form an excellent dark. I used Mars Black because of its granulation properties. It might add interesting texture to a relatively simple subject. I rarely use black in my palette, and it can deaden a piece. You can choose any colours that appeal to you and evoke the emotion you wish to convey – use what you already have. A harmonious palette will be calmer, and one with complementary colours might be more energetic.
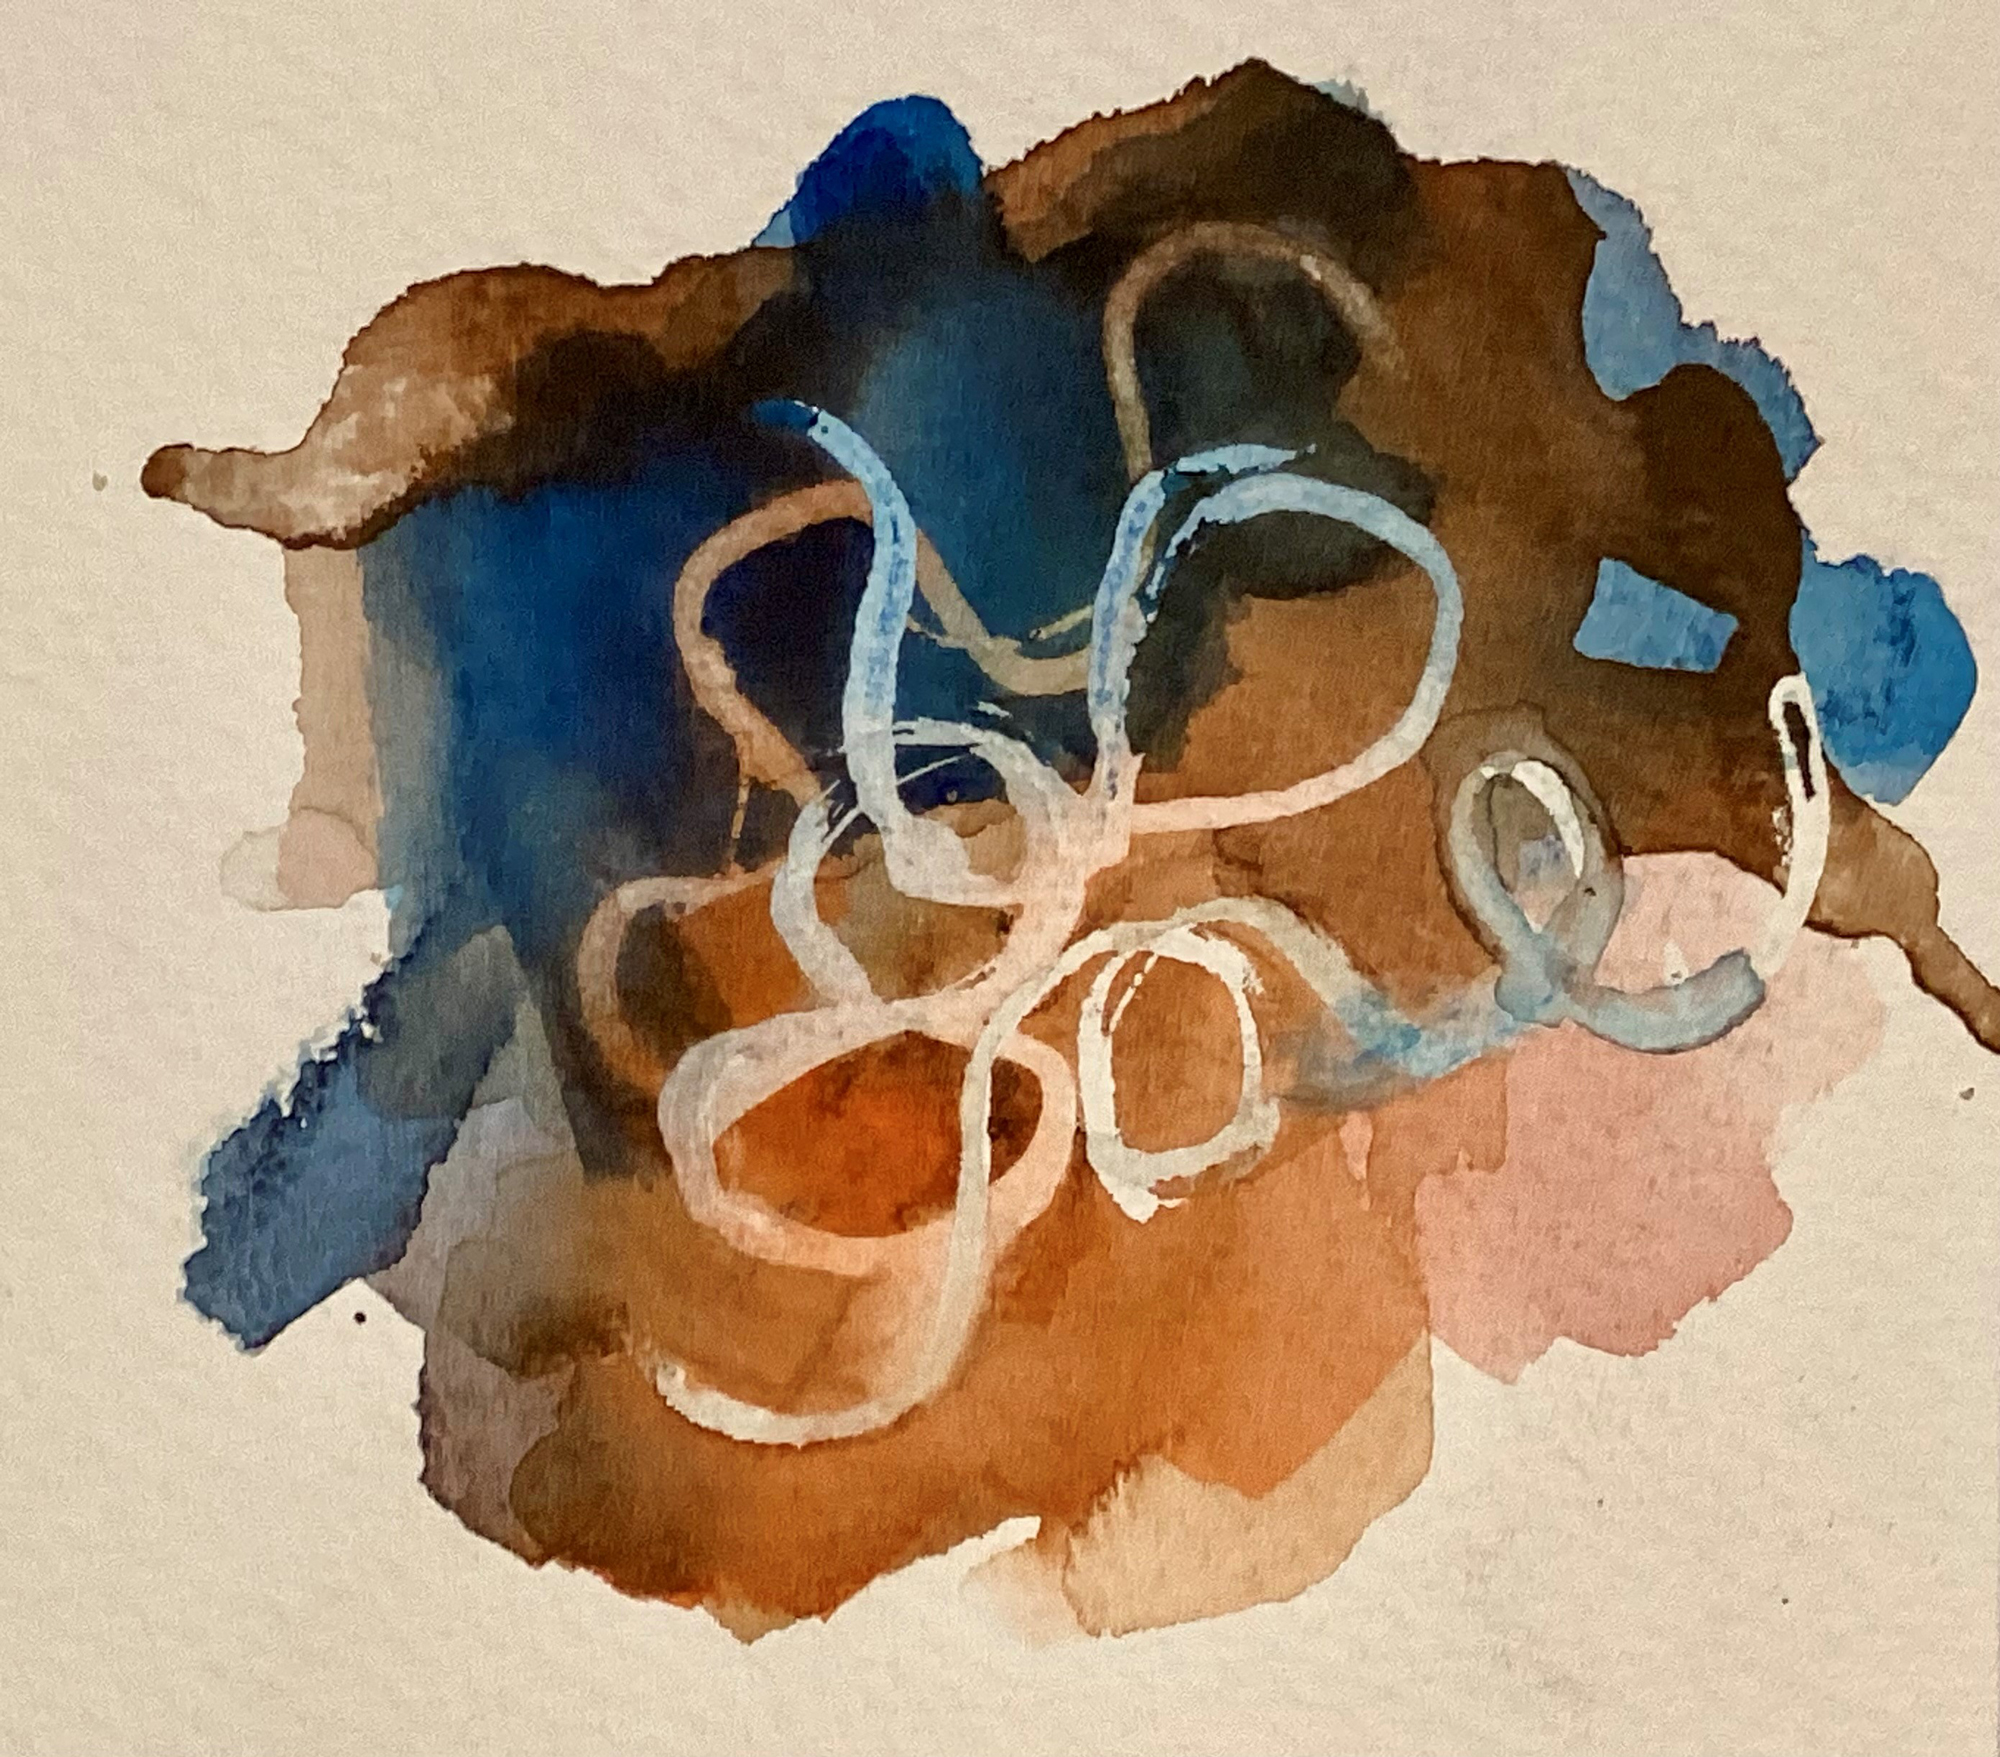 Swatch out your colours and let them mix on the paper. Are there any unexpected or unpleasant mixes? We will use a lot of water and allow the paint to move on the surface, so you need to know beforehand if any colours need to be separated. Also, test your paper. Apply masking fluid and allow it to dry. Apply a mixed wash of colour and allow to dry. Repeat one or two times. Now, remove the masking fluid. Does it come off easily? Does it rip the paper? Does it pull off the paint? If it does, select a different paper. You don’t want to spend several hours layering your painting only to discover that you can’t remove the masking at the end.
You can also watch this member-exclusive extended tutorial on our Video On Demand service.
Watch the video
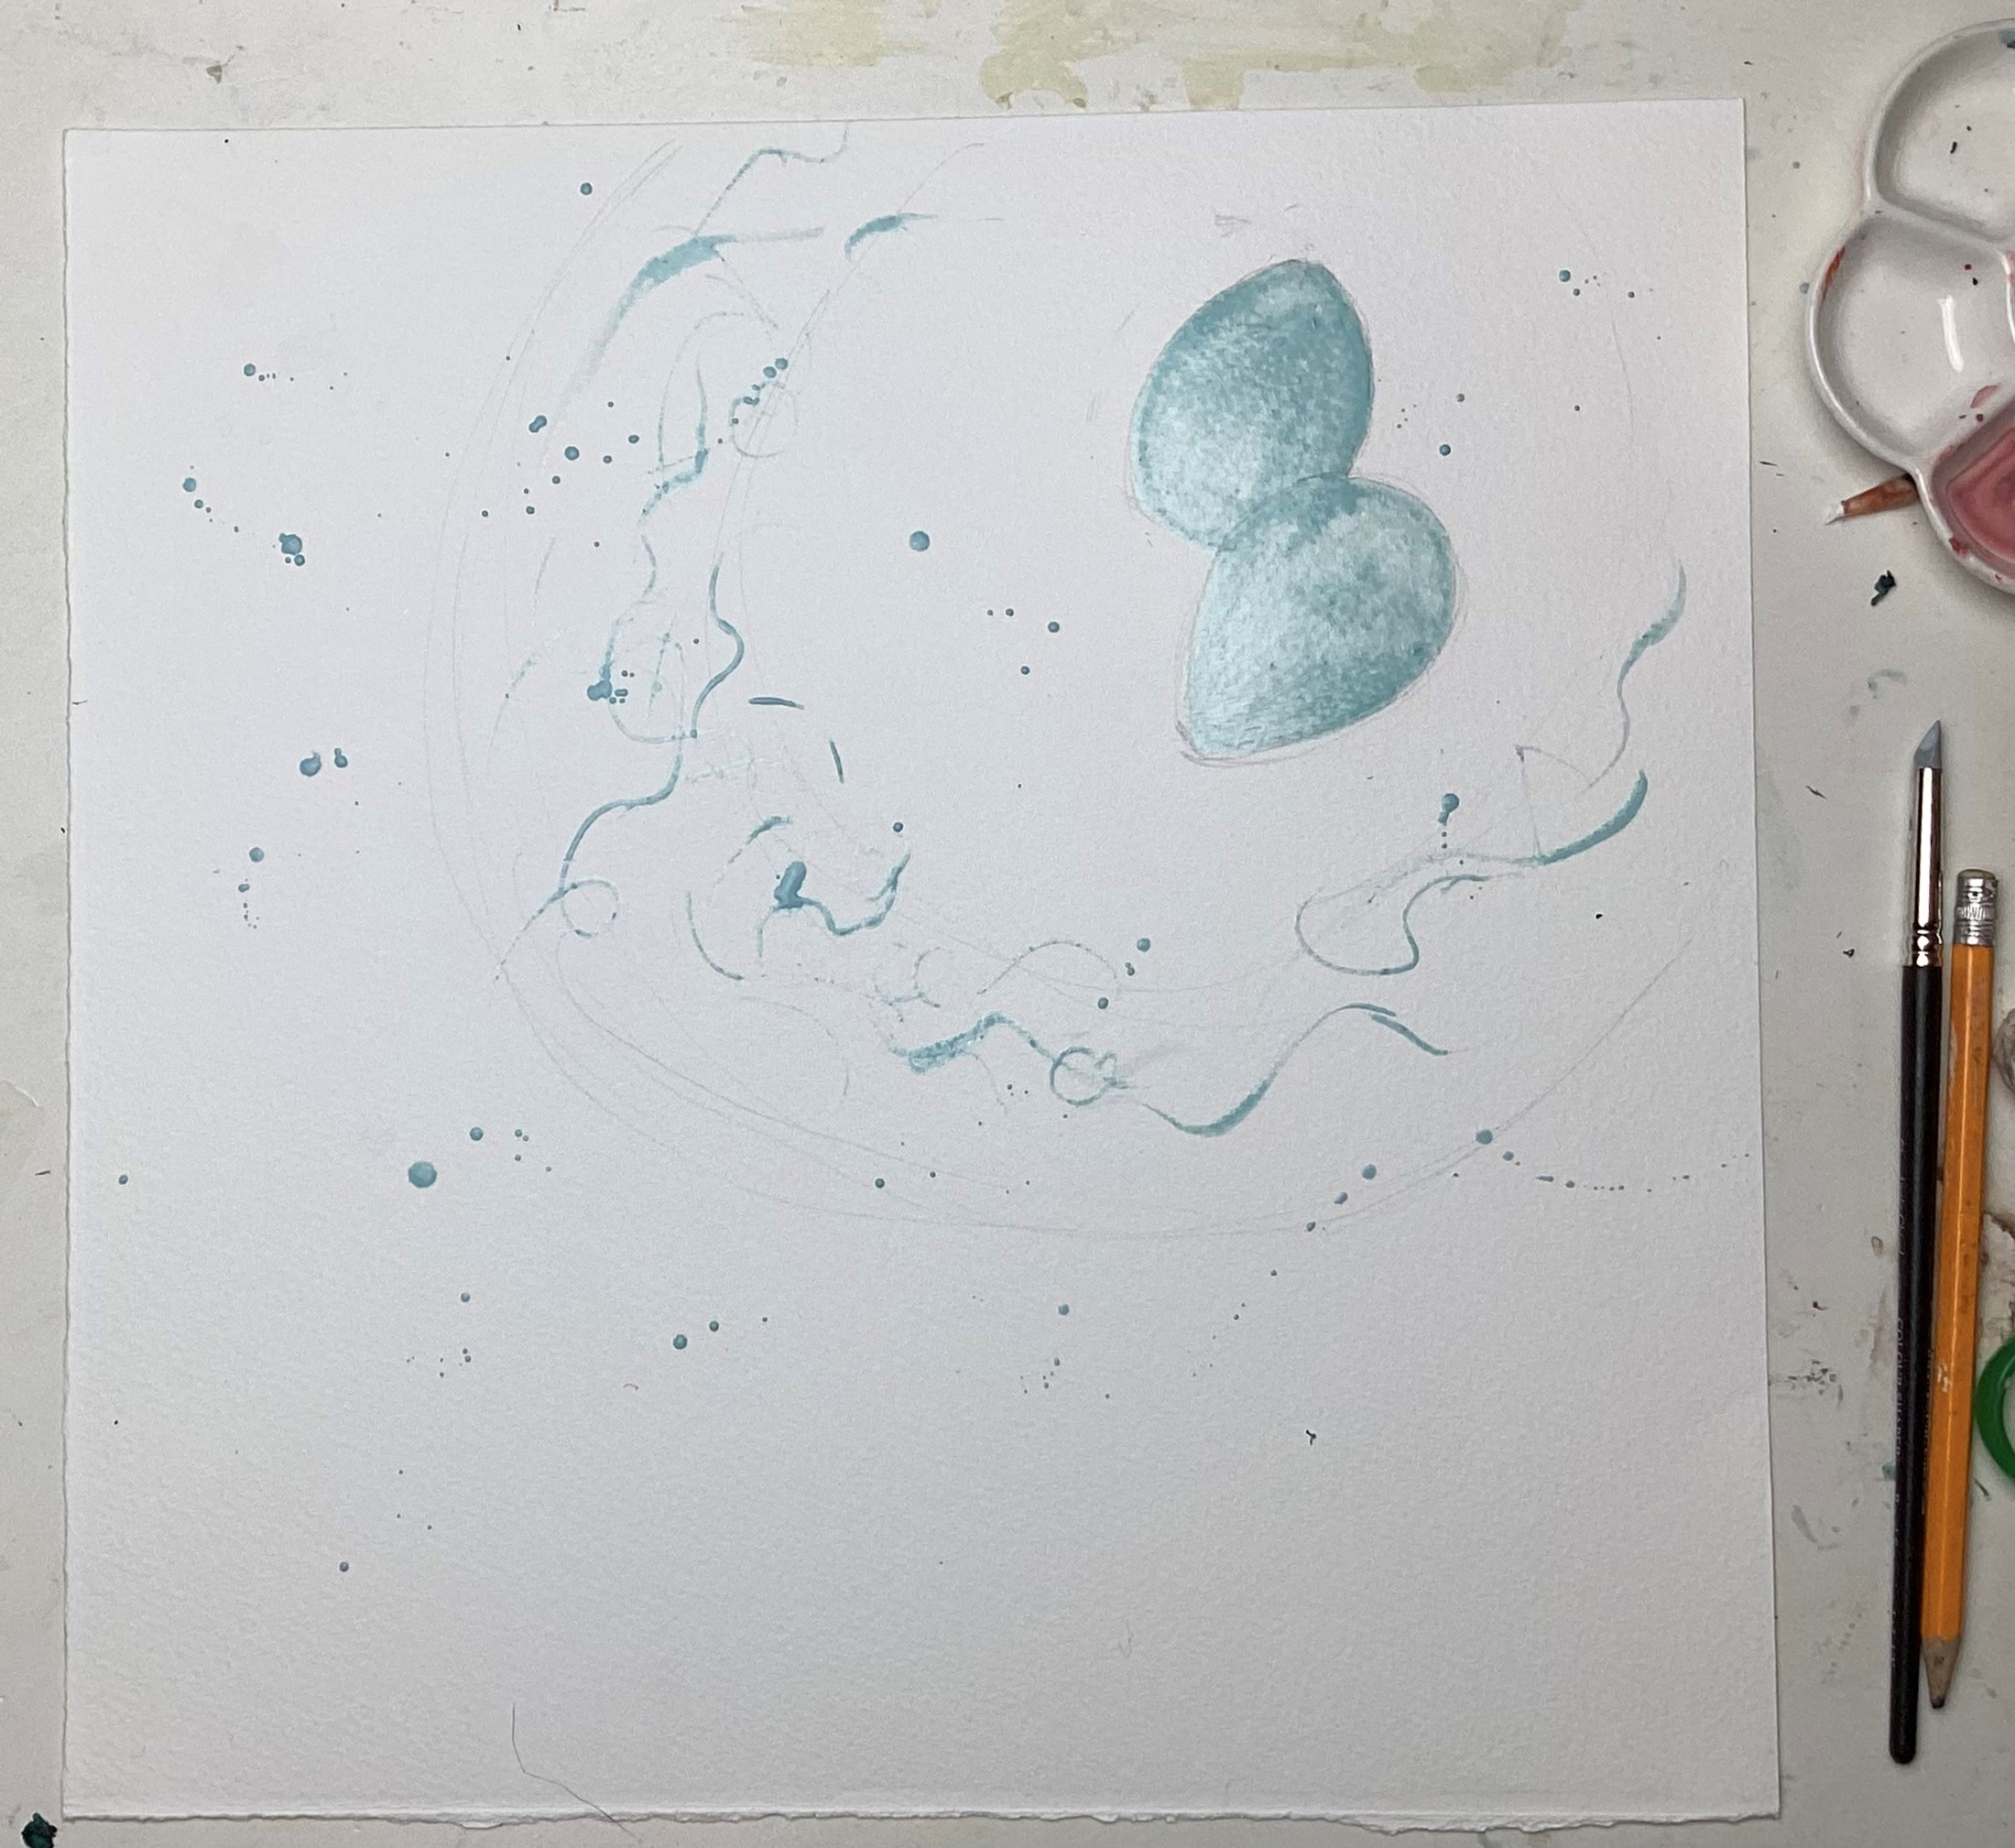 You don’t need a complicated drawing – outline the main shape of the nest. Are you looking at it from the top or the side? Considering the nest as a bowl will help. You might wish to indicate the thickness of the rim. Draw your eggs, taking into account the guidelines above. I use an HB pencil and keep the lines light and minimal, as I don’t want them to show in the final painting. Using your chosen tool, mask the eggs as one shape (unless they don’t overlap). Your chosen tool could be as simple as a cotton bud. Cut off one end to use for fine details and use the cotton end for broader marks. Then, start masking fine details on the rim of the nest. These will be white once the masking is removed, so look where the light is being caught. Aim to keep the marks consistent in character, but varied in size, width and direction. Add a few spatters or drops of masking fluid if you want to echo the eventual speckles on the eggs.
 |
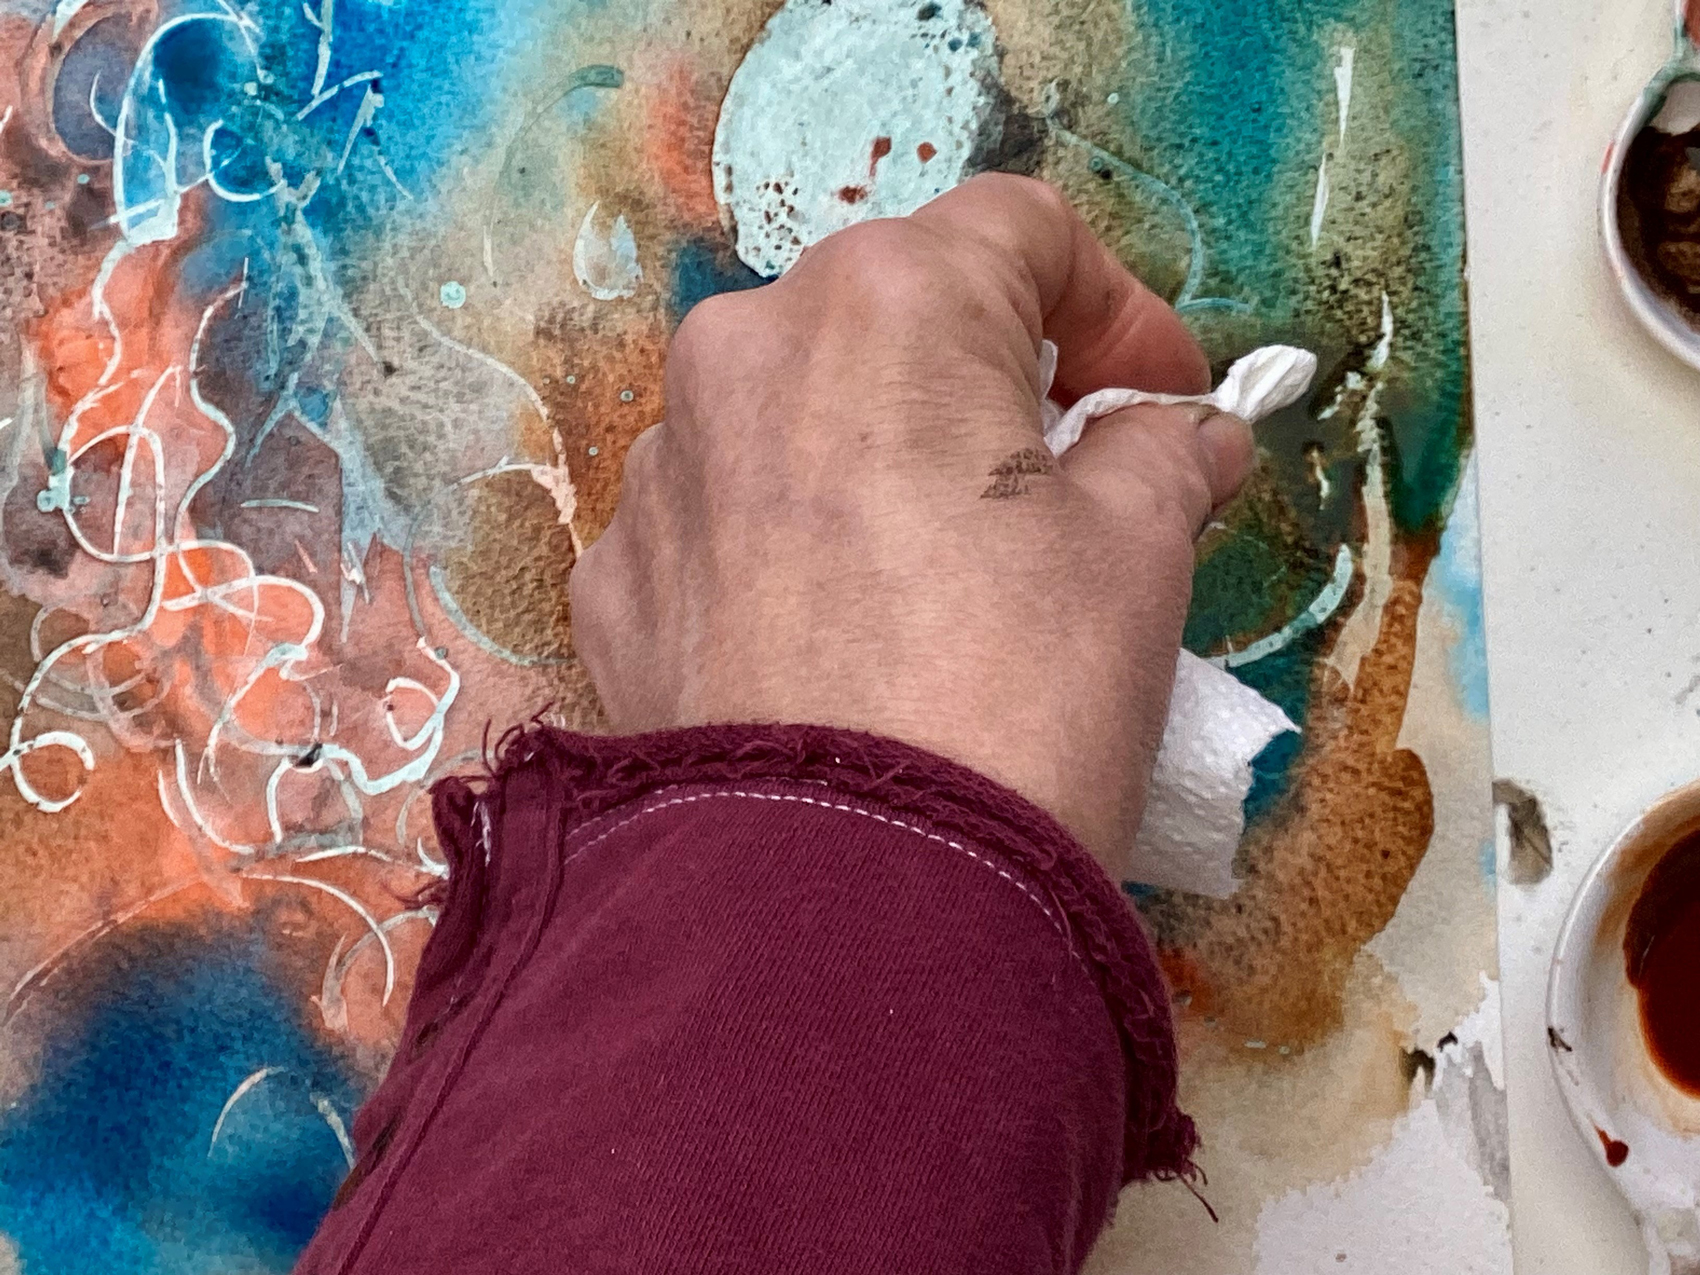 |
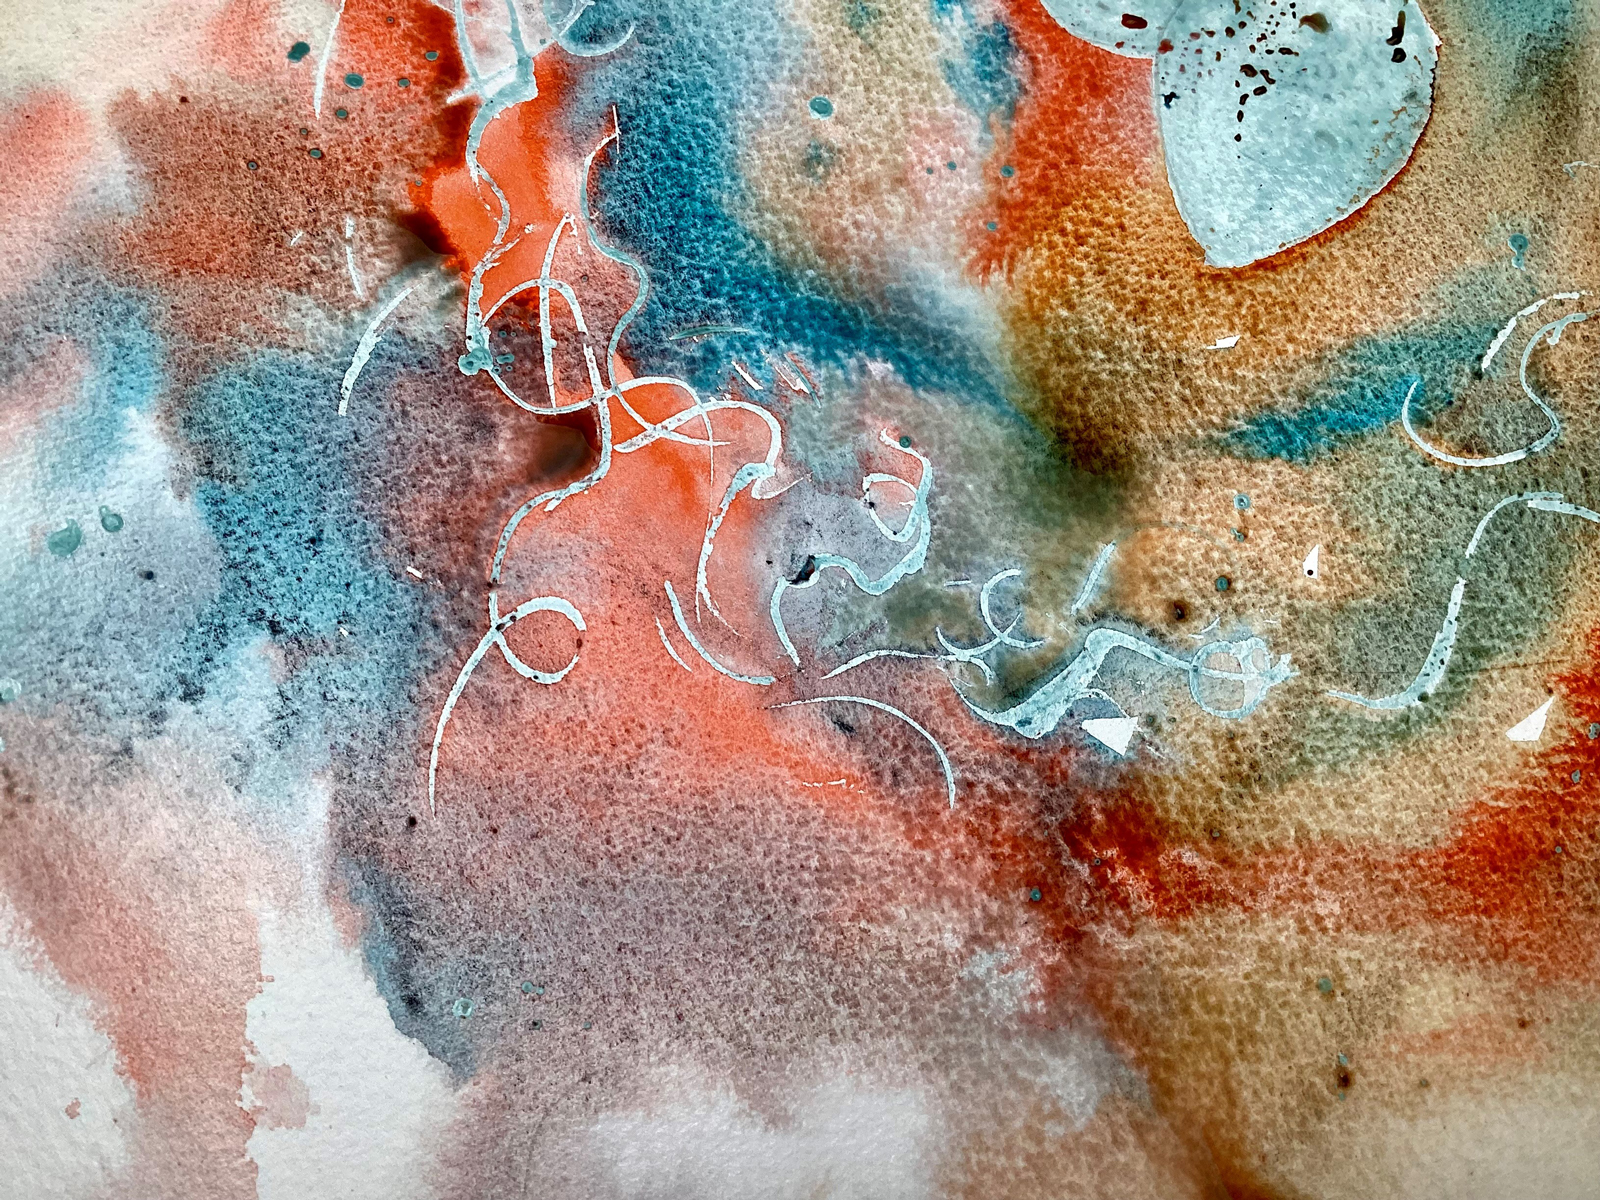
Once the masking is dry (avoid heat tools if possible), it’s time for the first wash. Ensure you have large pools of creamy paint ready mixed (aim for a fullfat milk consistency). Watercolour is a spontaneous medium, and if you need to pause to mix up paint, you may miss the optimum timing. If you’re using pans, spritz them with clean water to moisten, and mix up washes in a separate palette. Using your wash brush on dry paper, liberally apply strokes of your colours, allowing them to merge. Spray with clean water to further mix and pay attention to edges using the spray or a damp brush to soften any unpleasant hard marks. You can tilt your paper to enhance flow, but avoid doing this too much as it will become too homogeneous; we want areas of pure colour showing as well as mixes. If you have large puddles, absorb the excess fluid with kitchen towel. Allow to dry naturally if possible. A dryer will blow the colour around if your paper is very wet, which may flatten out interesting marks.
Want to keep reading? This article is exclusive to SAA members, where you’ll also enjoy a wide range of benefits, including:
Unlock these perks and more by joining today! Become a member.
Once fully dry, we can repeat the masking process and apply a further wash, but before we start, look at what you have. I…
This article is for members only. Please login or sign up to continue reading.
Notifications