
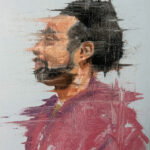
 If you’re looking for a way to bring more depth and energy into your portraiture, Polly Pincott’s oil painting scraping technique is a must-try. By selectively removing and blending paint with a palette knife, you can create dynamic textures and add an expressive edge to your work. Follow Polly’s step-by-step guide to master this technique and take your oil paintings to a whole new level.
 |
 |
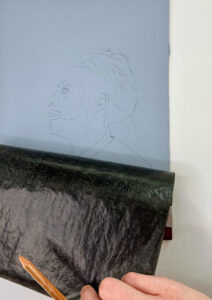 |
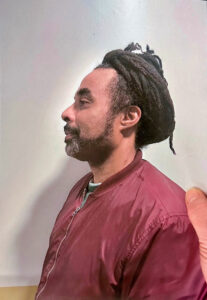
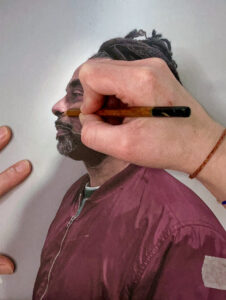
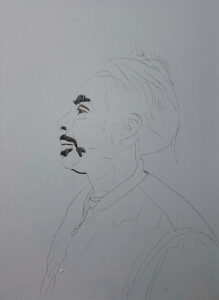
The first thing is to lay down our initial drawing. If you’re feeling confident and have time, drawing directly onto your canvas is great, but a helpful and simple alternative is to trace/transfer the image from a printout of your reference. I like to use a primed surface so as to not be working on a stark white ground. A couple of layers of a mix of Gesso and any acrylic paint (I use Payne’s Grey as a personal preference) just gives the paint you apply something to work with rather than against.
Place a piece of Tracedown face down on your surface with the reference image on top and trace along the lines of the image with a pencil. It can be helpful to mark out heavy shadow areas as well as your main outlines and features. Don’t press too hard, you just want the underdrawing as a guide. It can be helpful to lightly tape the papers in place to save them from moving around as you go – realigning can be tricky once you’ve started. Also, gently pull the papers back periodically (keeping tape in place) to ensure the marks are transferring visibly.
 |
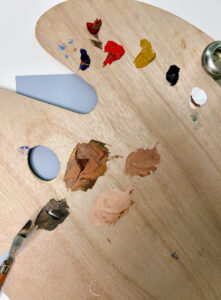 |
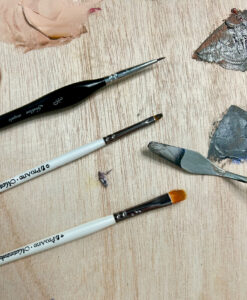
Once the drawing is ready it’s time to start mixing some paint. I’m going use a base selection of the ‘Zorn Palette’. This consists of Titanium White, Ivory Black, Cadmium Red, and Yellow Ochre. While it may seem limited, it’s a great palette to prevent from getting overwhelmed by too many colours, and believe me, the array of mixes that can be achieved from it are vast. I also like to cheat with it a little, and add French Ultramarine Blue (quite common) alongside Permanent Rose, which for this particular image I think will be useful for those more magenta tones in the coat and lips. The colours you choose are entirely personal preference or dependent on your reference image. Here we will mix a few basic flesh tones that will carry us through the painting. These can be achieved with a base of the Cadmium Red and Yellow Ochre, plus a fleck of the French Ultramarine Blue. Don’t be alarmed by the likely bright orange you first encounter through this mix, the blue will knock out a bit of that intensity, then you will tint (make darker or lighter) and adjust. Take your initial mix and make around four sections before tinting each with varying amounts of black and white, ultimately levels of grey. You’re creating darker and lighter values of your initial flesh tone. I have kicked off by mixing one dark for shadows, one light for highlights and two mid tones. As well as keeping my palette minimal I like to use a small number of tools for these pieces – four brushes and a palette knife. But you could always try using just one brush; you’d be amazed by how far it can take you and all the different marks you can make.
 |
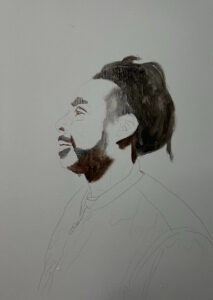 |
Now let’s get some paint down! Start with your smaller brushes and mark out your darkest dark areas. I like to start by going over the key moments such as the eye, nostril and lip lines with my finest round brush, in this case the 3/0. This just pins down those key features for maintaining proportion. As more paint is applied you will lose your drawing guide and you want everything to look as in proportion as possible for your portrait. Or not! Again it’s all personal preference. But if you’re aiming for a likeness this can be helpful. Next, keeping with your darkest paint mix, loosely block in the darkest masses, in this case the hair, beard and some shadow areas under the ear and chin. We’re creating a base and some landmarks to work around. Use your other filbert or flat brushes now, size depending on the space you’re covering. These areas don’t require very heavy paint application – if you have too many areas of dark mass, when it comes to scraping later you will just be wiping this over any other colours, creating a muddy swamp of paint.
Want to keep reading? This article is exclusive to SAA members, where you’ll also enjoy a wide range of benefits, including:
Unlock these perks and more by joining today! Become a member.
This article is for members only. Please login or sign up to continue reading.
Notifications